Training starts… TODAY!

So I innocently opened my dresser drawer while getting ready for church this morning and I saw them… spandex. It hit me like a ton of bricks that in five short months I would be spending eight straight days in spandex. At the same moment I realized that five months is also the gestation period for a Nigerian Dwarf Goat and Sebastian would certainly need to be separated from mama Ariel as he was unmistakably coming into his own in the buck department. Get ready for a new guy in Buckville boys! We don’t want any babies born on the farm while we are cycling down the California coast.

I think Kevin and I are officially calling this ride our honeymoon. We never had one after we were married 16 years ago and I think I even went to work the next day (quite possibly that same day… I can’t quite remember).

So I thought the night I went pig wrastlin’ (Read about that little escapade here…) I had started my training because I ran and ran and ran some more after that little pig racing champion (seriously, I think she won gold in the Olympics) but alas my drive thru McDonalds trip on the way home probably was a sign I wasn’t quite serious about training.

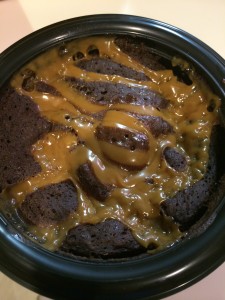
Add that to the fact that I’ve had my bike almost two weeks now and haven’t been on it yet may tell you that I’m procrastinating with this whole “stop eating Warm Delights cakes, start the cycling exercise program, and quit fooling myself that hobby farm chores keep me in “good enough” shape.”

Warm Delights... yum! Wait I mean BAD, so very BAD!

Warm Delights… yum! Wait I mean BAD, so very BAD!

Incentive… I need incentive. I need some instant gratification (bad on me, I know. Save the lecture for when we are enjoying a nice piece of chocolate cake together as I will surely be more receptive to what you have to say at that point). The ride itself… the 550 mile ride from San Francisco to Los Angeles to be specific, serves as motivation but five months is SO FAR away.

Raising money for the Arthritis Foundation is motivation but I hate asking people for money (hence my soap making and selling… I love making soap!) Wanna give me incentive and more motivation? Donate here for the Arthritis Foundation and make my California Coast Classic ride a reality. If I do all this training for nothing you all are in trouble… just kidding… or am I?

Back to the spandex. I saw it in my drawer… I didn’t put it on… yet. I will need to, and soon, but not today. I may scare the horses.

So I did find some incentive to this whole bike ride (the kids keep caling it a race and I keep correcting them that it is most assuredly a “ride.” They reply, “Dad is so gonna beat you in the bike race.” Ugh!) with the recent purchase of new bikes for the boys.

Our youngest son is nine and has never wanted to learn how to ride a bike. We got him one years ago and he put his foot down, no bike riding for him. However, with all the talk in the house about our big bike RIDE (not race) both boys are excited to jump on some bikes and do some family riding.

On the way home from getting the bikes our youngest son kept going on and on about how he was going to learn as soon as we got home. We had about 45 minutes of daylight when we pulled into the drive and he used every second of it to practice. Kevin and I took turns holding on to the back of the seat and running along, helping him to steer when he got nervous and refused to look up or straight ahead. He’s learning. He doesn’t have it down yet, but he’s learning. My heart was and is soaring. This was one of those “I can’t wait for it” moments… watching my husband teach his son to ride a bike.

Kevin teaching our youngest son to ride!

Kevin teaching our youngest son to ride!

So, I’m calling it… training starts today. Eating right, training, spandex wearing… all today! Well, the spandex may wait for tomorrow but the rest starts TODAY!

So my question is… do you all want to hear how it goes? Daily installments, weekly, only highlights/lowlights? Let me know 🙂 I think I’m actually excited about all of this, love it!

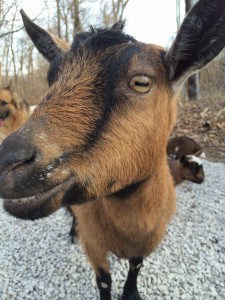
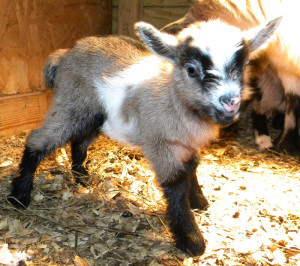
Goat pic... because I can

Goat pic… because I can


How to make Goat’s Milk Chamomile Soap

Time for another soap installment!

We are going to up the difficulty level ever so slightly but still within the realm of “yes, YOU can do this!” Trust me, if I can do it, anyone can do it.

This soap recipe takes a little preparation ahead of time to freeze your goat’s milk and infuse your olive oil with chamomile. It is well worth the effort as this is one of my fastest selling bars (only to be outdone by my most basic goat’s milk bar which has such a boring recipe but amazing results.)

You need all your basic supplies for cold process soap making. These include:

  • Safety goggles/glasses
  • Good rubber gloves (like the ones you’d wash dishes with… not the thin “surgical” gloves. We are not doing surgery here people.)
  • Container to put frozen goat’s milk in (thick plastic pitcher works well as does a 4 cup glass Pyrex meassuring glass… that’s what I use.)
  • Thermometer (candy thermometer works well though I prefer my longer sciency looking one that I nabbed from Jackson’s chemistry stuff… note to self, order Jackson another thermometer.)
  • Stainless steel pot… must be stainless steel as lye does nasty things to other types
  • temperature resistent stirrer of some sort (shout out to my Pampered Chef rubber scrapers… always want to call them spatulas but those are the things you flip pancakes with. Seems like the two utensils should share the name.)
  • Some sort of soap mold. Check out my “Grocery Store Soap” post to get some good YouTube videos of how to make a mold out of an ordinary box…

https://simplehobbyhomesteading.com/diy-homemade-grocery-store-soap-yes-you-can-do-this/

  • spray bottle with vinegar (to be used in case you spill any lye on your worksurface)
  • Kitchen scale (I keep mine in a gallon size plastic bag to keep it clean while measuring oils)
  • Container to measure oils in and a separate container to measure lye in.
  • Immersion blender… you could get away without this but it cuts the mixing time down considerably! Compare 3 or 4 minutes of pulsating an immersion blender with 30 to 45 minutes of constant brisk hand stirring… yup I’ll buy the $15 immersion blender.
  • Crockpot (this is used to infuse the olive oil with the chamomile. No worries, you can use the crockpot for food again, no lye will be touching it)
  • Big bowl for ice water or hot water

Ok, now that we got supplies all out of the way let’s get on to the fun stuff… ingredients! Remember everything is by weight, not fluid ounces.

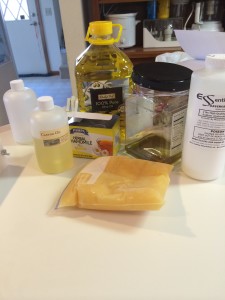
Ingredients

Ingredients

  1. Olive oil: 65 ounces total (for infusing) though only 48.8 ounces will go into soap (not the extra virgin or the virgin… look for the regular ol’ classic.)
  2. Chamomile leaves: 1 box or 1/4 pound of loose leaves/flowers (you can easily use a whole box of chamomile tea. Cut bags open and empty contents into crockpot)
  3. Castor oil: 4.3 ounces (often found in the medicine aisle of a store)
  4. Goat’s Milk: 20 ounces (get buddy buddy with someone with goats or buy it in the baking aisle of the store)
  5. Lye: 6.6 ounces

This recipe perfectly fills two of the white molds I got at Michaels with my 40% off coupon 🙂

That’s it, five ingredients. Almost seems easier than the grocery store soap doesn’t it! The goat’s milk and preparation is what is going to kick this one up a notch. If we were cooking I’d say “Bam!”… another note to self, come up with a cool word while soaping that means “Bam”

Put your goat’s milk in the freezer until it is very frozen. What’s “very frozen” you ask? Not slushy like, actual frozen chunks.

* Side note… have you seen the movie “Frozen” yet? Sooooooo cute! Tons of singing so my boys tried to hate it but they liked it and asked if we could get it, score!

Combine all 65 ounces of your olive oil with loose chamomile leaves/flowers in the crockpot and set on low for 3 to 4 hours (I just do mine overnight).

After olive oil has been infused strain the chamomile out of the olive oil (I have a little sieve just for this job but cheesecloth would work too). No worries if some of the chamomile flowers/leaves make their way through and into the olive oil, it adds to the prettiness of the bar. However, you do not want all of them in there… too much pretty can be a bad thing.

Step 1: Weigh out the olive oil and castor oil. Heat them on low in the stainless steel pot.

Step 2: Get your molds ready (line them, grease them with crisco, whatever trips your trigger)

Step 3: Put pitcher/Pyrex on scale and zero out the scale. Add your 20 ounces of goat’s milk.

Step 4: Get your big bowl of ice water ready… just in case.

Step 5: Put on safety gear! Ensure worsurface and area is safe, send the kids and animals out of the room to watch a movie… ooh FROZEN!

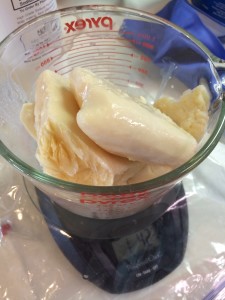
Frozen goat's milk

Frozen goat’s milk

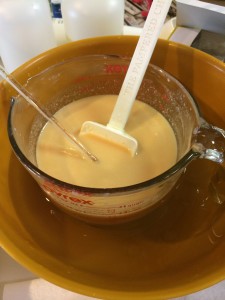
Step 6: Measure out lye. Add lye to milk slowly and stir slowly and constantly. Check the temperature often and if it goes above 130 degrees stop adding lye and put pitcher/Pyrex in ice water bowl. Continue adding lye slowly and then stir, stir, stir checking temperature often. You do not want milk getting past 140 degrees or it could easily scald and that creates a nasty smell and somewhat unsightly appearance (though some people like the appearance I haven’t met anyone who likes the smell).

My lye mixture got too cool so I had to put it in a hot water spa bath

My lye mixture got too cool in its ice bath so I had to put it in a hot water spa bath

Step 7: Check temperatrure of oils. Check temperature of lye mixture. Get them both between 90 and 115 degrees (both need to be about (within 5 degrees) the same temperature). If your lye mixture gets too cold dump your bowl of ice water and fill with hot water. Put your pitcher/Pyrex in the hot water and stir to warm it up.

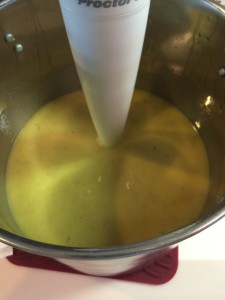
Step 8: When both are about the same temperature slowly add lye mixture to oils and stir to incorporate. With your immersion blender pulse, pulse, pulse until you get a medium to thick trace. When I did this today it took me about 4 minutes to get to a medium, almost thick trace. If you want you can add some of the chamomile that you strained out of not much got into the oil. I added about a tablespoon.

Just keep blending, just keep blending

Just keep blending, just keep blending

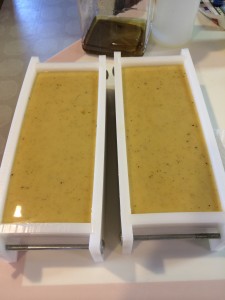
Step 9: Pour into molds.

Freshly poured!

Freshly poured!

Step 10: You can cover this soap if you would like but I have found that this particular recipe turns out great without covering.

After 36 hours in mold you can unmold and slice. Then the hard part… waiting the 4 to 6 weeks for it to cure! UGH! It’s so worth it though.

This bar is so amazing for people with sensitive skin, especially babies. I always love to give this at baby showers.

I’ll update with a pic after I unmold tomorrow. Can’t wait!

May the soaping force be with you!

Jhenna


Why EVERY parent should homeschool… (the reason may surprise you)

Family field trip to Marengo Cave!

Family field trip to Marengo Cave!

I’m guessing some of you read this blog post so you could start formulating your “How dare you tell me what I should do” letter to me while others read out of sheer curiosity. Alas, the majority of you read because I am still in the infancy of my blogging and most of my readers consist of friends and family… yes, my family, you are totally obligated to read my posts… mostly to see if I mention any of you! Thank You God for a big family!

Why should every parent homeschool? The answer is beautiful and simple…

You should homeschool because you already do and to quit would be to cease being a parent!

It is time to peel the stigma away from what most think of when they hear “homeschooling.” I’m hoping to give you a glimpse of our own homeschooling journey to show you how I was just as much of a teacher to my sons while they were in “brick and mortar” schools as I am now that they are not.

Our oldest son went to public school from kindergarten through fifth grade because I was active duty Air Force and my husband worked full time. He went to public schools in Germany (that’s where he started and they refused to speak English to him… talk about a steep learning curve, but it was so amazing for him and he soon became my little translator for our 90 year old German landlord who refused to believe I was anything but a nurse on the German air force base! I was not a nurse.). We experienced the public school system with that son in Germany, Nebraska, California, Wisconsin, and Indiana… we’ve been around.

Compare that to our youngest son who only attended half day kindergarten in public school and you get the basis of our oldest son’s common comment that his younger brother is more loved (not true…I’m adding this becuase they both often read this blog and I want to remind them that they are loved equally… you are both loved equally!). Apparently our oldest thought public school was some sort of punishment… not sure where that ever came from but I’m guessing it had something to do with the 6:45am bus stop.

Boys that like to hang out together... crazy ;)

Boys that like to hang out together… crazy 😉

My husband and I have educated our sons from the moment they were born as you have done with your children. Learning how to obery, respect others, and communicate effectively came from parents or parent figures for the majority of us. How to tie shoes… yup, parents. How to eat… yup, parents. Make their bed… you guessed it, parents. How to ride a bike… yup, parents. However, my best friend Minnette taught my oldest to ride a bike because I was horrible at teaching that skill (to say frustration and hesitancy do not mix well is an understatement) and to this day I still apologize to my oldest son for my tone of voice and words that day.

The fact that I reached out to another to help teach my kids in an area that I was ill equipped brings up a great point. Parents do not teach their children in a vacuum. Just as parents who teach all, or the majority, of their children’s academics at home do not do so in a vacuum. We all reach out to others when help is needed so in that way we are more alike than we are different. What have you had “outside help” in teaching your kids?

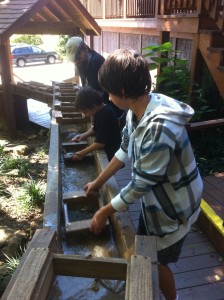
Panning for riches at Marengo Cave... this is where Gunner's geology passion began.

Panning for riches at Marengo Cave… this is where Gunner’s geology passion began.

We have always been very active in our kids’ education. Kevin is the go to math, computer programming and history nut (as well as mathemtaical based sciences… physics etc.) while I tackle language arts, biological and chemistry based sciences, foreign languages, and well… everything else. We were in the kids’ public school classrooms often helping and enjoying the interaction. We sat at the table with the kids when homework was being done at night to see what they were learning and be on hand should they have needed help. I did plenty of projects “for them” because I wanted them to get a good grade and impress their teachers. We fought about “our way” of doing things versus “the teacher’s way” and most often lost to the “teacher’s way” even though we thought to the very core of our being that our way was the best. We read, read, and read some more. With our kids, to our kids, and having them read to us. This has been a staple in our family from day one and really is a blessing if it is in your home as well.

I became a stay at home mom after my medical retirement from the air force and we moved to Indiana. I really liked the public school system here because it allowed for parents to be very involved in their child’s education both in school and after school. The teachers showed a genuine interest in getting to know our kids and would often report how much they enjoyed having them in class (bear with me here, I’m not putting my kids on any sort of pedastal). Our boys were raised to say, “yes ma’am, no ma’am, yes sir, and no sir” throughout their whole life (gotta love the military) and the teachers in these “civilian” sections of the nation seemed to really love and eat this up (Wisconsin, Indiana etc. The other schools were always on or near a military base so the teachers were used to the yes ma’am etc.).

Youngest son's first meme... awwwww

Youngest son’s first meme… awwwww

Then we noticed a disturbing trend… our sons were learning (quickly) to manipulate their teachers and the system. If they were quiet, respectful, and helpful (without being pushy) the teachers would lower the standards for them and let them get away with more.

Our sons have always had horrid handwriting (no secret, they know this). We work on it and work on it but to little improvement unless they take 10 minutes to carefully write one word (nope, not even I have the patience for that and it’s not practical). In public school my oldest son’s teacher would actually call him up to ask him what his answer said because she could not read it. He would try to read his own writing (many times he could not) and the teacher would let him get away with it without marking it wrong because he was so kind, polite, and followed along in class well. She mentioned this during a conference. We talked to our son and found out he wasn’t even trying to write legibly because he didn’t have to and got it right. He admitted in fact that sometimes if he didn’t know the answer he wrote “super sloppy” so she couldn’t read it… apparently she always gave him the benefit of the doubt. Well played son, well played.

This was the straw that broke the camels back so to say. We weren’t mad at the teacher, we were unhappy with our son’s attitude and choices. We thought we had taught our son to do what is true and right regardless if others expect it of you or not. Your actions are not determined by another’s. Just because his teacher let him get away with something does not mean he should continue in that behavior. Both of our sons had learned that all that was necessary at school was the bare minimum. Ridiculous, absolutely ridiculous and proof that our work ethic training was not carrying through to time away from us at school.

The world is our classroom... youngest son volunteering at the humane society

The world is our classroom… youngest son volunteering at the humane society

It was at that moment I finally agreed to Kevin’s longtime plea that we pull the boys out of public school and take it to the home. It turned out to be the best decision of our lives and the lives of our boys. We are on year five and I am actually teaching a high schooler *gasp*! Our boys are learning work ethic, compassion, and good decision making now all day, every day, at a time in their lives when their brains are developing rapidly and outside influences truly have a huge effect on them. We are controlling the influences they are surrounded by as much as we can during this time of development so when they are adults and their judgment and impulse control are better cultivated they will have already developed good habits and sound decision making in their maturity.

Not every kid needs this type of intense structure and guidance. Our kids do. There are parents who work their tail ends off in the time that their kids are home to instill these things and their kids carry them through to their school days. I know so many kids like this and I love to be around them and learn with and from them. There are also kids who are naturally more mature, focused, and able to succeed easily in whatever they put their minds to and their parents encourage them in ways that are absolutely beautiful and breathtaking. Love these kids as well!

Everyone has to learn at The Shepherd Hobby Farm!

Everyone has to learn at The Shepherd Hobby Farm!

My point is, every kid is different just as every family is different. Just don’t assume that parents pull their kids out of school and tackle academics at home because they think their kids are better than yours or the school system is horrible (though truth be told with standardized testing and common core I may be leaning more towards horrible the more I see of it).

Below are the top reasons we homeschool

  • Instill work ethic in our children
  • Teach creation (Bible) based academics
  • To be together as a family
  • To guide our sons decision making at a time of great cerebral development
  • To teach each child based on their learning style
  • To link what we teach to real world application
  • Flexibility in schedules and traveling
  • To pursue passions and interests with ease and excitement
  • To ensure proper rest, exercise, and nutrition for growing boys (and the whole family)
  • To socialize MORE with varied peer groups and people of all different race, age, and culture
  • Increased community involvement

If you look at that list you will find that you, as a parent, are filling a lot of those boxes with your kids as well regardless if they are in public, private, or home school. Homeschooling just works well for our family because we were not capable of filling those boxes above when our kids were in public school.

I’d love to hear what led you to homeschooling, how you fill thses boxes with kids in public school, and/or myths/questions you have about homeschooling! Comment here!

Keep on keeping on and HAPPY FIRST DAY OF SPRING! (yes I know I shouted that)!

Jhenna


Meet the Nigerian Dwarf… Goat


iphone pics 11 Feb 2012 179

Baby Ella, Feb 2012… Could you resist?


I just had to go with this title as my husband always loves to joke about all my little Nigerian Dwarves running about the farm. I beg him to add “goat” so people don’t think we have some sort of labor camp for foreign little people but he refuses to give up this joke.

To be perfectly clear, we have Nigerian Dwarf Goats. In fact the boys actually counted this morning and we officially have 11 of these amazing little creatures. We have 13 goats total but 1 is a Nubian and 1 is a fainting goat (sooooo funny to watch!). The boys and I are proud card carrying members of the Indiana Nigerian Dwarf Goat Association… we even have the shirts to prove it!

I fell in love with the breed immediatley upon getting our oldest son a week old Nigerian Dwarf buckling for his twelth birthday. I saw a picture on Craigslist of the most adorable little goat and said, “He must be ours”… the timing of Jackson’s birthday was perfect and I convinced him he wanted a goat. We named him Elliott. He was our first goat and one of two wethers we have. I’m going to be throwing around some terms during this blog that everyone may not recognize so let’s get a couple things straight in the goat lingo department…

  • doe: female goat
  • buck: male intact (not neutered) goat
  • wether: male goat (neutered, no testicles and therefore none of the hormonal surges and stink of the buck)
  • kid: baby goat (boy and girl)
  • buckling: baby boy
  • doeling: baby girl

We wethered Elliott (via banding) and bottle raised him. Goat’s can easily digest whole cow’s milk and I have to say bottle feeding this goat was an amazing experience which bonded him to us (and us to him) in ways few would ever believe. Elliott comes when called, loves snuggles, and gets along beautifully with everyone he meets (animal and human!). I highly recommend bottle raising goat kids to bond them to you.

Boys with Elliott in 2012. Notice the cat in the background playing with a snake... ugh!

Boys with Elliott in 2012. Notice the cat in the background playing with a snake… ugh!

People ask if we consider our goats as pets. No, we really do not. I define a pet as a creature that you have almost constant contact with and allow in your living space (no, I don’t call my kids my “pets” but they could qualify I guess). There are only a few occasions that we have brought a goat kid inside for any length of time and for that period yes, I guess they could have been considered pets (when they joined the herd outside they relinquished pet status).

However, this does not mean that goats are less friendly, less trainable, or need less attention than our indoor dogs, cats, bunny, or fish pets. Goats certainly need to be checked on at least twice a day, socialized and receive human contact (yes even the smelly bucks… PLEASE handle your bucks people so they do not become unruly!) if you are to have any chance of being able to trim hooves, give veterinary care, milk, and be able to lay hands on your goats for whatever purpose (including snuggles!).

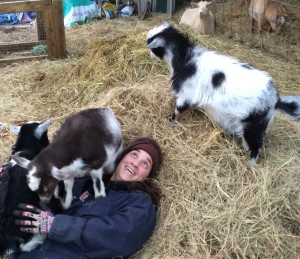
Jhenna and baby goats6

Left to right, Tybalt, Mercutio, and Baine

Jhenna and baby goats4

Bainey Boo is so gonna jump on me as Ariel just watches from a distance!


Well socialized bucklings... ATTACK!

Well socialized bucklings… ATTACK!

Why do we have goats? Oh let me count the ways…

  1. Great comic relief and so much fun to watch
  2. We milk our goats and use that milk in lotions and soaps.
  3. We use their droppings (called “berries”) for fertilizer in the garden and compost
  4. They are amazing at clearing brush and poison ivy in our woods
  5. They provide an avenue to build work ethic with our boys
  6. Some day I will talk my sons into joining 4-H and they can take the goats into the show ring!
  7. They are just plain adorable
  8. To teach others about God’s creation
  9. I can’t resist the lure of a baby goat face (not a good reason I know but I’m honest)
Ella all grown up with her baby Baine Bloodhoof

Ella all grown up with her baby Baine Bloodhoof

Many urban areas even allow up to 2 miniature sized breeds of goats (think pygmies and Nigerian Dwarf Goats). Please know that if you are thinking of getting a goat consider this

  1. Goats need hay (or forage to include grass AND more fiberous woody material), minerals (can be bought in bags at feed stores), constant access to clean water (try to elevate it slightly, they seem to love pooping in their water and will not touch it after that… can you blame them?), and a balanced feed ration, especially in winter (often comes in a pelleted form).
  2. Most goats (including the Nigerian Dwarf Goat) are escape artists and can easily jump 4 foot fences and climb seemingly vertical structures to check out if the grass is truly greener on the other side of the fence…or if shingles on your roof are edible. Though they will not eat ANYTHING as most people think, goats do eat A LOT of things (to include your or your neighbors beautiful roses, garden produce, berry bushes, and pine trees). Like horses, goats usually know instinctively which forage is harmful to them and will stay away from it. But, if they are really hungry and nothing else is available (or if it’s heavily mixed with things they do find yummy)they will eat things that can poison them. Goats will not eat any little piece of hay or food that has been urinated or pooped on… put their hay up!
  3. Goats have to be wormed regularly. There are organic and chemical methods for this but it has to be done consistently. Because they eat from the ground they tend to carry wormloads and you don’t want worms overtaking your goat!
  4. Goats are herd animals and want to be part of a herd (this can include other goats, sheep, YOU, and sometimes dogs). If you are getting one goat I highly recommend you get another for its buddy unless you want to hear a goat “yelling” for you day and night.

To understand these things is to understand that you need to let a goat be a goat. I understand our goats really well… they want to eat, drink water, play, sleep, fight, and reproduce. The fighting is few and far between as they all have their herd status and “pecking order” figured out now, but as our bucklings grow up they are testing their elders and each other. Goats spend most of their time grazing (eating). They fill up their bellies to almost bursting proportions and then they lay or stand lazily regurgitating that food and chewing it (chewing their cud) to finally be digested. I wish I had a dime for every person who has asked if my wethers were pregnant… full bellies (known as “rumen” in goats) makes any goat look very pregnant to the unpracticed goat handler.

See those healthy rumens :)

See those healthy rumens 🙂

Why the Nigerian Dwarf Goat?

  1. For their size (small in stature, a tiny bit bigger than a standard pygmy) they give an amzing amount of milk. Ariel, our wonderful beige Nigerian Dwarf Goat, kidded a few months back with a single buckling and we are getting almost 2 quarts of milk out of her a day. Most goats kid twins and triplets and usually will produce even more milk than that!
  2. Their personalities can’t be beat. They are friendly, easily trainable, and truly enjoy human contact.
  3. They are able to breed year round. Most goat breeds only are able to breed once or twice a year, based on seasons, but the Nigerian Dwarf Goat cycles throughout the entire year making it easier for us to schedule breedings and kiddings to fit our plans and schedules.
  4. They are a hardy breed. Great in winter and in summer.
  5. They are small and therefore take less to feed and drink less water than bigger breeds of goat. Their veterinary care is also less expensive (think dosing worming meds, antibiotics, etc.  on weight)
  6. They are very agile and this adds to the entertainment value when you pull up a chair or log and watch them jump about and play.
  7. They are intelligent. All of our goats know their names and come to them. We are working on teaching a couple of them fun tricks and they are proving to be quick learners. Except Ella, she is so stubborn and is trying to teach me tricks! I secretly think she has the upper hand and has me trained quite well.
And then there's Pedro... our Nubian wether and only horned goat (the rest are polled or have been disbudded)

And then there’s Pedro… our Nubian wether and only horned goat (the rest are polled or have been disbudded)

Not to be left out is Pedro… his coming to the farm was a bit of a surprise to my husband (I really thought I had talked with him about Pedro but apparently not…)

One day I was looking at Craigslist (note to self, stop looking at Craigslist) and saw an ad for a Nubian wether who was super friendly! We had just gotten Elliott and the love for goats was becoming strong (think of the Star Wars “force”) in this hobby farmer. I had talked with Kevin (my husband) about a buddy for Elliott and apparently I left out the fact that I had found one. I told the boys I was heading to get Pedro and to let their dad know if they needed anything. I picked up Pedro, brought him home and unloaded him to meet Elliott. They became instant best friends and I saw Kevin and Gunner at the sun room window watching Pedro and Elliott meet. This is the converstaion I could not hear but was told about word for word when I came inside…

Kevin: What is that?

Gunner: That’s Pedro, our other goat.

Kevin: What other goat?

Gunner: You know, Pedro

Kevin: No I do not.

Note to self… make sure I clear all new animals with my husband BEFORE they arrive at the farm.

DIY Homemade “Grocery Store” Soap… Yes, YOU can do this!

Ever look at the ingredients list of soaps in the grocery store? Even the “natural” soaps have chemicals and preservatives that may or may not cause health issues (we can all find research to support our theories on either side, not my point today). I don’t really blame these companies because their products have to have a long shelf life (who knows how long they will be on those store shelves!). However, when I can make a product here at home I jump on it like a frog on a lily pad. Add to that the simple fact that my DIY endeavors usually get me these products for a fraction of the price and you’ve got one happy hobby farmer.

I’ve become quite the soap maker lately as Kevin and I are looking for ways to raise money for the Arthritis Foundation through the AMGEN “Arthritis Bike Classic”. It’s hard to get people to just donate money because we have become a society of “I want something for my money.” You can agree or disagree with that but its an argument for another day… even I am guilty of wanting a product to show for money I spend (not good, I know, but I’m a work in progress as far as the be more giving, loving, and self sacrificing department). Enter soap making. People seem to really love homemade soaps and I have goats that I milk twice a day so this could be (and is) certainly an outlet for using that goat’s milk and my ambition!

Today I want to share with you a super easy cold process soap that uses ingredients you could find at any local grocery store, discount store, hardware store, and even your local drugstores. I hate to say it, but I can get every one of these ingredients, except one,  at my local Super Wal-Mart (bear with me, I live in a small town).

I’m going to give you step by step instructions for you to make this soap. I’m not going to go into much detail on the terms as I plan on doing a blog all about soap terms in the very near future. This is a super simple beginner’s soap and I hope you enjoy! Invite some friends over and do it together (confidence in numbers right?). Everything is weighed using mass on a kitchen scale, even liquids (in other words, don’t measure out the liquid oils trying to use the fluid ounces on the side of a liguid measuring glass).

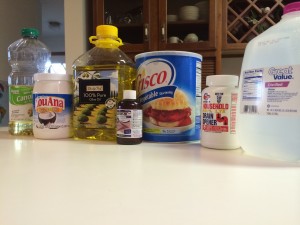
Grocery Store Soap Recipe (makes 2 two lb loaves or you can use a couple small cardboard boxes or 1 medium box lined with plastic, saran wrap, or even a garbage bag… at the bottom of the page are some links for good ideas for DIY soap molds)

24 oz olive oil (I prefer the classic olive oil, not the virgin or extra virgin)

7.2 oz canola oil

2.4 oz soybean oil (otherwise known as Crisco)

12 oz coconut oil

2.4 oz castor oil… add at end, after trace (I’ll explain that in a minute… castor oil is often found in the medicine aisles)

18.2 oz distilled water (or fresh, clean rain water)

6.7 oz lye (pure sodium hydroxide,aka caustic soda, often found at hardware stores. Evansville, IN area you can get it at ACE Hardware). This is extrememly caustic and will burn a hole through anything quickly when mixed with a liquid so use caution)

**optional… essential oils or fragrance oils (about 2.4 oz for this recipe, meant for soap), ground oatmeal, ground almonds, fruit zest, honey, etc.
 

14 Mar 2014 169


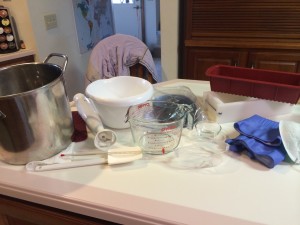
Supplies (do not ever use these supplies for anything with food after making soap with them)

Stainless steel pot (must be stainless steel as other materials react badly with the lye)

Thick plastic pitcher or glass Pyrex measuring glass (4 cup)

Thermometer (candy making thermometer is fine)

High temperature resistant stirrer ( I use Pampered Chef rubber scraper)

Rubber gloves (Decent thick ones, think dishwashing gloves. Not talking welding gloves but you better not be using those thin surgical gloves either!)

Safety glasses/goggles (optional mask… I use ones for painting)

Soap mold (see YouTube links below for cool DIY ideas)

Kitchen scale (I always keep mine in a gallon size Ziploc bag so it doesn’t get all oily or dirty)

Immersion blender (not a must but cuts down stirring time by almost an hour! Only $15-$20 in stores or online)

Spray bottle with vinegar in it (for use in case of lye spills/splatters)

Plastic wrap, garbage bag or wax paper (to line molds and for coering soap during gel phase)

Heavy blanket or towels (used for gel phase)

Big bowl with about 2 inches of water and ice (used in case you need to lower temperature of lye solution or oil mixture)
 14 Mar 2014 170


Step 1: Gather ingredients and supplies and clear away any food and food preparation things. Accidents happen and you do not want lye getting on anything you will ever put in or near your mouth or skin. If you want, you can line your soap molds with plastic wrap. People say it is easier to unmold the soaps this way but I can never get it in there right to prevent wrinkles on my soap. I prefer to rub mine with Crisco instead and just wash them after I unmold the soap the next day.

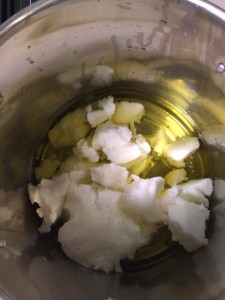
Step 2: Weigh out your oils Remember to weigh them using your kitchen scale. Dump them into your stainless steel pot (EXCEPT castor oil, weigh it out, put in separate bowl and wait until the end to add it). Put your pot on the stove and turn on lowest setting possible.
14 Mar 2014 171

Step 3: Put on safety gear and make sure room is ventilated. Usher kids and pets out of the room. I combine my lye and water under the stove exhaust fan with my overhead ktchen fan on and windows open. May be overkill but I don’t want to take any chances. Lye creates a vapor you don’t want to breathe but the vapor doesn’t last long.

Step 4: Measure out lye and water in two separate containers (I put water in my glass pyrex… this is where we will be mixing the lye and water). You can substitute any liquid for the water but if you use milk (goat’s milk, buttermilk etc.) there are extra precautions that I will talk about in another post so you don’t scald the milk. Many people like to use room temperature teas!

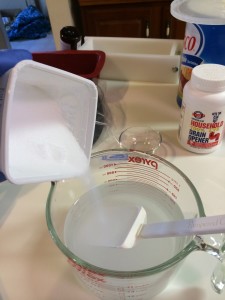
Step 5: Carefully and slowly add the lye to the water as you calmly stir the water. The lye will cause the water to heat up drastically (to about 160 or 180 degrees F). It is ALWAYS LYE INTO WATER, never water into lye. Just think “I like to lie IN the water.” If you happen to get any lye on any workplace surface spray it with vinegar and wipe up with paper towel. If you get any lye (or lye water solution) on your skin rinse with cool water for 10 minutes straight. Lye will burn a hole through anything when it is “activated” by liquid.
14 Mar 2014 173

Step 6: Check the temperature of the lye/water combination. If it reads over 160 degrees F place the whole Pyrex container in the bowl of ice water and gently stir (it will bring the temperature down). Let sit for a few minutes.

Step 7: Check your oils and give the pot some stirs. You want all the solids (coconut oil, soybean oil) to melt down to liquid. The more you stir the faster it will melt. You can raise the heat slightly as long as you continually stir. Check the temperature. You are trying to bring the melted oils the same temperature as the lye mixture (or within 5 degrees or so).

Step 8: Monitor your lye mixture and oil mixture, checking temperatures frequently. Gently stir, stir, stir. Take oils off the stove top as soon as everything is melted. Alternate as needed with the oil mixture and lye mixture in the ice bath to get them both down to between 90 and 115 degrees F.
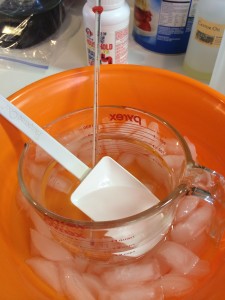
14 Mar 2014 175

Step 9: When both mixtures are within 5 degrees of each other (and fall between the 90 and 115 degrees F range) you are ready to slowly and carefully pour the lye mixture into the oil mixture. Stir by hand until all lye mixture is incorporated into the oil mixture (about 10 stirs). Spray the inside of the Pyrex glass (where the lye/water mixture was) with a couple sprays of vinegar, this neutralizes the lye just in case you forget there was lye in there and go to wash it. If either mixture get too cold put pot back on stove and Pyrex glass in a bowl of hot water.
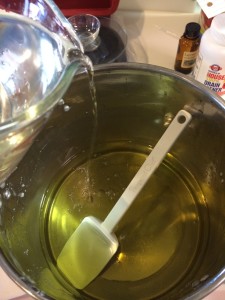
14 Mar 2014 176

Step 10: Put your immersion blender in the pot upright and all the way to the bottom. Pulse the immersion blender in short rapid spurts and you will see the mixture (the SOAP!) start to thicken. Keep blendering all around the pot keeping it to the bottom to avoid splatters. There are three traces… light trace, medium trace, and heavy trace. These are just ways of descibing how thick it is becoming. Thin trace is the point when oils and lye are mixed but the mixture is still very runny (like a thin soup). Medium trace is like a thin gravy or medium thick soup. Heavy trace is like thick pudding.
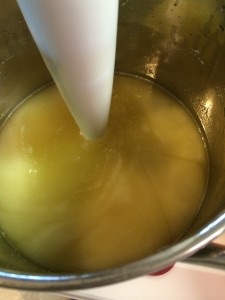
Just started blendering... thin trace. Notice the white swirls as lye/water incorporates with oils

Just started blendering… thin trace. Notice the white swirls as lye/water incorporates with oils

At the medium trace point (thin gravy, for this recipe about 3 minutes into blendering) add the castor oil and any of your other additives that you want (almonds, essential oils, zest, etc.). To my batch I added 2 oz lettuce fragrance oil and 1/4 cup ground oatmeal. Continue to blender for another 30 to 45 seconds, enough to get everything mixed in. I like to pour my mixture into mold right between the medium and heavy trace point.
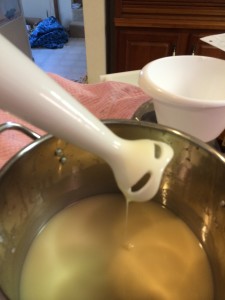
Medium trace

Medium trace

Step 10: Pour your soap into your molds. I like to add a little oatmeal to the top. Sometimes I use a bamboo skewer to mix oatmeal in and make sure it doesn’t all settle to the bottom.
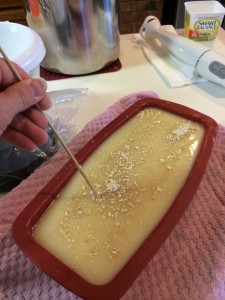
14 Mar 2014 183

Step 11: Take your soap somewhere where little fingers will not poke and prod it (including yours!) and place plast wrap or garbage bag over soap in molds and cover with blankets so the soap will go through it’s “gel phase.”
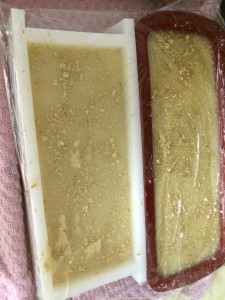
plastic wrapped, doesn't have to be tight.

plastic wrapped, doesn’t have to be tight.
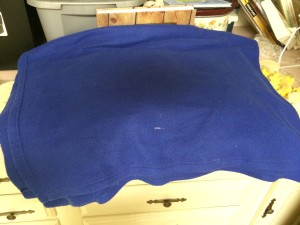
Warm and "snuggy" for the night

Warm and “snuggy” for the night

Step 13: Clean up. I prefer to just put everything in my stock pot and leave it alone until the next day. This gives everything the chance to harden and the lye to become inactive on my supplies (except for the container I measured the lye in, I never wash that out). The next day I just scrape off the soap into the trash and wash everything in my kitchen sink (you can use dish soap to help get the oilyness off but often you only need the soap leftover on your supplies).

I really love this step because it gives me an idea how well the soap may lather and clean and it smells awesome! My hands are silky soft after washing my soap stuff! Doing things this way has never caused a clog in the drain as I’ve heard some people experience when washing up directly after making soap.

Step 12: Wait… the hardest part for me! Twelve to twenty-four hours after covering the soap you can uncover it. Leave it to sit in molds for another 12 to 24 hours (uncovered). You may then unmold it, slice it (it may be a little soft and that is ok!), and put it up somewhere because it has to cure for 4 to 6 weeks!
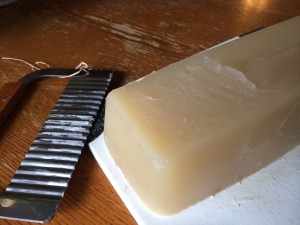
 

unmolded 24 hours after making it
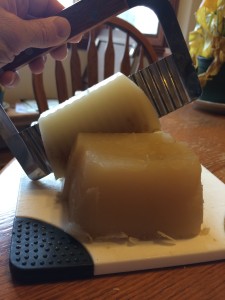
unmolded 24 hours after making it


Slicing... a little soft but it will harden to an awesome bar after curing!

Slicing… a little soft but it will harden to an awesome bar after curing!

You have gone through the chemical process of making soap called saponification and it is time for nature to do its part. During these 4 to 6 weeks moisture is evaporating and making your bar of soap nice and hard. The lye is being neutralized so it loses all of its caustic properties and forms the awesome glycerin that is the base of great soap. Four to six weeks seems a small price to pay for awesome soap that could last you the whole year (depending of course on family size and how often you roll in the dirt). After that time you have perfectly safe and hard bars of soap that you made yourself and you’ll fall in love with!

Enjoy and feel free to post any suggestions, questions, or comments! Happy soaping!

Want to dnate for our “Ride for Arthritis? Tax deductible!

http://ccc14.kintera.org/faf/donorReg/donorPledge.asp?ievent=1087174&supid=400863333

DIY Soap molds

http://www.youtube.com/watch?v=e7Wy7t7ZKIA

http://www.youtube.com/watch?v=tKtXsrL1uk8

Pig wrastlin’… added that to my resume last night

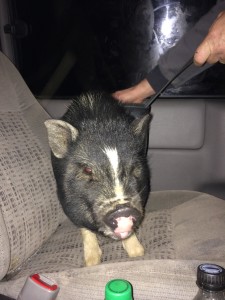
Miss PIggy

Miss Piggy

So last night I had a couple things that I really needed to do and I had planned my night perfectly to get them all done. They were simple things… get supper on the table, get youngest son to basketball practice (last one of the season, YEAH), and take some soaps to our church (while youngest son was at practice) for a care package to an amazing missionary in Lithuania (Hi Judy!)

Instead of these well laid out plans I chased a Vietnamese pot bellied pig through the corn fields, woods, and cricks of Chandler (I say “crick”, you say “creek”, others say “stream”, roll with me here or you’ll never get past the fact that I call drinking fountains “bubblers”). The supper fail was somewhat my fault… I asked my husband to pick up a few things for red and green enchiladas on his way home from work (tomatoes and tortillas) and he reminded me that we still had cavatini in the fridge (silly me, I thought he had tired of eating cavatini as it had been his lunch and dinner for the past two days). I guess you could say the pig had nothing to do with supper being a “fend for yourself” of leftovers and a 9 pm Subway and Taco Bell run for our boys but I will anyways… I blame you little pig for my boys eating fast food.

This is how it all went down and even this morning I can’t believe it. Youngest son and I pull in to basketball practice and just as I am getting out to usher son in to practice a friend pulls in with his son and said to me, “Get in, we’ve got to go catch a pig.” Ummmmm ok, yea, that’s not a weird “Hello, how ya doing?” I look at my little bag of soaps thinking, “I really need to run these to the church quick and get back in case youngest son breaks a collarbone playing basketball” (oldest son has done this). I throw caution to the wind (not out of character for me), grab my purse, and tell youngest son and his friend to “Head into practice and not break any bones until I get back.” Seriously, those were my words… not winning any mother of the year awards this year. I text my husband, Kevin, that I am off to catch a pig quick and his response is “Don’t eat it” (I’m allergic to mammal meat… weird, I know).

John and I head down to the muddy corn field where he saw the pig and he tells me someone dumped it when he was bringing his son to basketball. Opened the car door, and kicked the pig out… seriously! Really? People these days. He figured it wouldn’t be tough to catch the little pig because it was probably used to people. All I know about potbellied pigs is that they usually squeal bloody murder when they are handled against their will. Do they bite? Are they mean? Did this one have tusks? Would I have a really stupid obituary including “death at the hooves of a pig?” It didn’t matter, we were not getting very close to this pig as it was scared out of its mind, could run way faster than anyone would ever have imagined, and really had no interest in being anywhere near people… quite the opposite in fact. We chase this pig through the cornfield for about 30 minutes in freezing, windy weather (what is up with snow in March Indiana?) and even got three more helpers (John’s wife came with a banana… this pig did not like bananas. Two guys passing by also stopped to help). The pig eluded all five of us and we were seriously trying to get this pig! The pig (we had figured out at this point it was a lady pig and had no tusks to hurt us with… still wondering if pigs bite) ran off down through the cornfield/small lake and into the woods.

The two guys gave up, got back in their vehicles and took off.  I suggested we go get some Fritos… I think everyone (animals included) love Fritos and maybe the crinkly bag would get Miss Piggy’s attention. I also REALLY had to get those soaps to the church so John said he would get the Fritos while I ran to make the soap drop off. We would rendezvous back in the woods for some more pig catching.

I happily dropped off the soaps, interrupting our Bible study group, all the while trying not to blurt out that I had to run to go catch a pig. I was a total muddy mess (no one seemed to notice, love those folks!) but the adrenalin was starting to pump… I could do this, Miss Piggy would be caught and saved (this area had a huge coyote population and she wouldn’t last the night). I looked at the minivan clock, added an hour because I refuse to accept Daylight Savings Time fully and change all my clocks (telling myself it’s good math practice for the boys to add an hour… add 1… yup we are raising geniuses) and realized basketball practice would be done in about five minutes.

I go to the gym, see no sign of John and his wife, so I pick up youngest son and John’s son. Call John, yup he’s in the depths of the woods chasing the pig. The boys and I head down to the woods and John’s son is super stoked to practice his skills for the pig wrastlin’ competition for the 4-H fair this summer. The boy is in shorts, sweaty from basketball, and it’s 34 degrees outside… I tell them to wait in the van. My youngest son looks relieved.

Long story short, we chase this pig around the woods and cricks for well over an hour (added to the 45 minutes of cornfield chasing). At several points the pig comes up to the gravel road and I sprint after it to wear it out. I guess my training begins today (Kevin and I are doing a 550 mile bicycle ride in the fall to raise money and awareness for the Arthritis Foundation… I haven’t started training yet) and I have to tell you this was not on the agenda for tonight. I run full out behind the pig for about a quarter mile each time and when I think I’m going to vomit I overtake the pig and turn it on its heels to run back the way we came. Little piggy legs should wear out quickly right? Wrong! All in all we did the road run about a dozen times (you do the math, I don’t like to do anything beyond add 1). When she made it back to where John, his wife, and two hysterically laughing boys were she would dart down the bank and into the woods.

At this point it was well after 8 pm and the only light we had was from the moon (headlights from our vehicles actually made things worse because we couldn’t shine them down into the woods and they screwed up any night vision our eyes were trying to attain). However, the headlights did shine brightly on every road run that me and Miss Piggy engaged in. Apparently this is funny to 9 year old boys. Branches, logs, thorns, crick, and mud made this ooh so much fun. At one point John and I were both chasing Miss Piggy, him from behind and me in from the right when I heard a loud crash and hear John go to the ground. He got clotheslined by some good size tree limbs and as I ran I shouted, “You ok?” He assured me he was so I kept going. Got a hand on that little pig and dove down to cover her. She wiggled from under me and took off. Seriously? At this point I told her that I hope she did become a coyote’s dinner… coyotes deserve to eat too! However, out of the corner of my eye I see two boys and John’s wife on the edge of their seats trying to get a glimpse of whether or not we would emerge from the woods carrying Miss Piggy. I just couldn’t give up.

More road runs to try to wear the pig out and back down into the blackness of the woods more times than I can count, this pig could run! Finally, and I do mean FINALLY I was sprinting on the road behind Miss Piggy and I saw a huge pile of brush to the side of the road with the crick directly below (we were farther up than we had been all night). Before, when she would get to the water’s edge she’d stop for a split second every time so I knew she could smell/sense the water… this was my chance. I caught up to her, zagged to the left directly at her and she headed straight for that brush. She dove into it and realized the water was right there and she froze. Her legs were caught up in the brush and I dove on her, reaching around her with one of my best wrestling moves… yes I was a wrestler in high school. She squealed and squealed and I had to have the biggest smile of relief known to man on my face!

I yelled for John and his wife to bring up their minivan, I had caught her!! It seemed like forever until they finally came up, all the while playing a game of Marco Polo in the pitch black night. I was buried pretty deep in the brush with a pig under me so I’m glad no one decided to pull out a camera. I wrapped an arm around Miss Piggy and John grabbed my other hand to try to pull me out. I left behind a shoe but after Miss Piggy was in the van I was able to dig around and find it… wet, muddy, but full of memories, I really get like these shoes. John had a bloody head but seemed in good spirits.

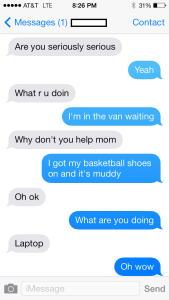
Yup, so that’s what I did last night. Even funnier yet was the text conversation I found on my phone between my two sons (one in van, one at home).

11 mar 2014 074

11 mar 2014 075

11 mar 2014 076


11 mar 2014 077

I really love life but man am I sore this morning! No, I didn’t keep the pig… I asked Kevin, he said “No”… he is the practical one in the family. Hmmm maybe some comments here can change his mind? Just kidding, I don’t want to push my luck with animals on the farm… or do I … notice I am not deleting that sentence. LOL, I must be a little nutty!

Anyone out there have pot bellied pigs? How are they as pets?
 

40 Signs You’re a Mom

momwithoutaclue

All right, depending on what “stage” of motherhood you are in some of these will resonate more than others… As of today I have a 15 year old and a 9 year old so that gives you a clue of where I am coming from! Go ahead, judge me, it’s kinda fun… I write this as my sons are daring each other to shoot the other (bare chests) with nerf guns and nerf bows and arrows… so I guess I know I’m a mother when I don’t step in to stop them. Darn that Duck Dynasty and its introduction of “Red Belly Rules”

“Owwwwww why would you shoot me? I didn’t think you would really do it!” Moving on…

  1. You have a secret candy stash that you don’t even tell your husband about.
  2. You unconsciously rock back and forth in the presence of any baby or little animal.
  3. You take it personally when strangers do not wave back at your baby/toddler.
  4. Legos, plastic animals, and matchbox cars are your personal World War II mine field.
  5. Olive Garden IS fine Italian dining.
  6. You have to feign interest in things you really have no interest in (think GI Joe story plots, what fingers smell like, how often the dog farts, fun facts about Hitler etc.).
  7. Your kisses can cure the near amputation (as a child would have you believe) of a limb.
  8. You can’t wait for them to say “mama” and then when you become their personal slave you wish they would hurry up and learn to say “dada”
  9. Goldfish crackers are their own food group
  10. You take a million and one pictures for the kids’ scrapbook that will most likely never be completed (or in my case, started)
  11. Yes, you have teeth, hair, and possibly a belly button cord “stump” in a treasure box somewhere… you are creepy… oh wait, you’re a mom…same thing.
  12. You find yourself playing ” I dare you” with your child when it comes to eating vegetables. It may even go to double dare, and if it’s brussel sprouts you are talking double dog dare.
  13. You’re first kid has an awesome detailed baby book. Your second, not so much. Your third child…you are sure you got one as a gift but can’t find it. Your fourth child… ummm they look a lot like the first child so they can share a book.
  14. College savings plan? More like “future therapy” savings plan (yes I made my oldest son help me butcher chickens so we are upping the amount we add for a couple years)
  15. Your husband says, “This is why we can’t have nice things” way too often.
  16. You wish there was a drive thru everything.
  17. You clean the house and the kids ask, “Who’s coming over?”
  18. You cross your legs when you sneeze or cough.
  19. You fake diarrhea to get a 10 minute immediate break in the solitude of the bathroom.
  20. You seriously wonder what you did with your time before kids. Did you just sit around and look longily into your husband’s beautiful eyes? Yup, I’m sure that’s what we all did
  21. You watch Sesame Street long after the kids have left the room and then justify it to yourself or anyone else by saying, “They have really cool singers, entertainers, actors, actresses on there and cookie monster is teaching me good eating habits now!”
  22. You hear yourself say things like, “Don’t bite the dog”, “Take your foot out of your mouth” (literally), “Do not eat your toenails”, “No I will not smell your finger… well ok I will.”
  23. That 10 minutes alone in the bathroom is like a mini vacation especially if you are able to sneak in a cool beverage (or coffee), your phone (or iPad), or a book!
  24. Someone is conversing with you while you are sleeping.
  25. You mix your kids’ names up (sometimes even interchanging them with the pets’ names) especially when you are angry or frustrated
  26. Your young kids drop their pants in public, comparing parts, and you simply say, “Where is your mother” with a serious face.
  27. You seriously cannot stand the “man hugs” that they give their father in which arms go out, they move towards each other, but there is no contact, UGH! That is not a hug!!
  28. You literally cannot stand the phrase “Oh I forgot” or if you have teenagers, “I don’t know”!
  29. You swear up and down you will never make 3 different dinners for picky eaters, but you do.
  30. You can’t help but smell the tops of all babies’ heads.
  31. Cutting a tiny person’s fingernails terrify you.
  32. Therefore you chew off tiny person’s fingernails.
  33. You have chewed up food to feed to your baby (think meat)… don’t try to say you haven’t!
  34. You beg your oldest child to get his/her license ASAP so he/she can run errands for you.
  35. You think you can cut hair (I thought I could, I can’t).
  36. You have whole conversations through the bathroom door because you refuse to leave your little fortress of solitude.
  37. Your husband takes the kid to the park so you can relax and you instead spend the time “cleaning up”
  38. Everyone tells you to sleep when the baby sleeps and instead you sit, obsessively watching the baby sleep.
  39. Your heart feels like its going to explode the moment you hold that child in your arms.
  40. Your heart feels like its going to explode again the day that child leaves the nest.


What are your “You know you are a mom when…” moments? Let me hear them!!

untitled

Itchin’ for a chicken!

Katja and chickens

Katja hanging out with a buff cochin and black cochin.

Stephanie asked a great question just the other day and I bumped this topic to the top of my “gotta blog this” list immediately. What kind of chickens should we get and what basics do we need to know?”

Chickens are the perfect starter livestock for any hobby farm, homestead, and even urban backyards. I get the following questions a lot about chickens and am so excited to share what has and hasn’t worked for us…

  1. What is the best kind to get
  2. What basics do I need from the start
  3. Where is the best place to get my chickens


What is the best kind to get? Chicken breeds/types are a lot like dog breeds/types. No matter what the breed is known for there will always be exceptions and a lot of your outcome depends on how the animal is raised. Basically, you need to ask yourself, “Why do I want these chickens?” and that will determine what type you get.

  • Do I want great egg layers?
  • Do you want meat birds (dinner table)
  • Do I want dual purpose (decent egg layers but also good for butchering)
  • Do I want good free rangers/pest control
  • Do I have extreme winters/summers
  • Do I want my kids (and me) to be able to easily handle them?
  • Do I want certain color eggs (brown, white, blue, green, pink etc.)
  • Do I want quick egg layers (chickens can start laying anywhere from 17 to more than 26 weeks old)
  • Do I want heritage breeds or hybrids?
pics 8 apr 2011 006

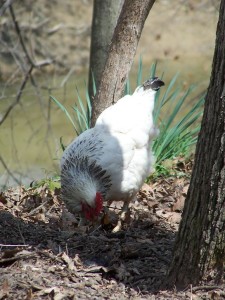
Delaware chicken searching for yummies to eat


This may seem a bit overwhelming and an awful lot of questions to just get a couple chickens but it cetainly helps guide one in the purchase of the best flock.

What is the best kind to get?  I absolutely have preferences on breeds based on what we have had. At one time I kept a flock of over 200 chickens which had the freedom to roam the entire hobby farm (including our front porch which did not make my husband and kids very happy). We had 23 different breeds of chickens and they all had their pluses and minuses but one breed certainly stood out amongst the others. The great cochin! We have had bantam (miniature version) cochins, standard cochins, and even frizzle cochins (their feathers are all frizzled and stand out on end) and I have loved them all for their gentleness, great egg production, ability to withstand cold and hot temperatures, beautiful looks, and great mama skills when we wanted to hatch out some chicks.

Some other great all around chickens for any type of environment are the orphington, brahma, australorp, cornish, polish, ISA browns, and golden comets, Rhode Island whites, Plymouth Rock, and New Hampshires.

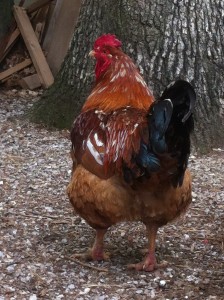
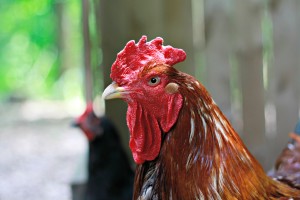
We love the look and color of eggs (rich dark brown) we get from cuckoo marans but I have to say these ladies are not very friendly. We also had a Cuckoo Maran rooster, Stanley, who was pure evil. He would even chase our German Shepherds around the farm, horrible guy. The boys wouldn’t go out the door when Stanley was out. He got his own pen because we needed him to raise other cuckoo marans from our hens but I really really really did not like him. Needless to say I was not all that sad the day old Stanley kicked the bucket however I was scared to death to go in the pen to get his body to bury because I thought he might be faking it to lure me in to attack me.


On the flip side there was Meathead, the most amazing (and HUGE) rooster you could ever find. He even visited grade school classes for kids to learn about chickens and hobby farming. He loved to be held and everyone loved him. Sadly Meathead passed away last fall and he will serioulsy be missed!

Meathead

Meathead

Meathead...photo by Casey Braden

Meathead…photo by Casey Braden

Next item to consider is whether you want:

  • chicks (male and female)
  • pullets (female less than 1 year old)
  • cockerels (roosters less than 1 year old)
  • full grown hens
  • full grown roosters

I’ve always preferred chicks because they are so darn cute and we could raise them up accustomed to being handled and returning to their coop at dusk. In spring you can get chicks from many feed/farm stores (around here it’s Tractor Supply Company and Rural King), mail order (my favorite is Murray McMurray Hatchery, link below), and from local breeders (check out Craigslist or local farmers).

pics 8 apr 2011 008 pics 10 apr 2010 064 21 mar 2010 115

What basics do I need from the start? This depends on what age you get.

Full grown egg laying chickens:

  1. Coop or hen house with nest boxes
  2. feeder
  3. waterer
  4. feed  (at least initially so you can entice them to return to the coop each night if they are free ranging. Make sure it is NOT “meat bird” feed if you are raising egg laying or dual purpose breeds), protected run (depending on predator level and which, if any, livestock guardians you have) and chicken first aid kit. Pretty easy right? Yup, which is why they make great starter critters for any homestead.
  5.  If your birds do not have access to dirt ( I highly encourage as much access to “foraging as possible) then you need to provide grit for their digestion. A small bowl or feeder of it is sufficient as they will eat what they need.
  6. Calcium of some sort. Some people provide this with oyster shell (we do) given freely as the grit would be. Others crush up egg shells and give it to them (we also do this).

Pullets/Cockerels: All of the same things above except you will not want to feed the egg laying feed. Instead get the starter/grower or grower/finisher feed depending on age of pullets. They will probably not be free ranging at this age (due to their size they make too easy of targets for predators) so you will be giving them more feed than full grown, free ranging chickens.

Chicks:

  1. Brooder of some sort. There are a million ideas on the internet for “homemade brooders” that range from super simple to complex. In the past we have used a baby pool with square mesh wire surrounding it or refrigerator boxes laid down with the “top” cut out. We now use a big stock tank with high walls similar to what you see the chicks in at the feed stores. It’s a bit of upfront investment but if you plan on having new chicks again it is worth it. If you only have a couple chicks feel free to make something or use boxes.
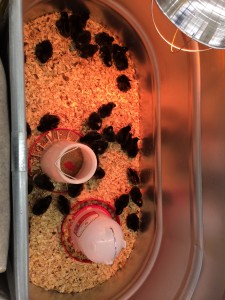
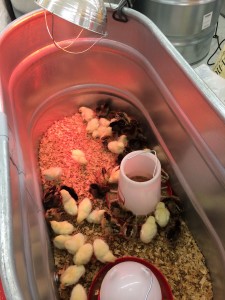
  2. Brooder light. Yes you need this even if it’s summer. Chicks need to be kept warm so you will have to adjust the height to get it just right. The chicks will let you know.

If they are all huddled directly under the light most of the time they are cold, lower it. If they are most often in the far depths of the far corners trying to get away from the light it is too hot, raise it.

1 mar 2014 iphone pics 089
PERFECT!
1 mar 2014 iphone pics 079
Maybe a little low but all in all this is fine

3.   Waterer. Do not use a bowl of water as they will probably tip it over and/or drown in it. Fresh water every day is super important for chicks. When you first get them home add 1 TBS of sugar per gallon of water and make it slightly warm the first time.

4.   Feeder. The round ones are great (pictured above). I have often found that my chicks get their food super dirty and icky with the long trough type.

5.   Feed. You will need chick feed (starter). DO NOT Get the meat bird starter (it is designed to grow chickens super fast to butcher sooner and that will be bad if your chicks are used for egg laying or dual purpose). You can get the medicated feed if your chicks were not immunized (Marek’s Disease) but only feed it for 1 to 2 weeks. You can also get feed with antibiotics but I have found I don’t need that as long as I keep the brooder clean and water refreshed daily. When we hatch out our chicks here on the farm I give the medicated feed (for Marek’s Disease) but if I get them from a hatchery I have them immunized there before shipment.

6.   Grit. If your chickens do not yet have access to the outdoors (dirt) put a bowl or feeder of grit out for them. THey will eat it as they need it to aid in their digestion.

7.   Bedding. If they came from a hatchery or someone’s incubator at first you will want to have paper towels down for the chicks (newspaper becomes slick when wet and they could easily hurt their legs). You can put hem on top of wood chips or just have it down on the floor of your brooder (I suggest the latter). Change this paper towel out daily. If you put them on wood chips when they have not been accustomed to them they often mistake them for food, eat them, get impacted crops, and could die. If they came from a feed store you can put them directly on wood shavings or chips as they are accustomed to them and shouldn’t eat them

8.   Chicken first aid kit. I will have more on this soon as I am working on a blog post all about general chick/chicken health and ailments. Basically you want scissors, antibiotic ointment, dressings, pressure tape, gloves, magnifying glass, and thermometer.


Last but not least, Where is the best place to get my chickens? I’ve bought them locally (breeders, farmers, fed store), ordered them, rescued them from inhumane conditions,and hatched chicks here at The Shepherd Hobby Farm. I love getting rare breeds and funny breeds from a hatchery but cannot help myslef in spring when I go into the feed store so I end up bringing a few home from there as well every spring. My all time favorite though is hatching them here at the farm… if you are ever able to do it I highly recommend hatching your own out.

Hey maybe I should start an “incubator rental” business, so fun!

When you get them from the feed store choose chicks that are moving around and curious. You may be tempted to “rescue” that one huddled by herself in the corner but you are setting yourself up for more work and probable heartbreak if she doesn’t make it. “Straight Run” means they haven’t been sexed (male and female) and you have no idea what you are going to get (hens or roosters). Pullets are female and cockerels are males as we stated before (though I’ve never seen a feed store sell just cockerels). You do NOT need a rooster for hens to lay eggs. Roosters are great but that is for a whole nother blog post!

Quick links that will help even the most seasoned chicken enthusiast!

Murray McMurray Hatchery: http://www.mcmurrayhatchery.com/index.html

Mother Earth News did an interesting survey all about different breeds and chicken management techniques. The results can be seen here… https://www.surveymonkey.com/sr.aspx?sm=Ng1SFU0PmWjHUT7ofHi5hKvyLiYkduQuX0GzIJnw6z0_3d

Another tool from Mother Earth News is their “Hatchery Finder.” You type in what you are looking for and it comes up with the mail order hatcheries that have what you want, cool!

http://www.motherearthnews.com/find-chickens-poultry-hatchery.aspx

Questions? Comments? Ideas? Pics of your poultry friends? Let me hear it and see them, post here in the comments section and feel free to share our site!


Chocolate Covered Strawberries… YUM!

I really can’t imagine many things more delightful than eating chocolate covered strawberries… they are just amazing! However, I am a slight cheapskate and refuse to pay the insane amount of money places charge for these delectable bites of happiness. Add that to the fact that I am not a fan of mushy or bruised strawberries that I have convinced myself places use because no one can tell once they are covered in chocolate.  So what do I do? I make them myself and it is so easy! Let me show you how…

What you will need:


  • Strawberries
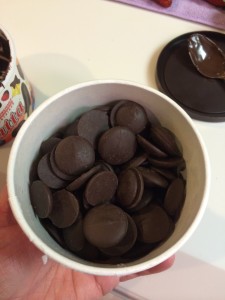
  • “Dolci” chocolate wafers (you can use chocolate chips… we’ll talk about that in a bit)

*Dolci is often found in the produce section perhaps by the jars of minced garlic, look around, it’s there.

  • White chocolate (chips or baking bars of white chocolate work equally well)
  • Wax paper (not a must have but handy)
Dolci, my preferred chocolate for dipping!

Dolci, my preferred chocolate for dipping!

Step 1: Rinse strawberries. Do this just before you start. If you wash strawberries days in advance they won’t last long in the fridge. You can wash them by putting them in a strainer and rinsing them under cold tap water or fill a big bowl with water and dump the strawberries in (my preferred method).

Step 2: DRY THE STRAWBERRIES! This is a key step and one that will determine your success or failure. Chocolate does not stick to wet or damp strawberries. I take the strawberries out of the water and put them on paper towel. I then pick a few up at a time in a paper towel and gently dry them and then place on a different towel.


Step 3: Put some wax paper on the counter or a cookie sheet. The beautiful thing about using Dolci is that it hardens at room temperature. Woohoo! For anyone who is remotely like me and plays a challenging round of “Tetris” when attempting to put anything in the fridge you will be glad that you don’t have to worry about balancing an entire cookie sheet of strawberries on a mayonnaise jar which is balanced on a stick of butter.


So now we have strawberries dried (admittedly I do a bunch at a time and don’t have room to dry them all at once so there are always strawberries hanging out in the different stations (water bath, drying towel, and dry/ready to dip towel) awaiting their turn.) You are doing great and it’s ok if you are trying to be quiet as a mouse so no kids (or spouse) will run in and steal all your strawberries… a common occurrence at our house.


Step 4: Pull out that “Dolci” chocolate and get really excited because in just seconds you will have your first chocolate covered strawberry ready to “taste test”!

* The concept of heating the chocolate is the same if you use chocolate chips but

the microwave times may differ (probably one extra 30 second interval) and you

will most likely have to refrigerate the strawberries for the chocolate to harden

(all depends on the temperature in your house).

Peel off the plastic on top and put container in your microwave (setting high/normal) for 30 seconds. Stir the contents and put in for another 30 seconds. When you pull it out this time and stir you may see quite a few big pieces or just a couple. Keep stirring for a couple seconds and if there are still big chunks put back in microwave for 15 seconds. Stir, stir, stir and those chunks will melt.  Yes, all microwaves are different but I have used this method in 2 different countries, 4 different states, and over a dozen different houses with different microwaves and I have never had to microwave Dolci more than 1 minute and 30 seconds TOTAL. Don’t be that person.

7 mar 2014 iphone pics 024   7 mar 2014 iphone pics 025 7 mar 2014 iphone pics 030


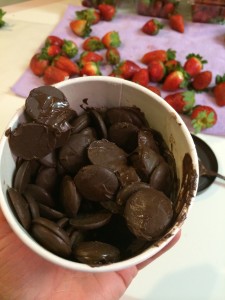
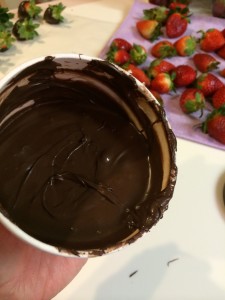
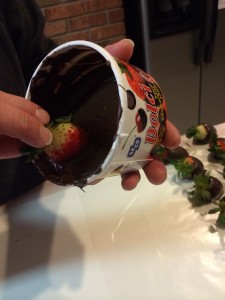
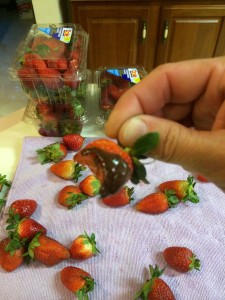
Step 5: When you have smooth chocolate (resulting from stirring) tilt it slightly and gather 7 mar 2014 iphone pics 031as much chocolate you can to one side to give the deepest “pool” of chocolate in which to dip the strawberries. Start with the biggest strawberries and gently but firmly (that makes no sense, I know) hold by the leaves (or stem if you are lucky enough to get some with stems) and dip in the chocolate. Dangle for a second to get the chocolate to stop dripping and lay on wax paper. Repeat repeat repeat.  If a stem or leaves fall off while you are dipping and a strawberry is lost at chocolate sea go in after it! Pull it out with your fingers, plop it on the wax paper, and know which one you’ll be taste testing first. You washed your hands before you started right?
 

Step 6: When you get low on chocolate in the Dolci container and the strawberries start coming out less than pretty because you have to smoosh them all around to cover in chocolate just put the container down (do not throw away) and get another container of Dolci. If you only have one container skip to step 7. Microwave it according to directions in Step 4. Come back to your workspace and scrape the contents from the first Dolci into the fresh container and stir. It will melt in with the new chocolate and you can resume dipping happily.


Step 7: There will come a time when you are done dipping strawberries and there is a little chocolate left in the Dolci container. Offer some to others if you want or be very quiet and happily grab a couple strawberries, pretzels, marshmallows, or whatever you want 7 mar 2014 iphone pics 037chocolate on and dip away and eat directly. Yum! Have the camera ready if you call in the troops (otherwise known as kids and spouse) because one will very likely try to stick their face in the container to lick out the last bits of chocolate and the resulting chocolate face is adorable!

You can be done at this point if you want or you can really get fancy (this is not difficult) and go for the gusto with white chocolate drizzle.

7 mar 2014 iphone pics 036

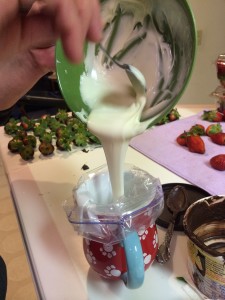
Optional Step 8: Get a plastic Ziploc (or off brand, I don’t care) bag (I highly recommend a “freezer” strength one as the regular sandwich bags may melt with the heat of the 7 mar 2014 iphone pics 057chocolate), open it, and place in a coffee cup to give support to the bag.


Melt white chocolate just as you did the Dolci in step 4. However, chips and baking bars often take 30 seconds or so longer to melt than Dolci. Melt at 30 second intervals even if it seems they are hardly melting. Stir after every interval. After 3 or possibly 4 intervals, with stirring, you will have smooth creamy white chocolate. Pour it into the Ziploc bag, press the air out as best as you can, seal, and cut off the bottom corner of the bag (the bigger the cut the thicker your drizzle). Squeeze and drizzle over the strawberries in whatever fashion trips your trigger. I like to drizzle each strawberry individually instead of down a row because it helps prevent strings of chocolate connecting them.


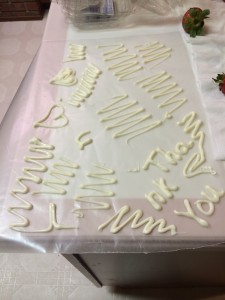
Unless it is really hot I have never had to refrigerate the strawberries to get the white chocolate to harden… perhaps the Dolci talks to the white chocolate and tells it to “quit your whining and harden up!” If you have any white chocolate left feel free to “draw” designs (squiggles, hearts, letters, etc.) on wax paper and let it harden to decorate your platter of strawberries. I hate to waste chocolate so I often do this even though my oldest son almost always swipes the designs for delivery to his tummy instead of my pretty platter of strawberries. 7 mar 2014 iphone pics 066

There you have it folks, you can easily make these strawberries and they taste AMAZING! Give them to friends, family, teachers (your kids will get some MAJOR brownie points), pastors (you’re welcome Pastor Ernie), or keep them all for yourself… I won’t judge lol!

7 mar 2014 iphone pics 068


Enjoy and let me know how they turn out. I’d LOVE to see pictures and any tips on how you made yours even better.


** I did not receive any payment for suggesting “Dolci” or Ziploc brand. I just really love using Dolci and have no clue what one would call those Ziploc bags other than “Ziploc bags”.


Hello World!

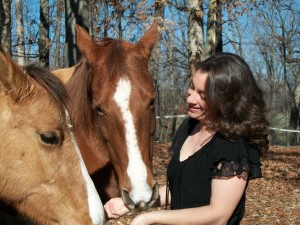
Me and my horses, Pepsi and Mercedes!

Me and my horses, Pepsi and Mercedes!

I’ve known three things my whole life…

  1. I wanted to be a wife.
  2. I wanted to be a mother.
  3. I wanted to be surrounded by nature (especially animals).

Amazingly enough, I now have these things and so much more. Pinch me, I’m dreaming. Don’t really pinch me, I seriously have a crazy irrational fear about being pinched.

How did I get to where I am today? Simply put, by the will of God. I’m no stranger to hard work and sacrifice but am truly blessed by God to the deep depths of my being.

To know me is to know a Christian wife, homeschooling mom, Air Force veteran, stroke survivor, hobby farmer, animal enthusiast, dog trainer, wood chopper, homesteader, and lover of all things culinary.

Impulsive to the core and easily distracted, I’m always up for a challenge… Hmmmm sounds like I’m applying for the A-Team. Buckle up, helmets and flak vests on and join me on this roller coaster adventure we call life. Freely share your own adventures, tips, tricks, ideas, and questions, I love hearing what others are thinking (probably because so many times it makes me feel way more normal!)

Recent Entries »