
DIY Homemade “Grocery Store” Soap… Yes, YOU can do this!
 Follow
Ever look at the ingredients list of soaps in the grocery store? Even the “natural” soaps have chemicals and preservatives that may or may not cause health issues (we can all find research to support our theories on either side, not my point today). I don’t really blame these companies because their products have to have a long shelf life (who knows how long they will be on those store shelves!). However, when I can make a product here at home I jump on it like a frog on a lily pad. Add to that the simple fact that my DIY endeavors usually get me these products for a fraction of the price and you’ve got one happy hobby farmer.
I’ve become quite the soap maker lately as Kevin and I are looking for ways to raise money for the Arthritis Foundation through the AMGEN “Arthritis Bike Classic”. It’s hard to get people to just donate money because we have become a society of “I want something for my money.” You can agree or disagree with that but its an argument for another day… even I am guilty of wanting a product to show for money I spend (not good, I know, but I’m a work in progress as far as the be more giving, loving, and self sacrificing department). Enter soap making. People seem to really love homemade soaps and I have goats that I milk twice a day so this could be (and is) certainly an outlet for using that goat’s milk and my ambition!
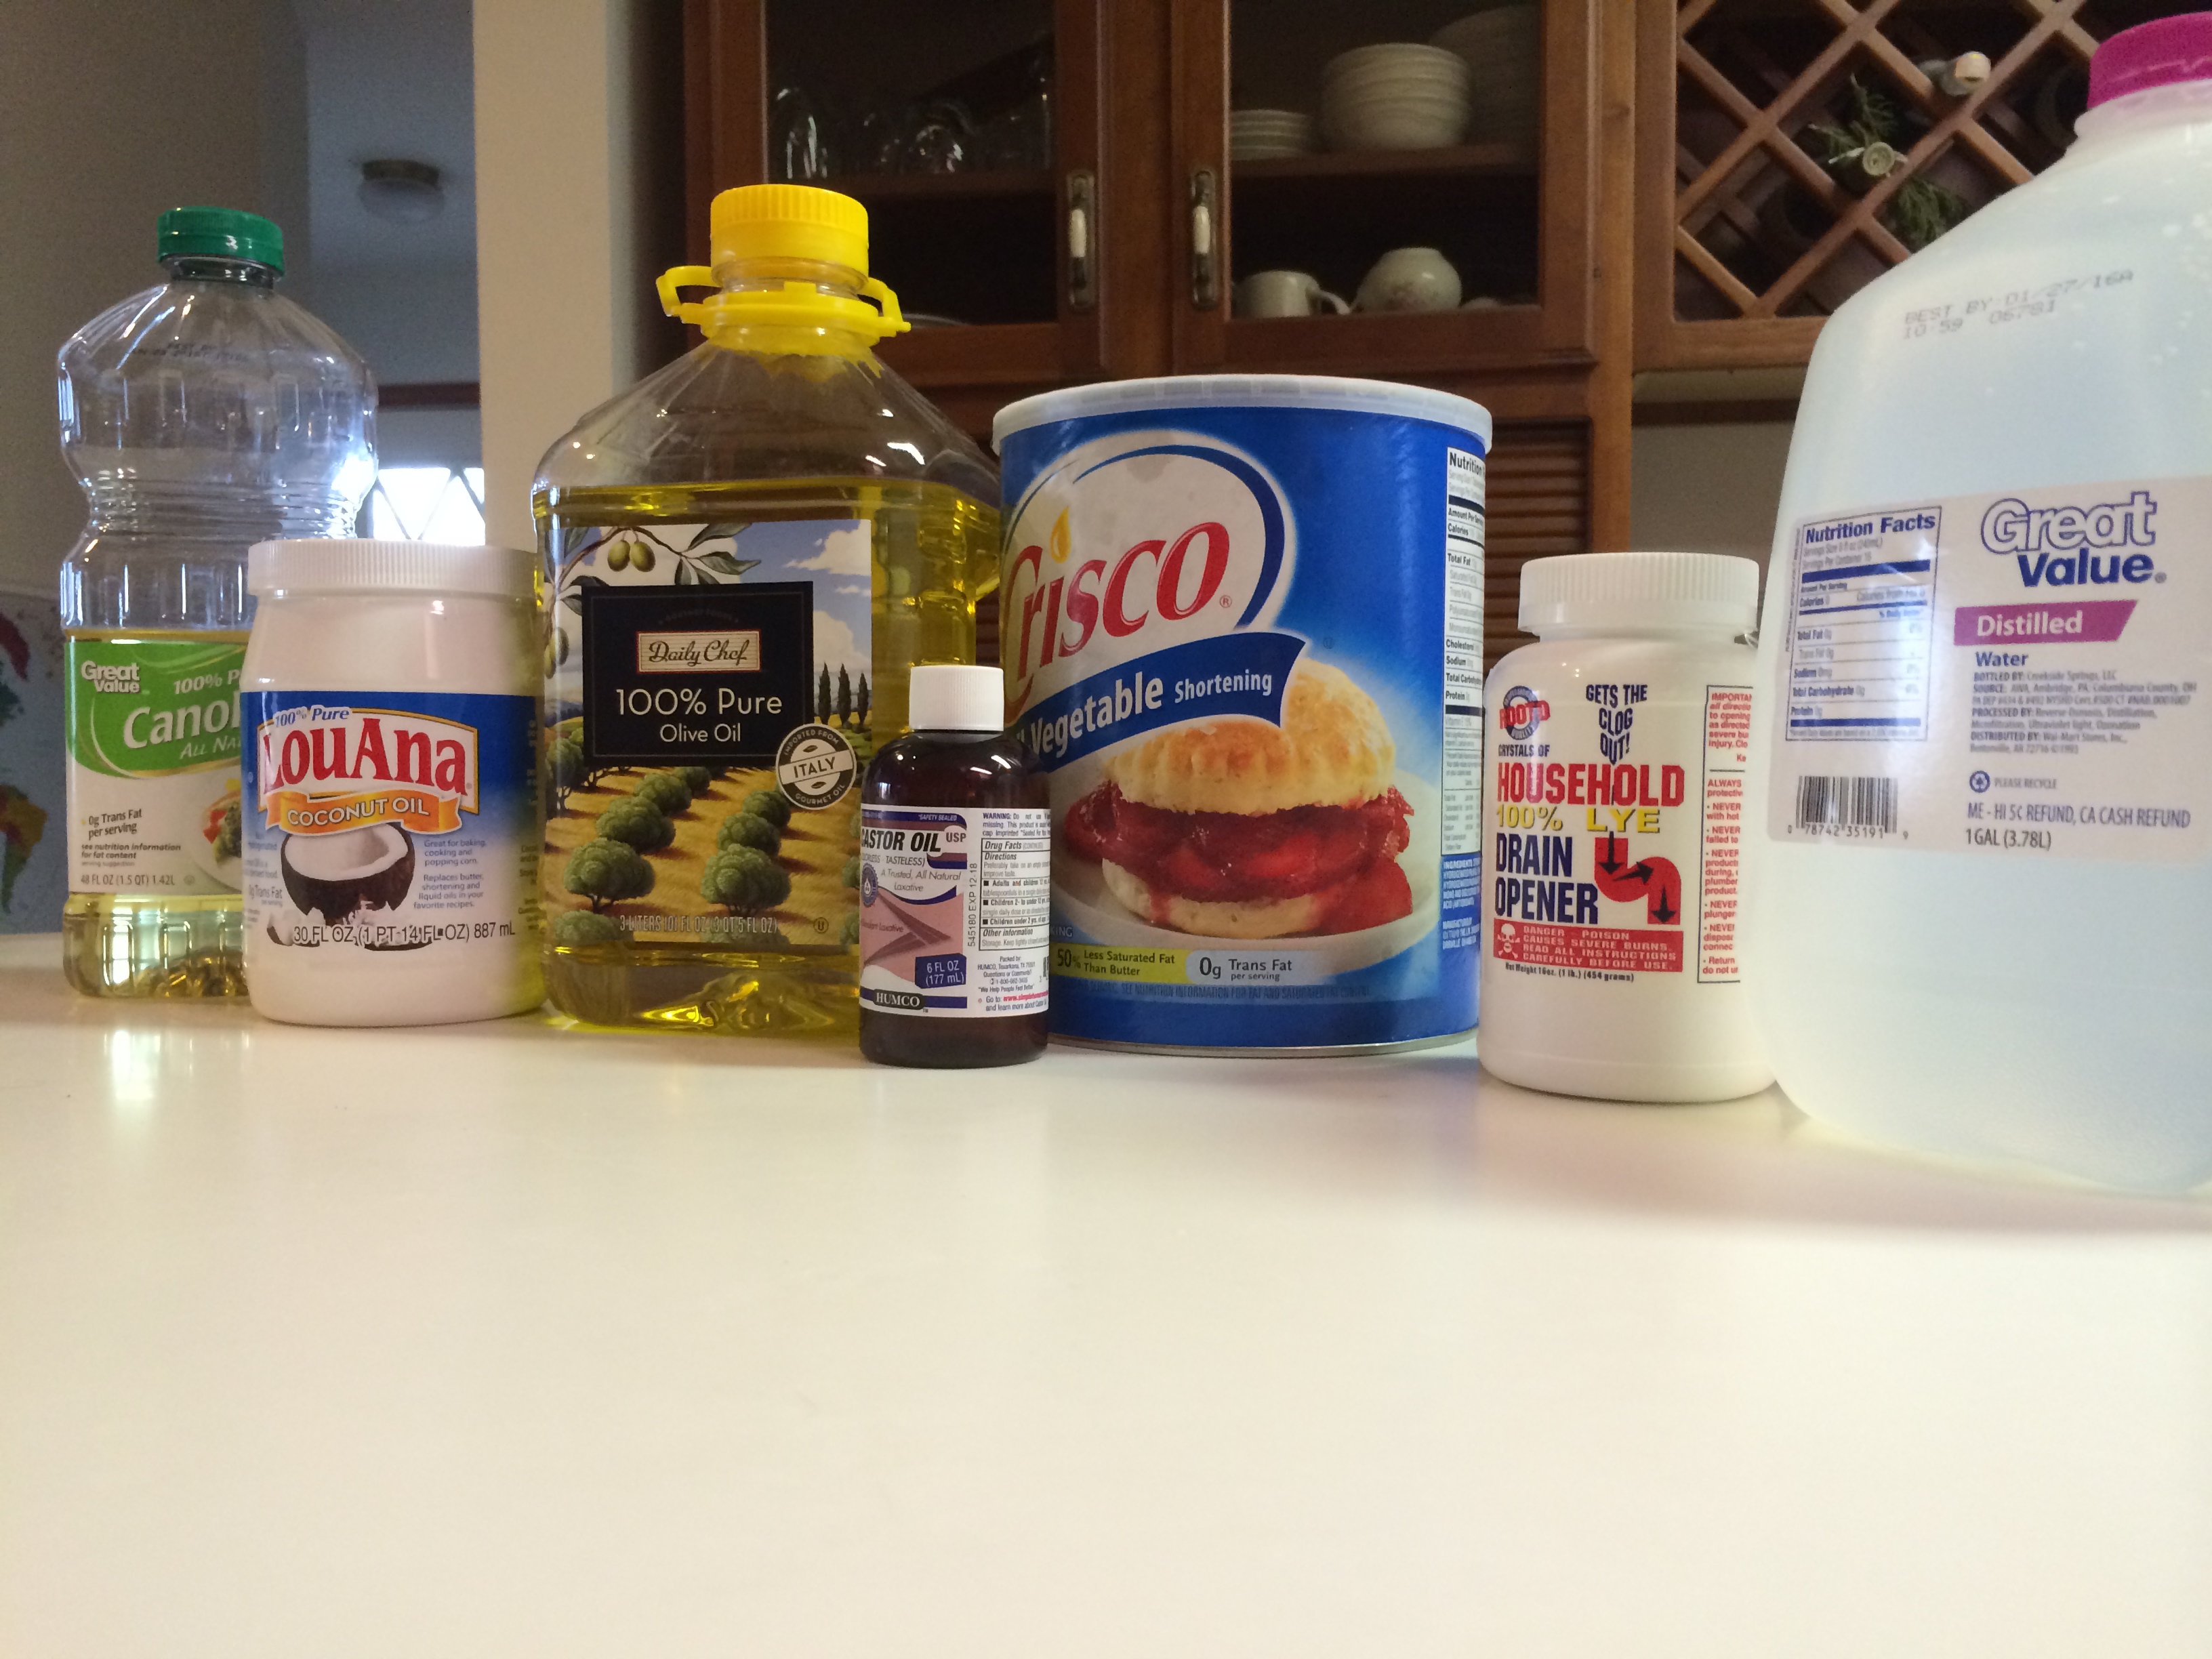
Today I want to share with you a super easy cold process soap that uses ingredients you could find at any local grocery store, discount store, hardware store, and even your local drugstores. I hate to say it, but I can get every one of these ingredients, except one, at my local Super Wal-Mart (bear with me, I live in a small town).
I’m going to give you step by step instructions for you to make this soap. I’m not going to go into much detail on the terms as I plan on doing a blog all about soap terms in the very near future. This is a super simple beginner’s soap and I hope you enjoy! Invite some friends over and do it together (confidence in numbers right?). Everything is weighed using mass on a kitchen scale, even liquids (in other words, don’t measure out the liquid oils trying to use the fluid ounces on the side of a liguid measuring glass).
Grocery Store Soap Recipe (makes 2 two lb loaves or you can use a couple small cardboard boxes or 1 medium box lined with plastic, saran wrap, or even a garbage bag… at the bottom of the page are some links for good ideas for DIY soap molds)
24 oz olive oil (I prefer the classic olive oil, not the virgin or extra virgin)
7.2 oz canola oil
2.4 oz soybean oil (otherwise known as Crisco)
12 oz coconut oil
2.4 oz castor oil… add at end, after trace (I’ll explain that in a minute… castor oil is often found in the medicine aisles)
18.2 oz distilled water (or fresh, clean rain water)
6.7 oz lye (pure sodium hydroxide,aka caustic soda, often found at hardware stores. Evansville, IN area you can get it at ACE Hardware). This is extrememly caustic and will burn a hole through anything quickly when mixed with a liquid so use caution)
**optional… essential oils or fragrance oils (about 2.4 oz for this recipe, meant for soap), ground oatmeal, ground almonds, fruit zest, honey, etc.
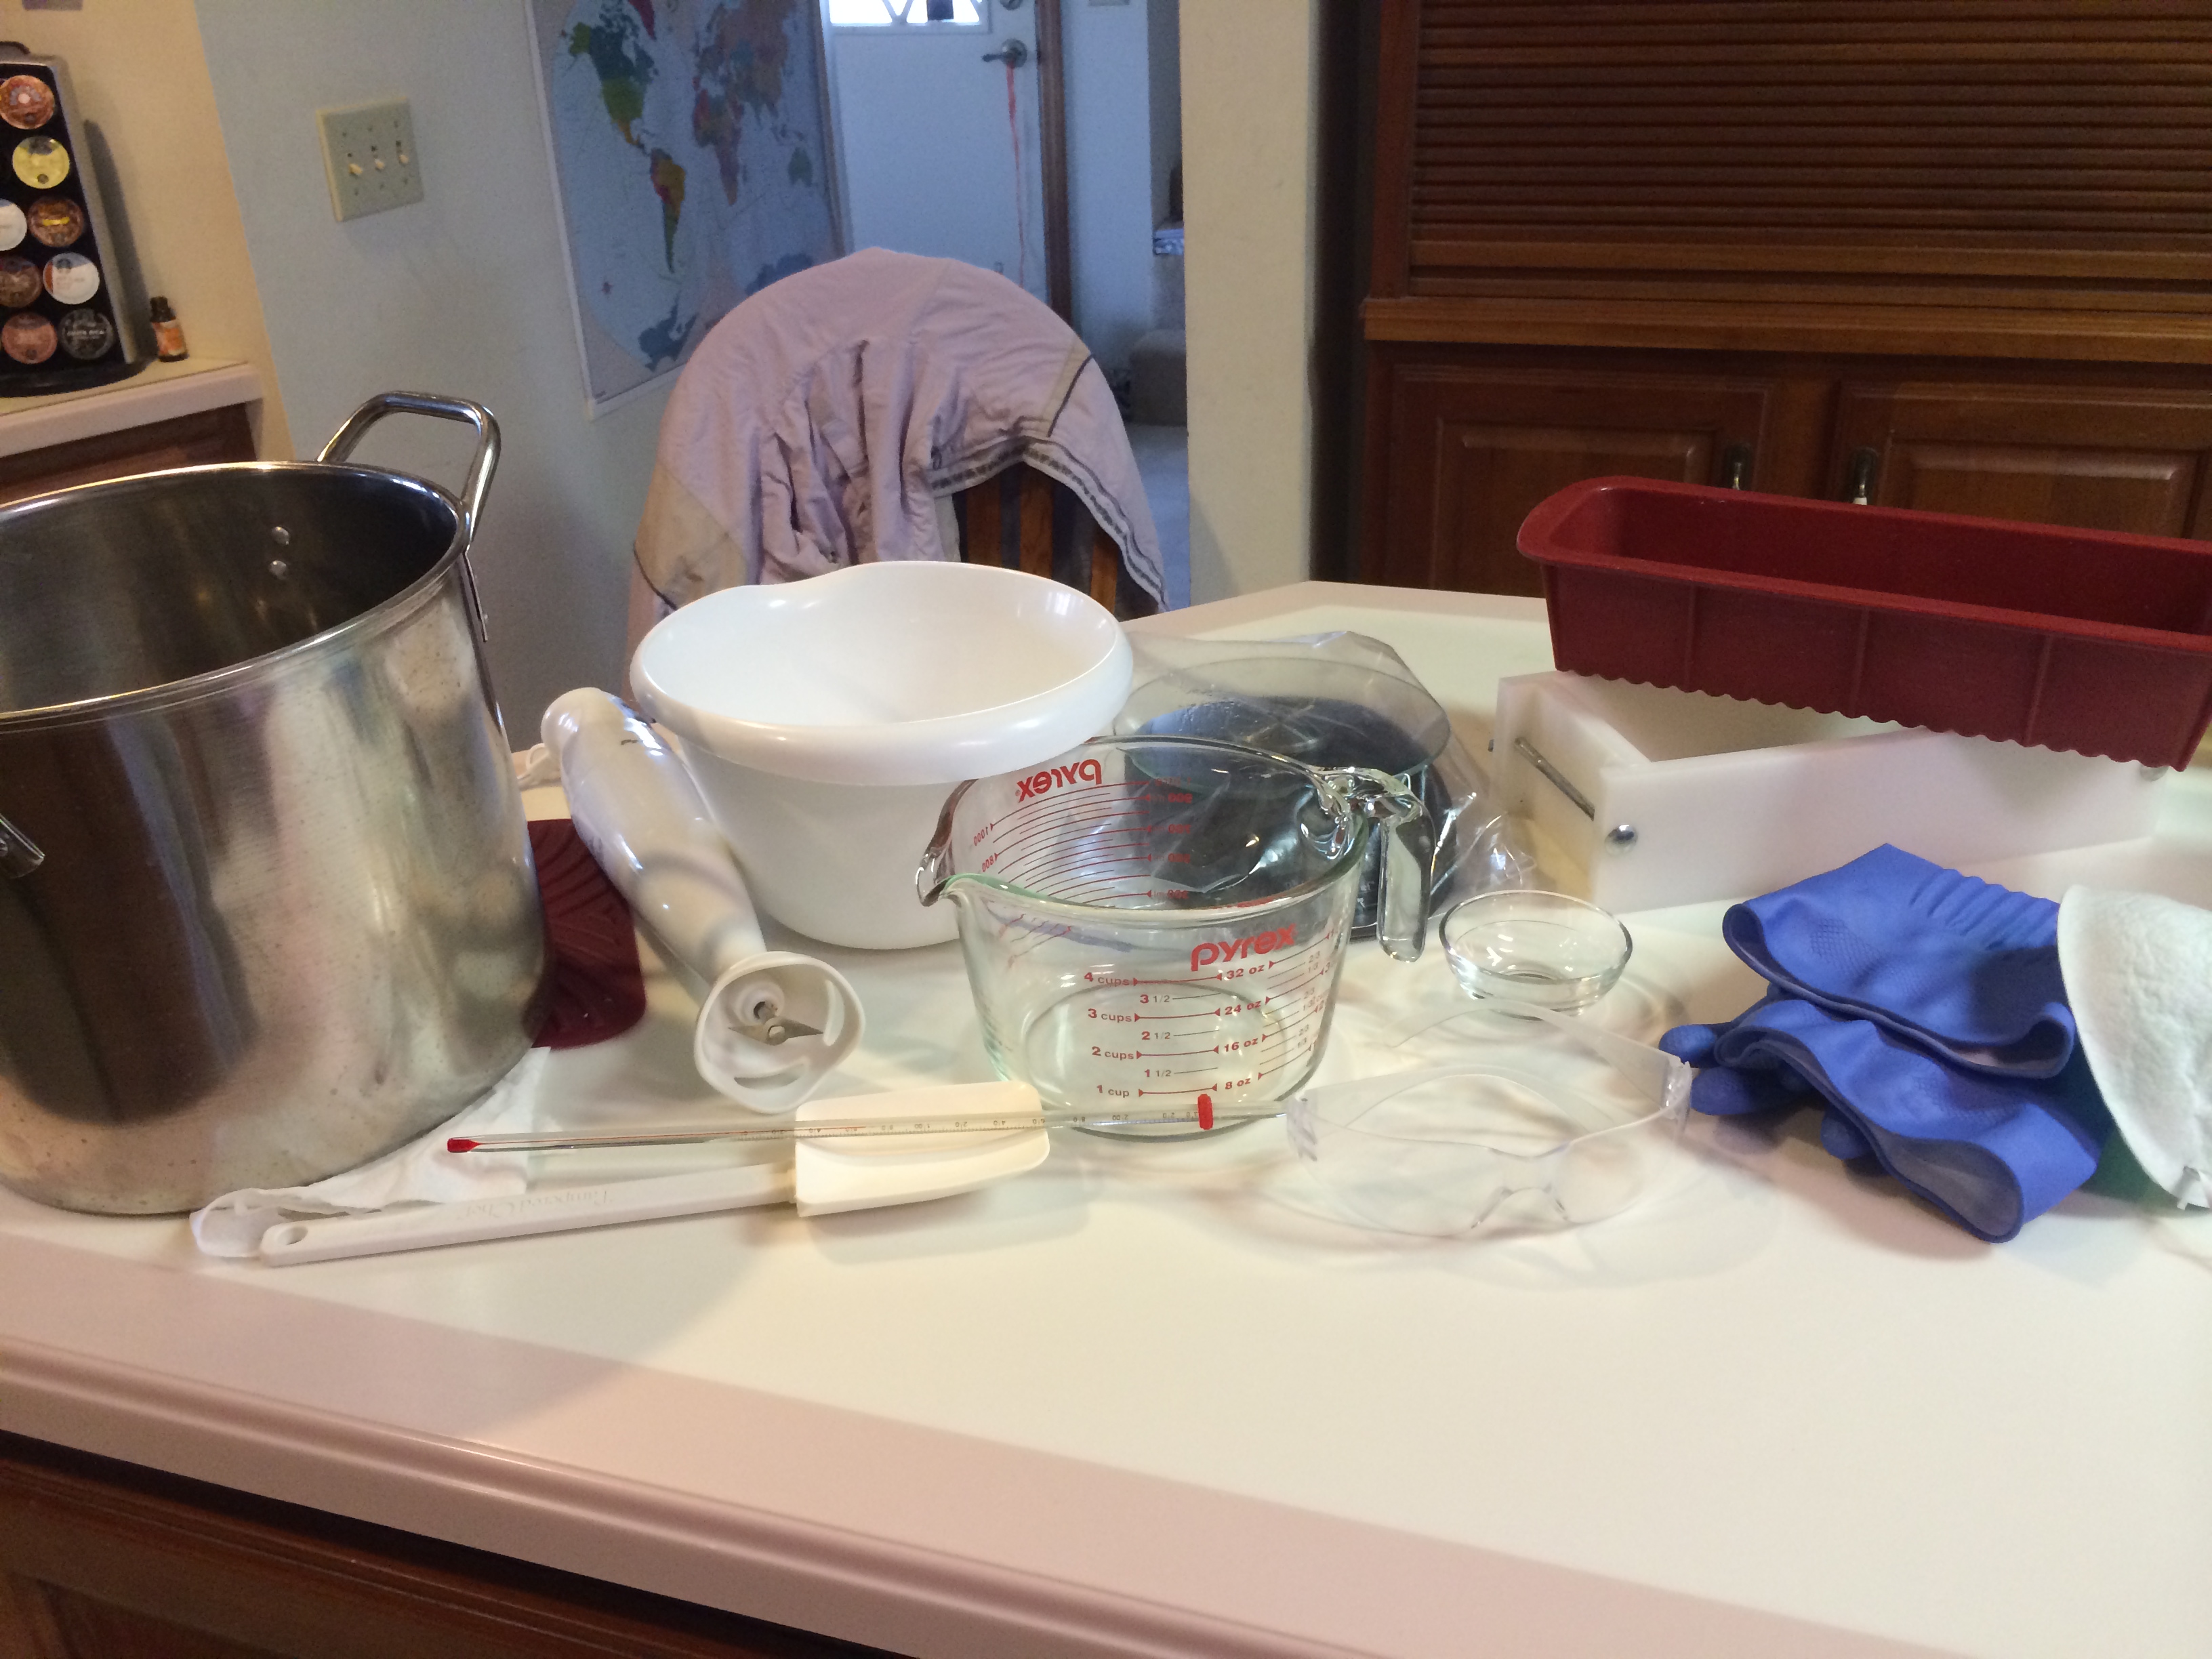
Supplies (do not ever use these supplies for anything with food after making soap with them)
Stainless steel pot (must be stainless steel as other materials react badly with the lye)
Thick plastic pitcher or glass Pyrex measuring glass (4 cup)
Thermometer (candy making thermometer is fine)
High temperature resistant stirrer ( I use Pampered Chef rubber scraper)
Rubber gloves (Decent thick ones, think dishwashing gloves. Not talking welding gloves but you better not be using those thin surgical gloves either!)
Safety glasses/goggles (optional mask… I use ones for painting)
Soap mold (see YouTube links below for cool DIY ideas)
Kitchen scale (I always keep mine in a gallon size Ziploc bag so it doesn’t get all oily or dirty)
Immersion blender (not a must but cuts down stirring time by almost an hour! Only $15-$20 in stores or online)
Spray bottle with vinegar in it (for use in case of lye spills/splatters)
Plastic wrap, garbage bag or wax paper (to line molds and for coering soap during gel phase)
Heavy blanket or towels (used for gel phase)
Big bowl with about 2 inches of water and ice (used in case you need to lower temperature of lye solution or oil mixture)
Step 1: Gather ingredients and supplies and clear away any food and food preparation things. Accidents happen and you do not want lye getting on anything you will ever put in or near your mouth or skin. If you want, you can line your soap molds with plastic wrap. People say it is easier to unmold the soaps this way but I can never get it in there right to prevent wrinkles on my soap. I prefer to rub mine with Crisco instead and just wash them after I unmold the soap the next day.
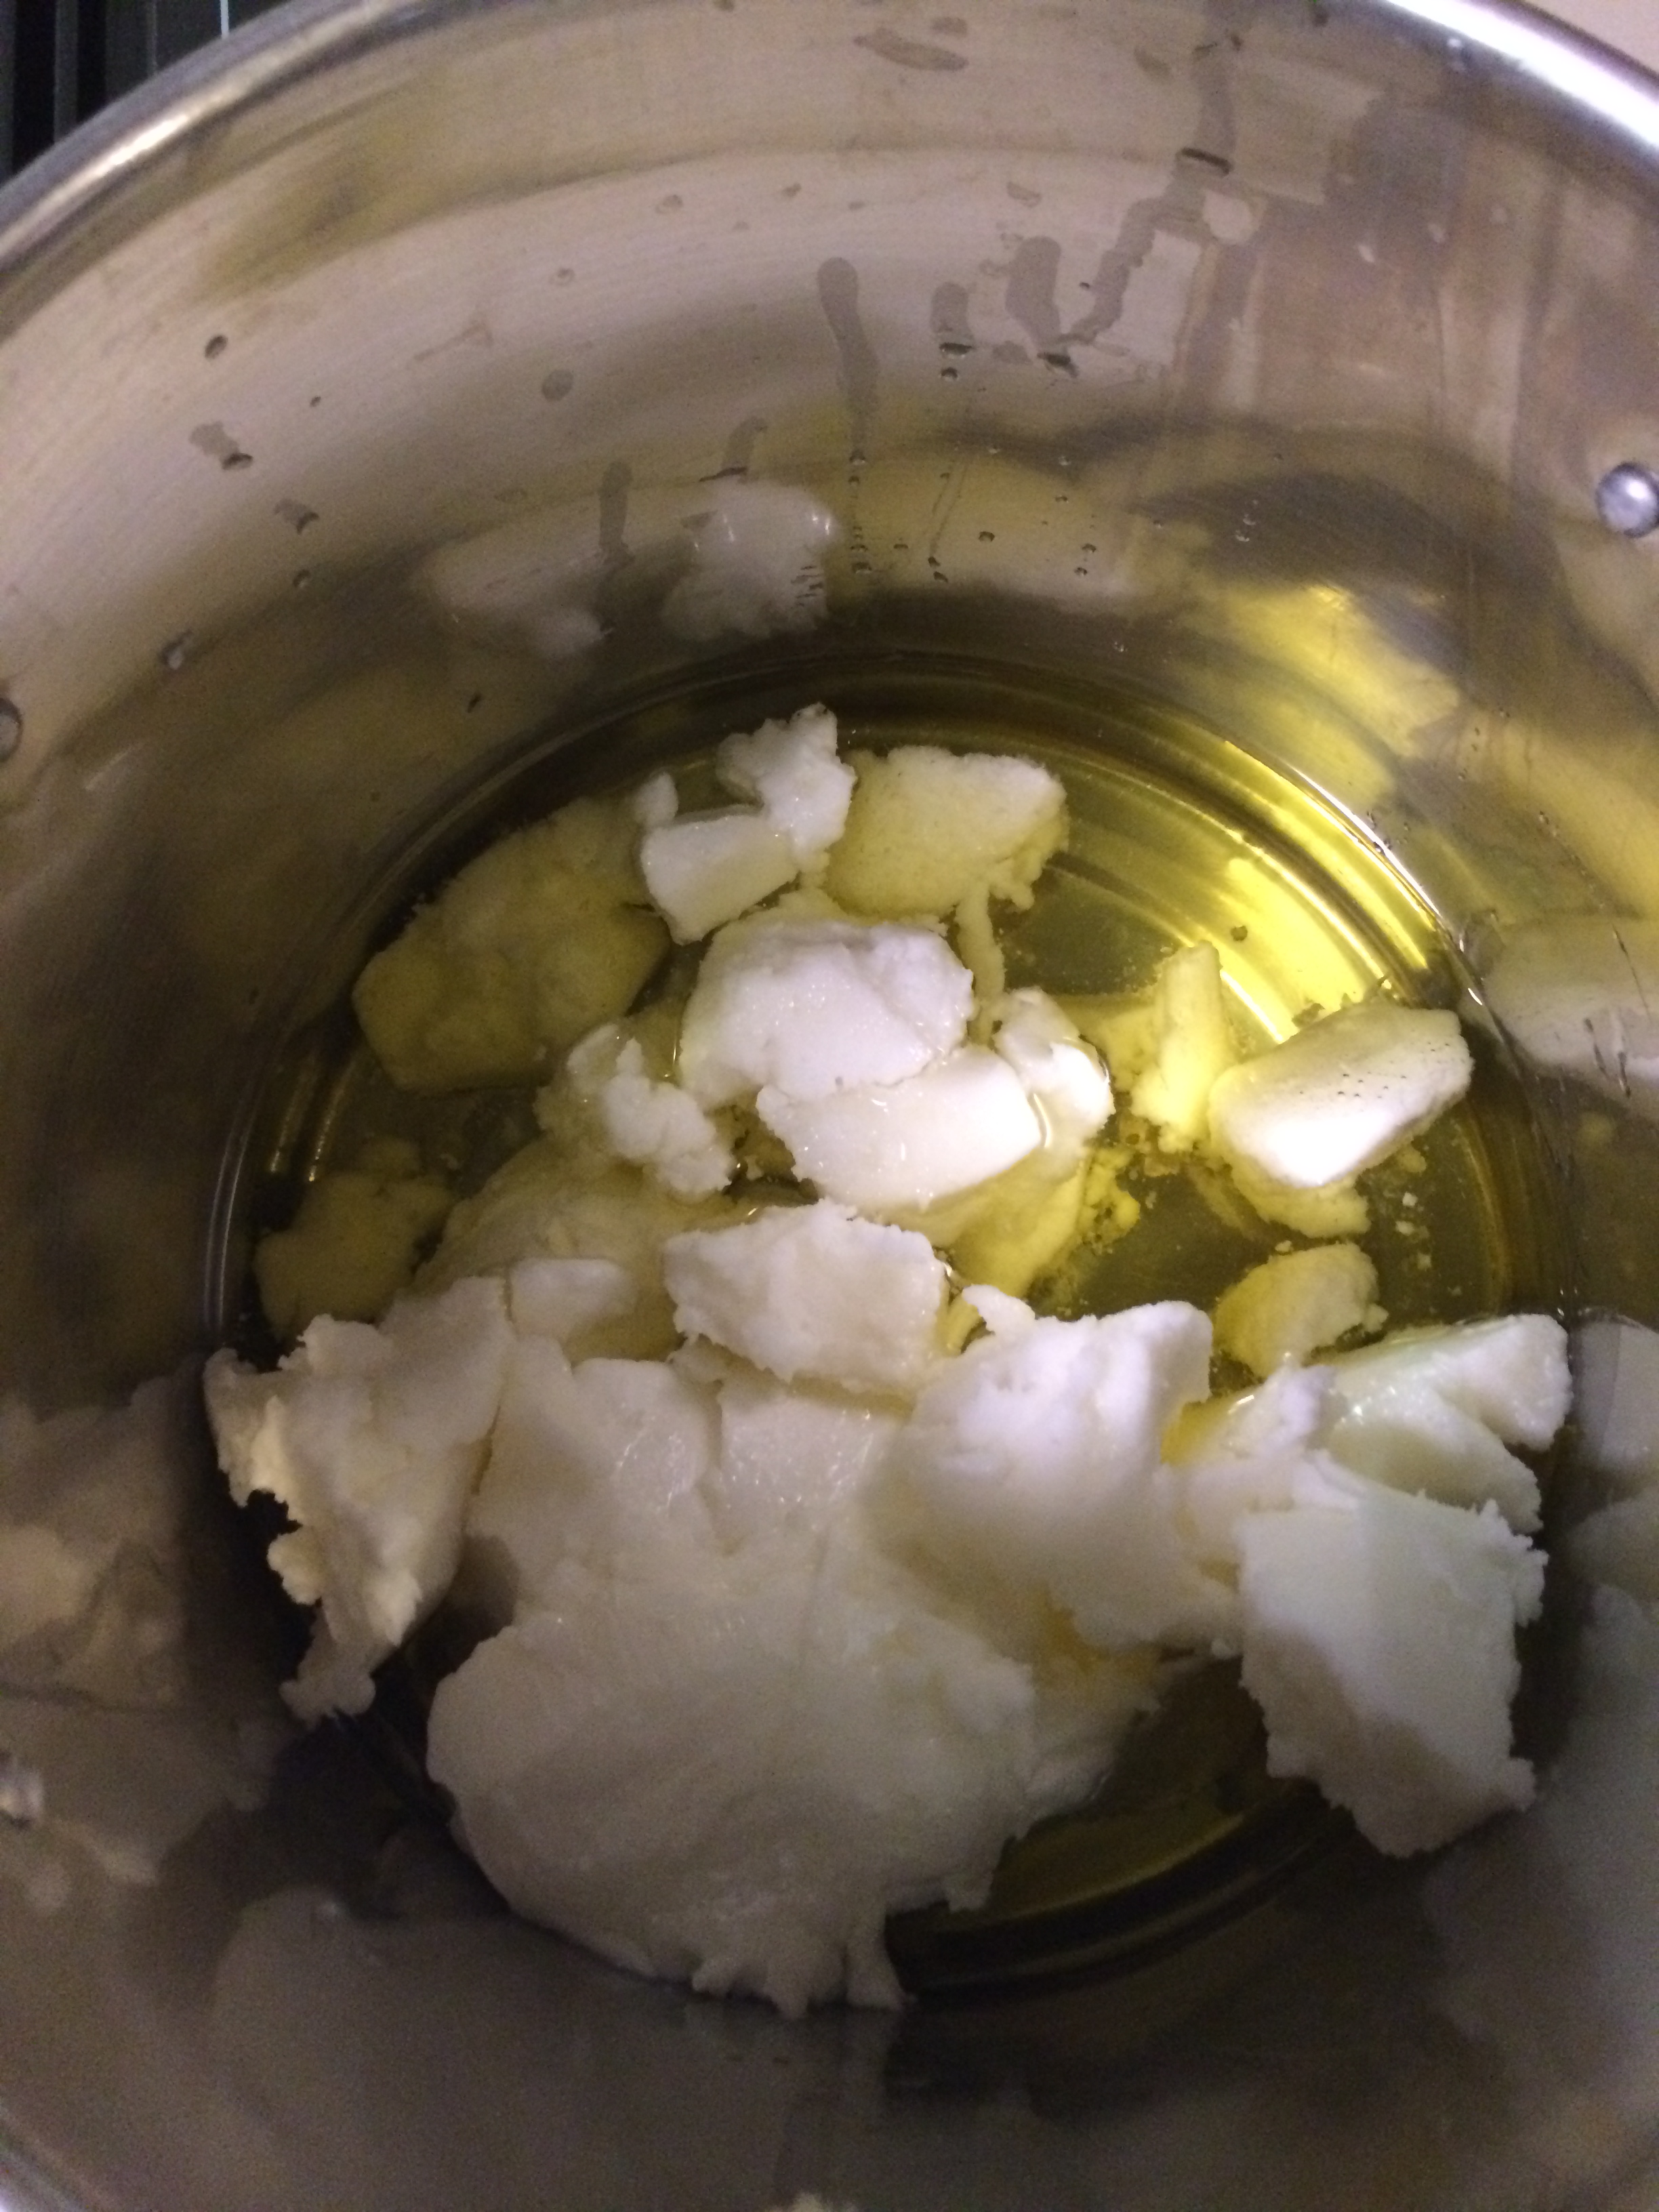
Step 2: Weigh out your oils Remember to weigh them using your kitchen scale. Dump them into your stainless steel pot (EXCEPT castor oil, weigh it out, put in separate bowl and wait until the end to add it). Put your pot on the stove and turn on lowest setting possible.
Step 3: Put on safety gear and make sure room is ventilated. Usher kids and pets out of the room. I combine my lye and water under the stove exhaust fan with my overhead ktchen fan on and windows open. May be overkill but I don’t want to take any chances. Lye creates a vapor you don’t want to breathe but the vapor doesn’t last long.
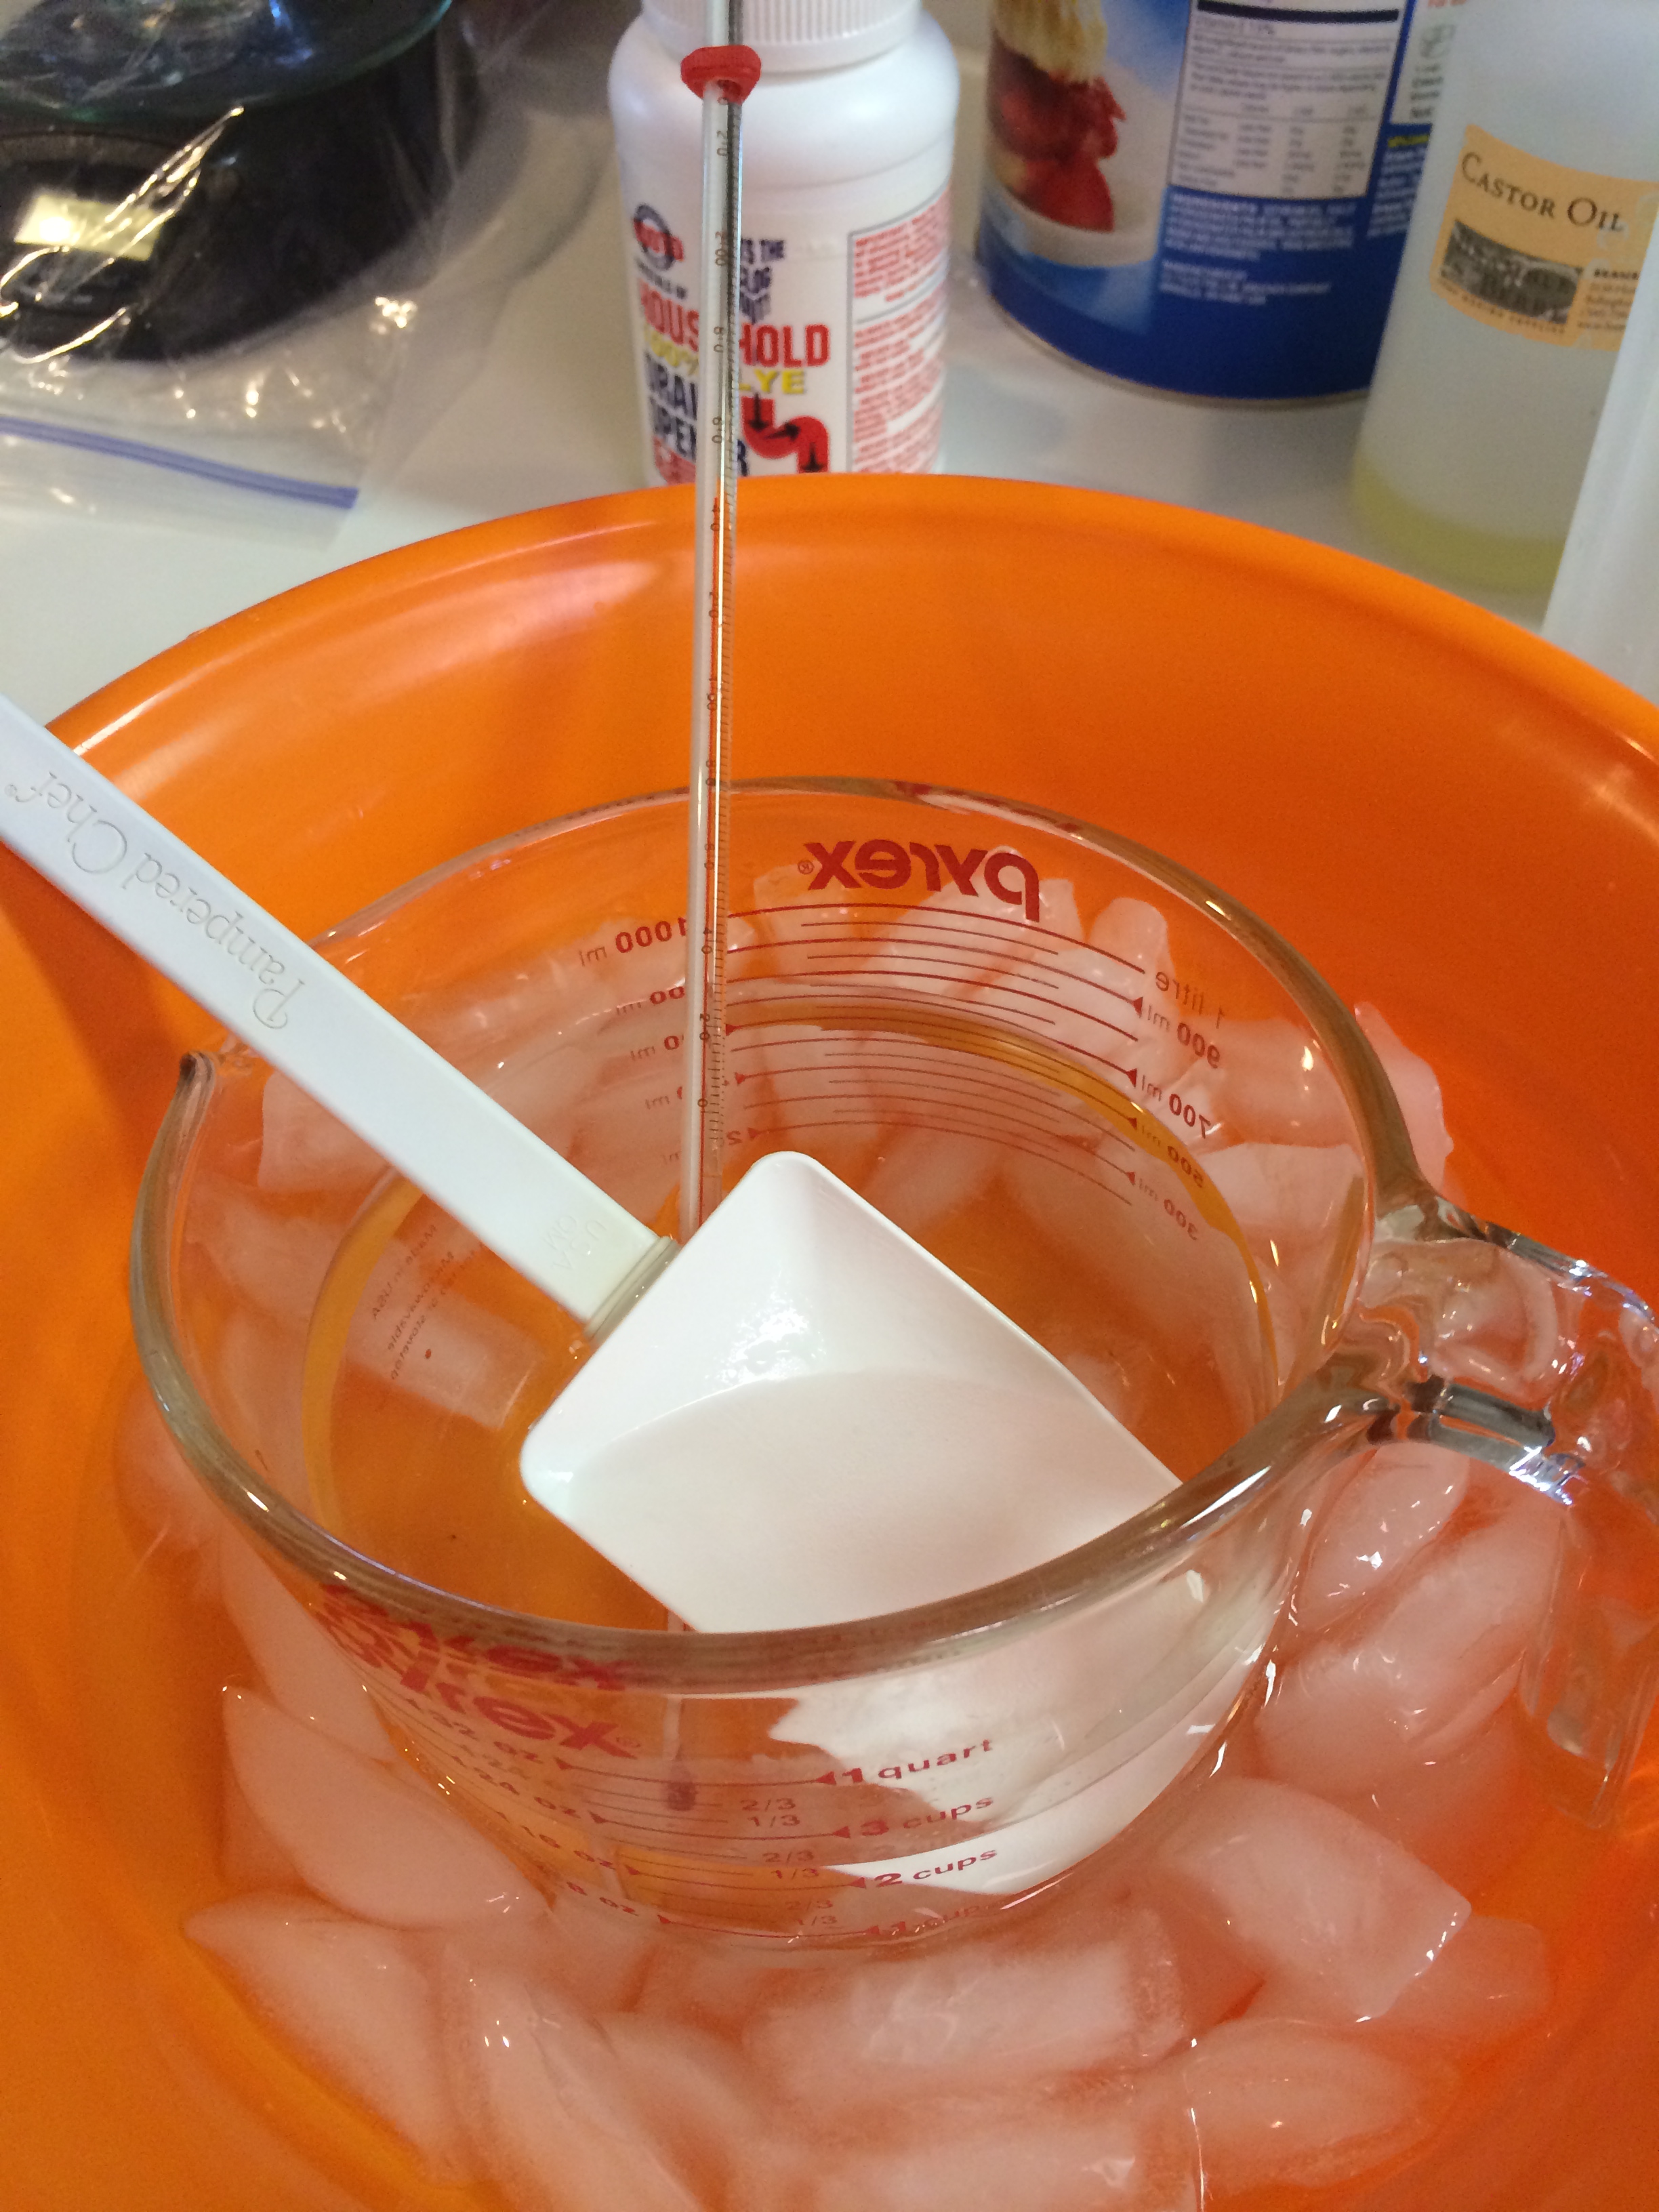
Step 4: Measure out lye and water in two separate containers (I put water in my glass pyrex… this is where we will be mixing the lye and water). You can substitute any liquid for the water but if you use milk (goat’s milk, buttermilk etc.) there are extra precautions that I will talk about in another post so you don’t scald the milk. Many people like to use room temperature teas!
Step 5: Carefully and slowly add the lye to the water as you calmly stir the water. The lye will cause the water to heat up drastically (to about 160 or 180 degrees F). It is ALWAYS LYE INTO WATER, never water into lye. Just think “I like to lie IN the water.” If you happen to get any lye on any workplace surface spray it with vinegar and wipe up with paper towel. If you get any lye (or lye water solution) on your skin rinse with cool water for 10 minutes straight. Lye will burn a hole through anything when it is “activated” by liquid.
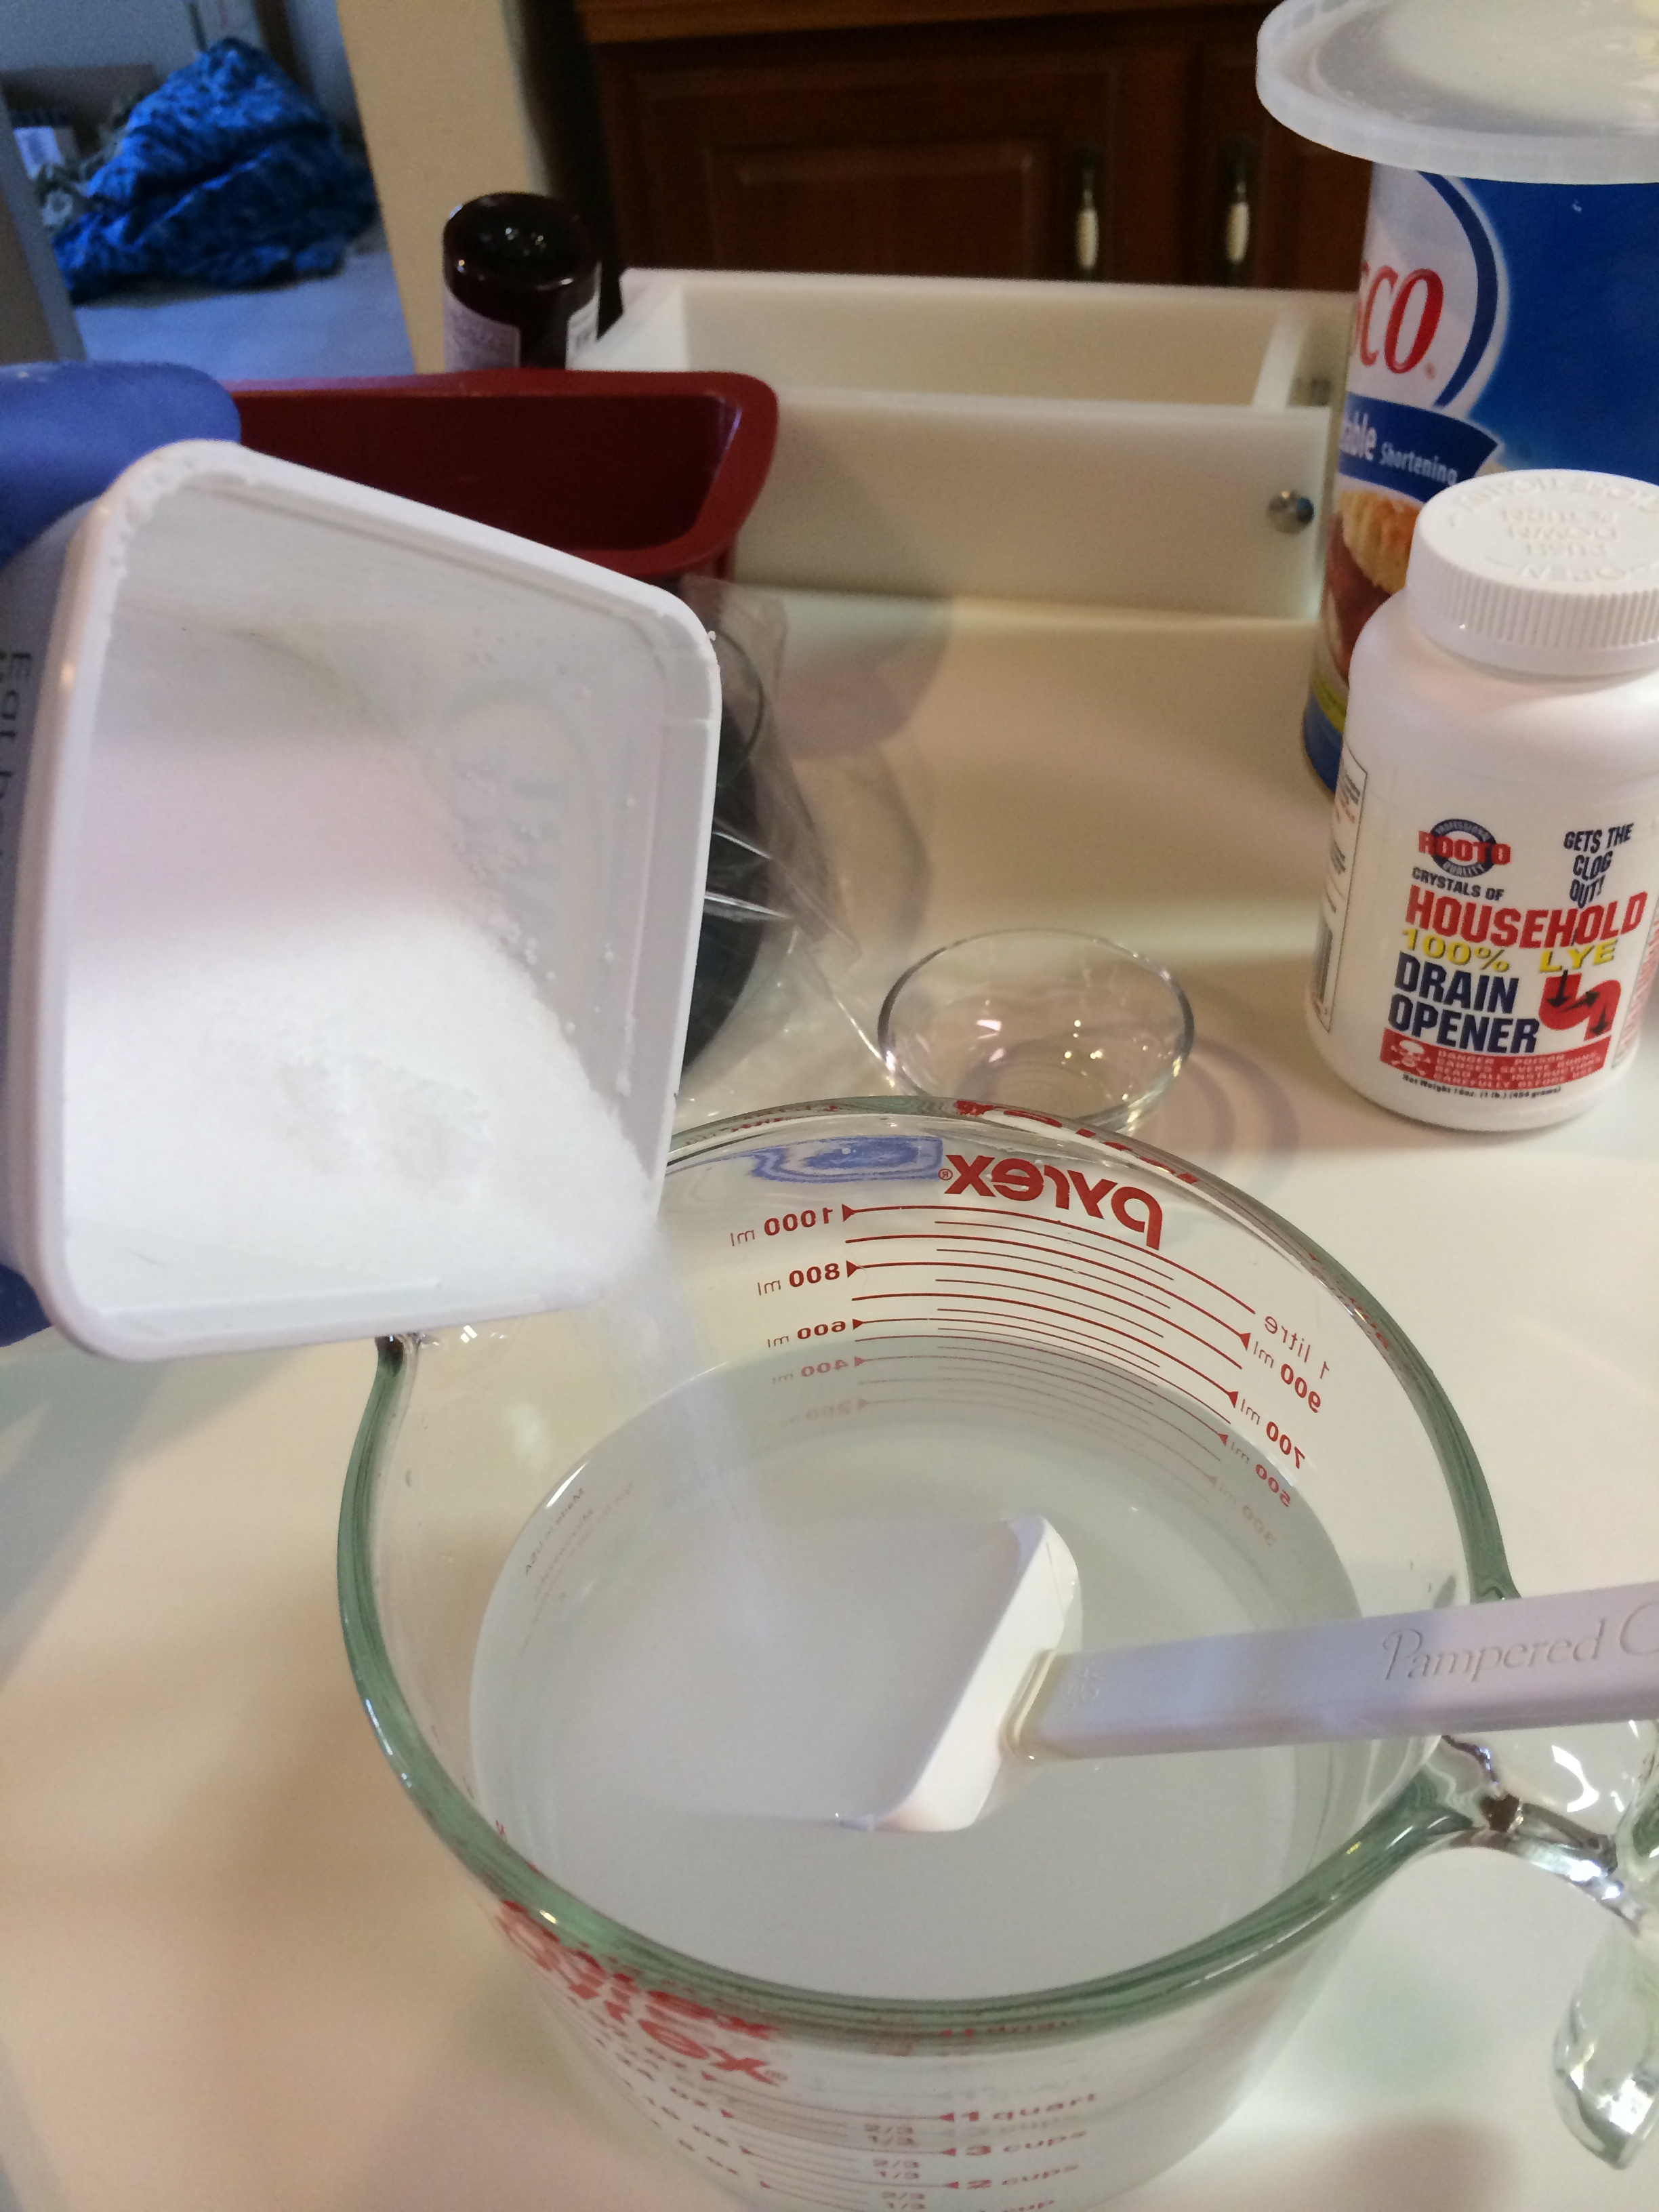
Step 6: Check the temperature of the lye/water combination. If it reads over 160 degrees F place the whole Pyrex container in the bowl of ice water and gently stir (it will bring the temperature down). Let sit for a few minutes.
Step 7: Check your oils and give the pot some stirs. You want all the solids (coconut oil, soybean oil) to melt down to liquid. The more you stir the faster it will melt. You can raise the heat slightly as long as you continually stir. Check the temperature. You are trying to bring the melted oils the same temperature as the lye mixture (or within 5 degrees or so).
Step 8: Monitor your lye mixture and oil mixture, checking temperatures frequently. Gently stir, stir, stir. Take oils off the stove top as soon as everything is melted. Alternate as needed with the oil mixture and lye mixture in the ice bath to get them both down to between 90 and 115 degrees F.
Step 9: When both mixtures are within 5 degrees of each other (and fall between the 90 and 115 degrees F range) you are ready to slowly and carefully pour the lye mixture into the oil mixture. Stir by hand until all lye mixture is incorporated into the oil mixture (about 10 stirs). Spray the inside of the Pyrex glass (where the lye/water mixture was) with a couple sprays of vinegar, this neutralizes the lye just in case you forget there was lye in there and go to wash it. If either mixture get too cold put pot back on stove and Pyrex glass in a bowl of hot water.
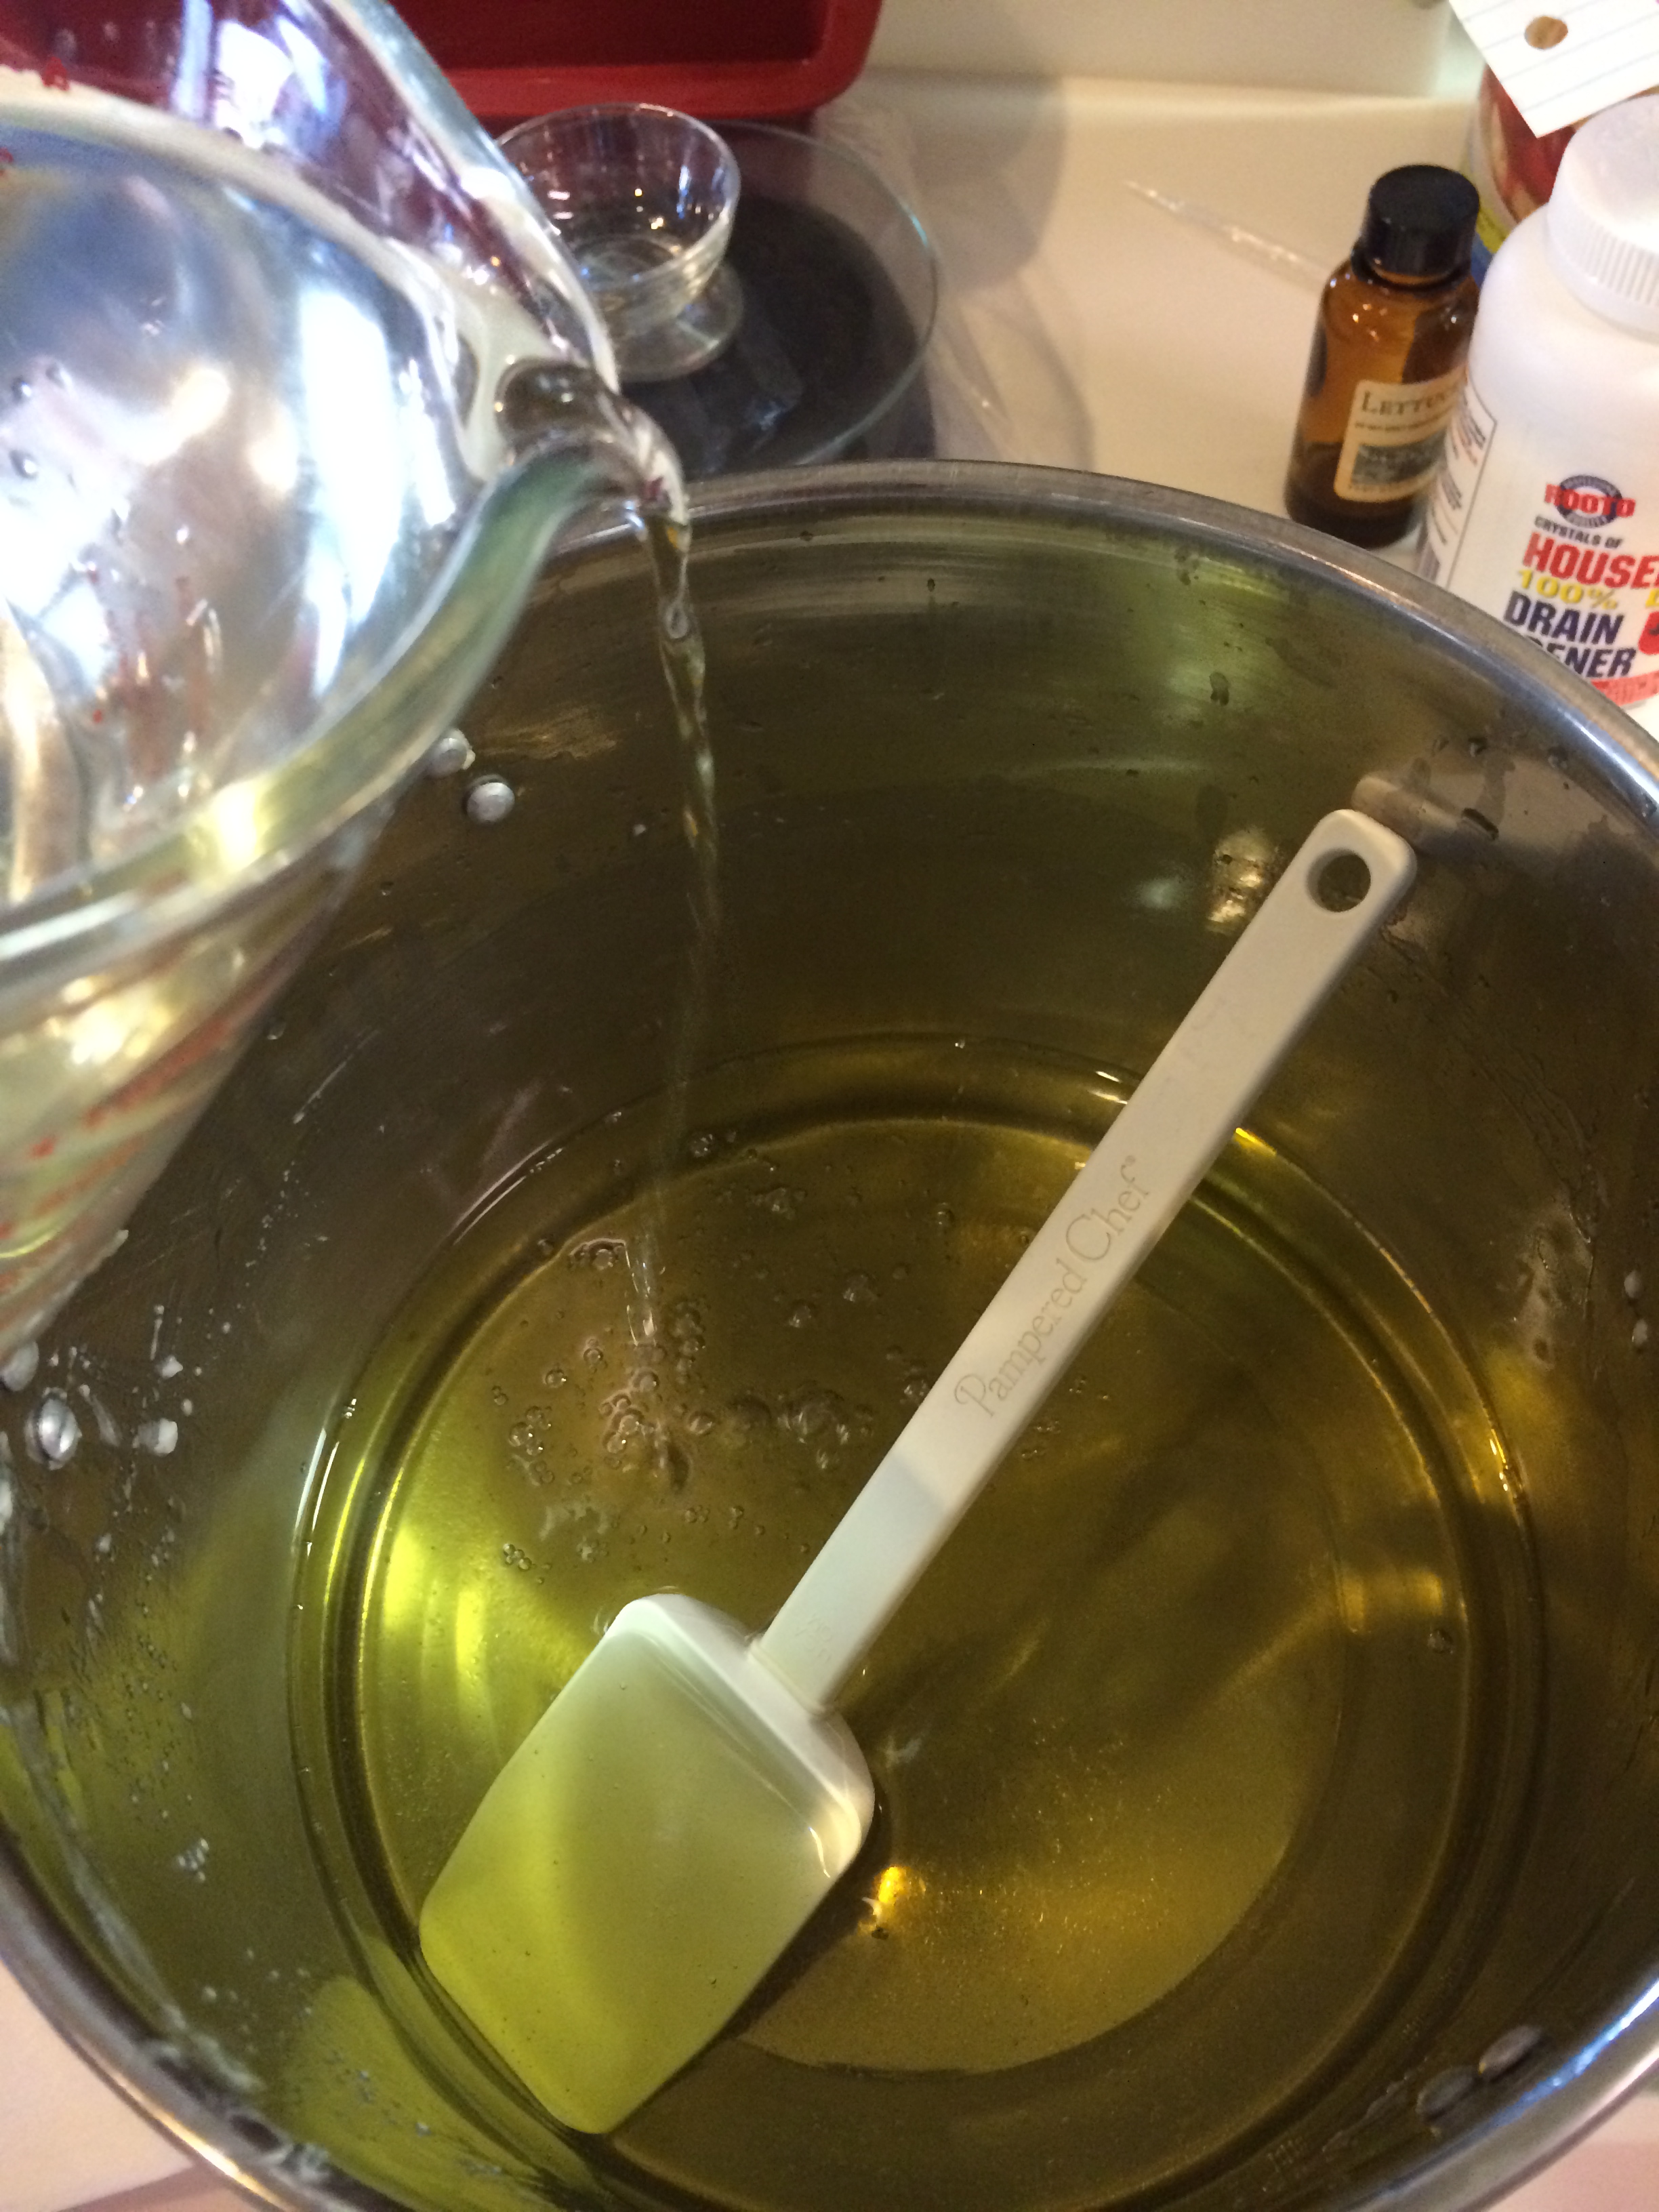
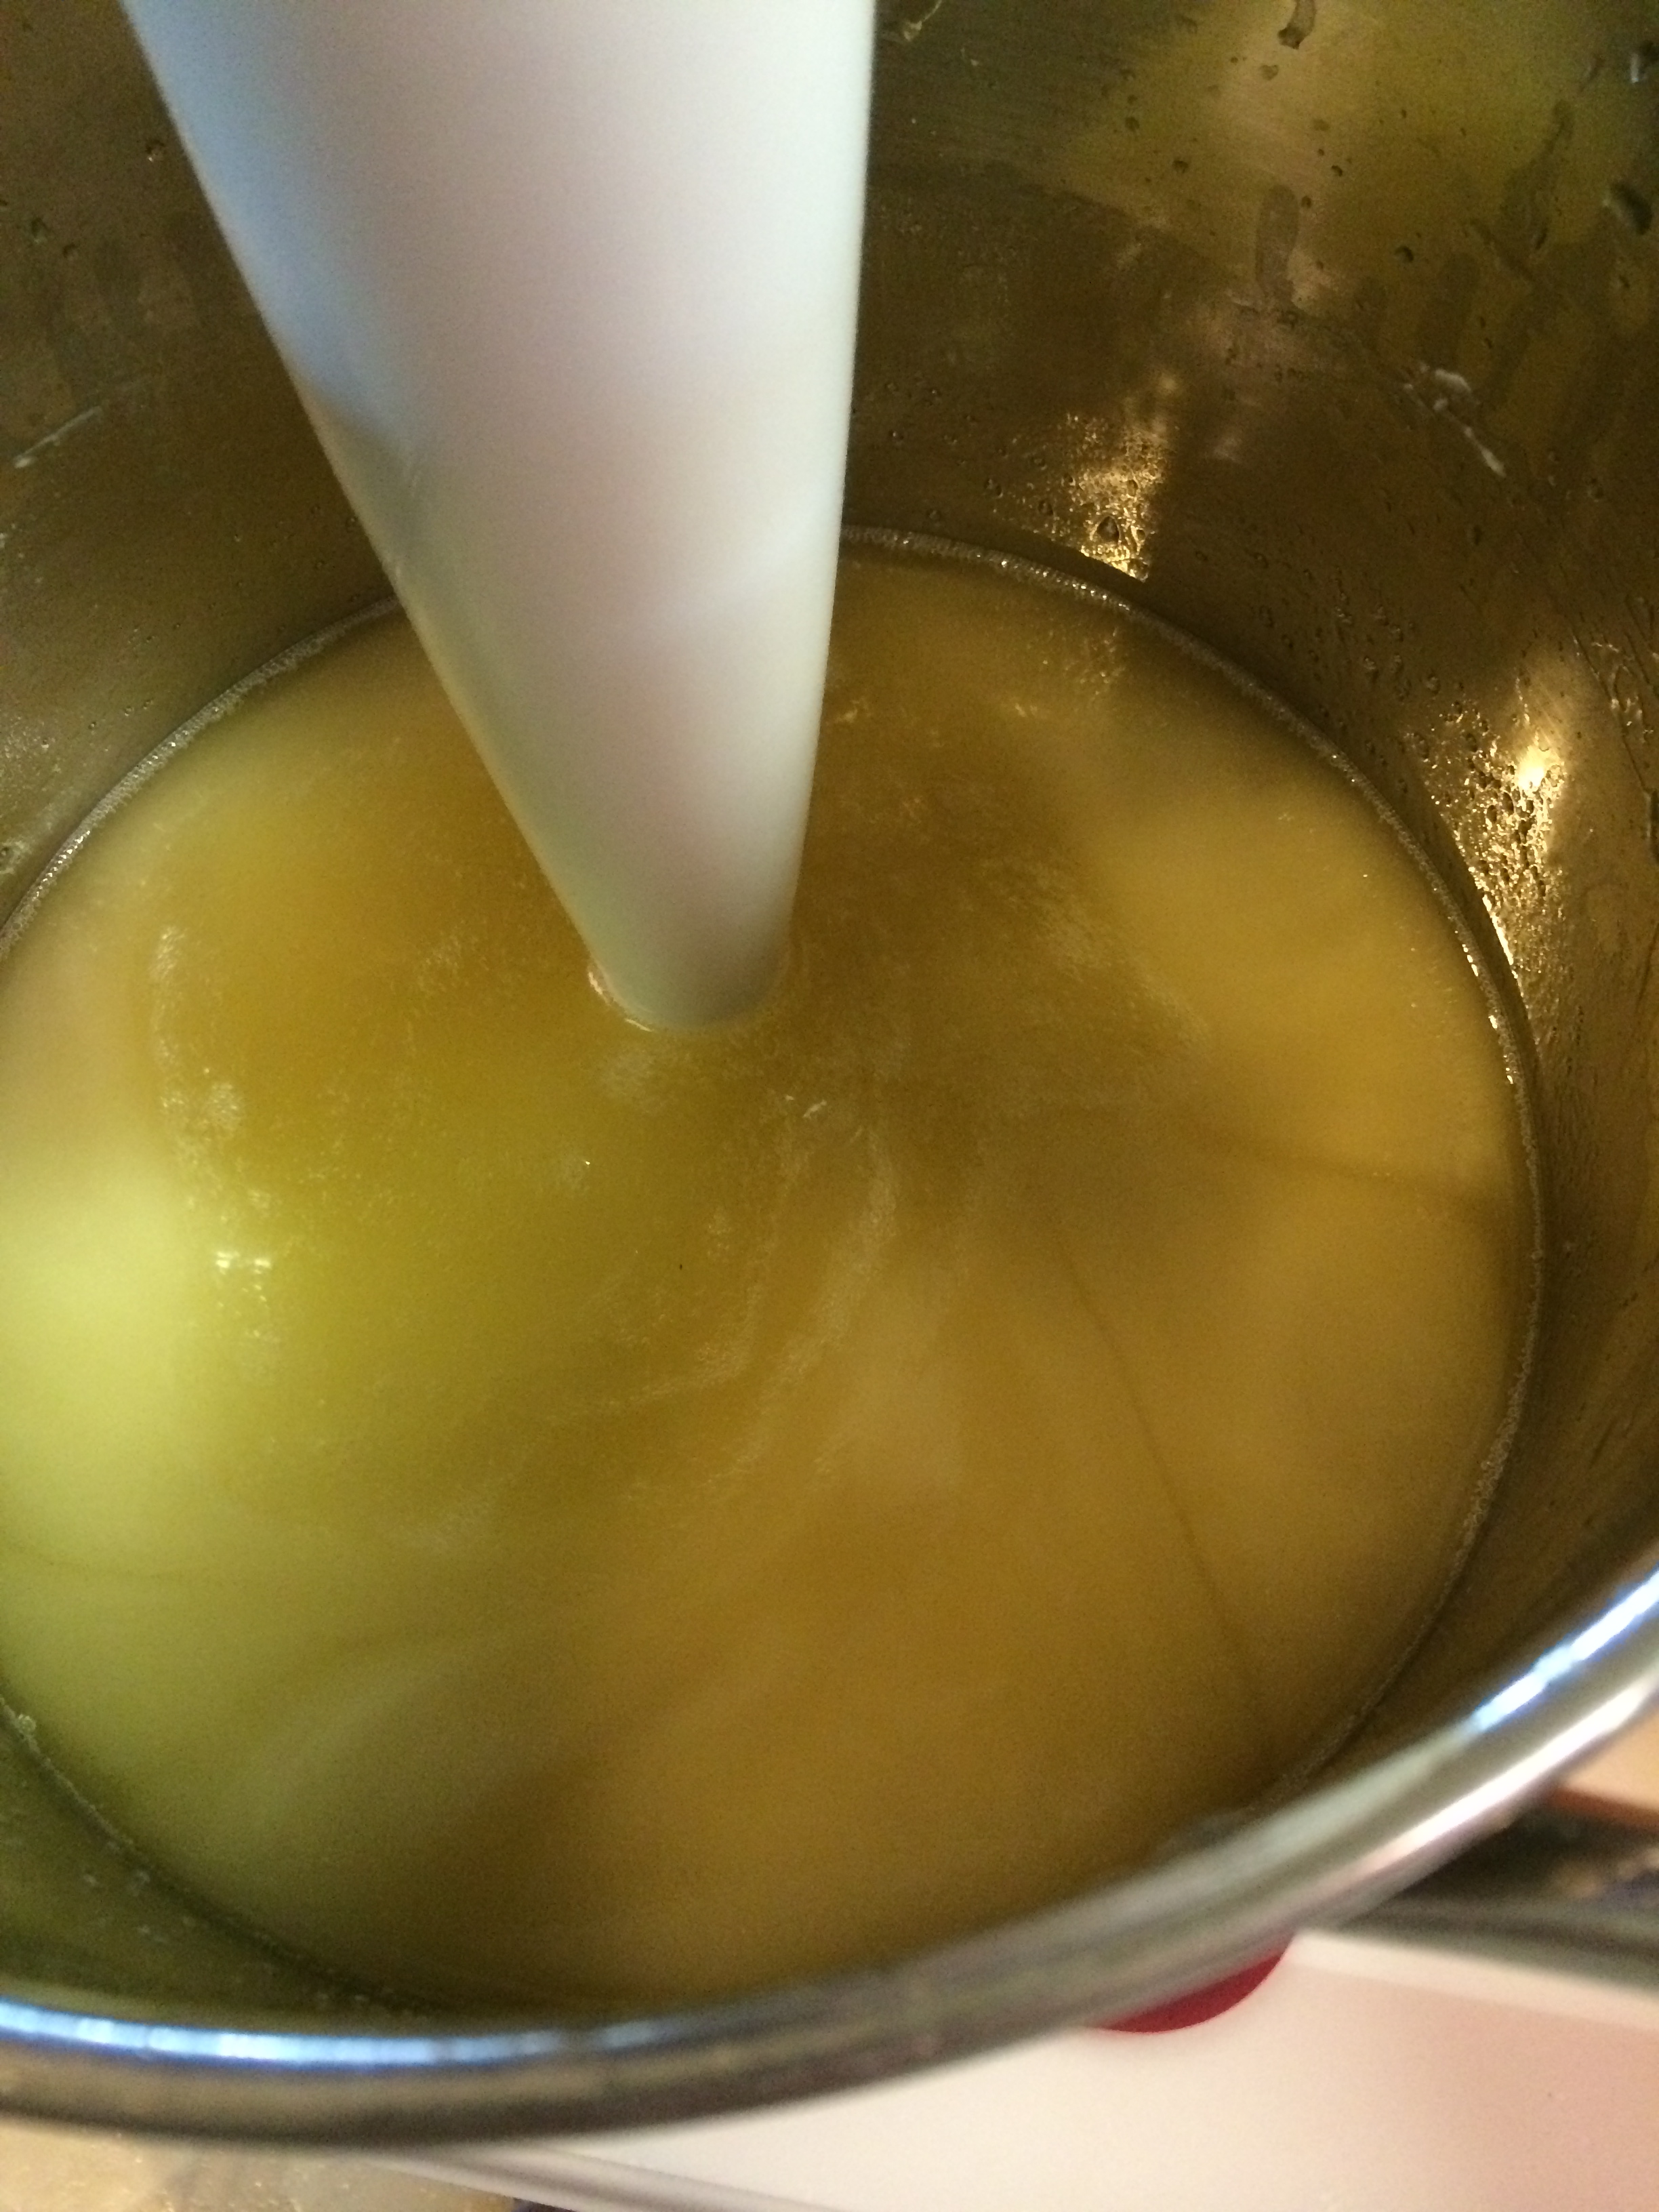
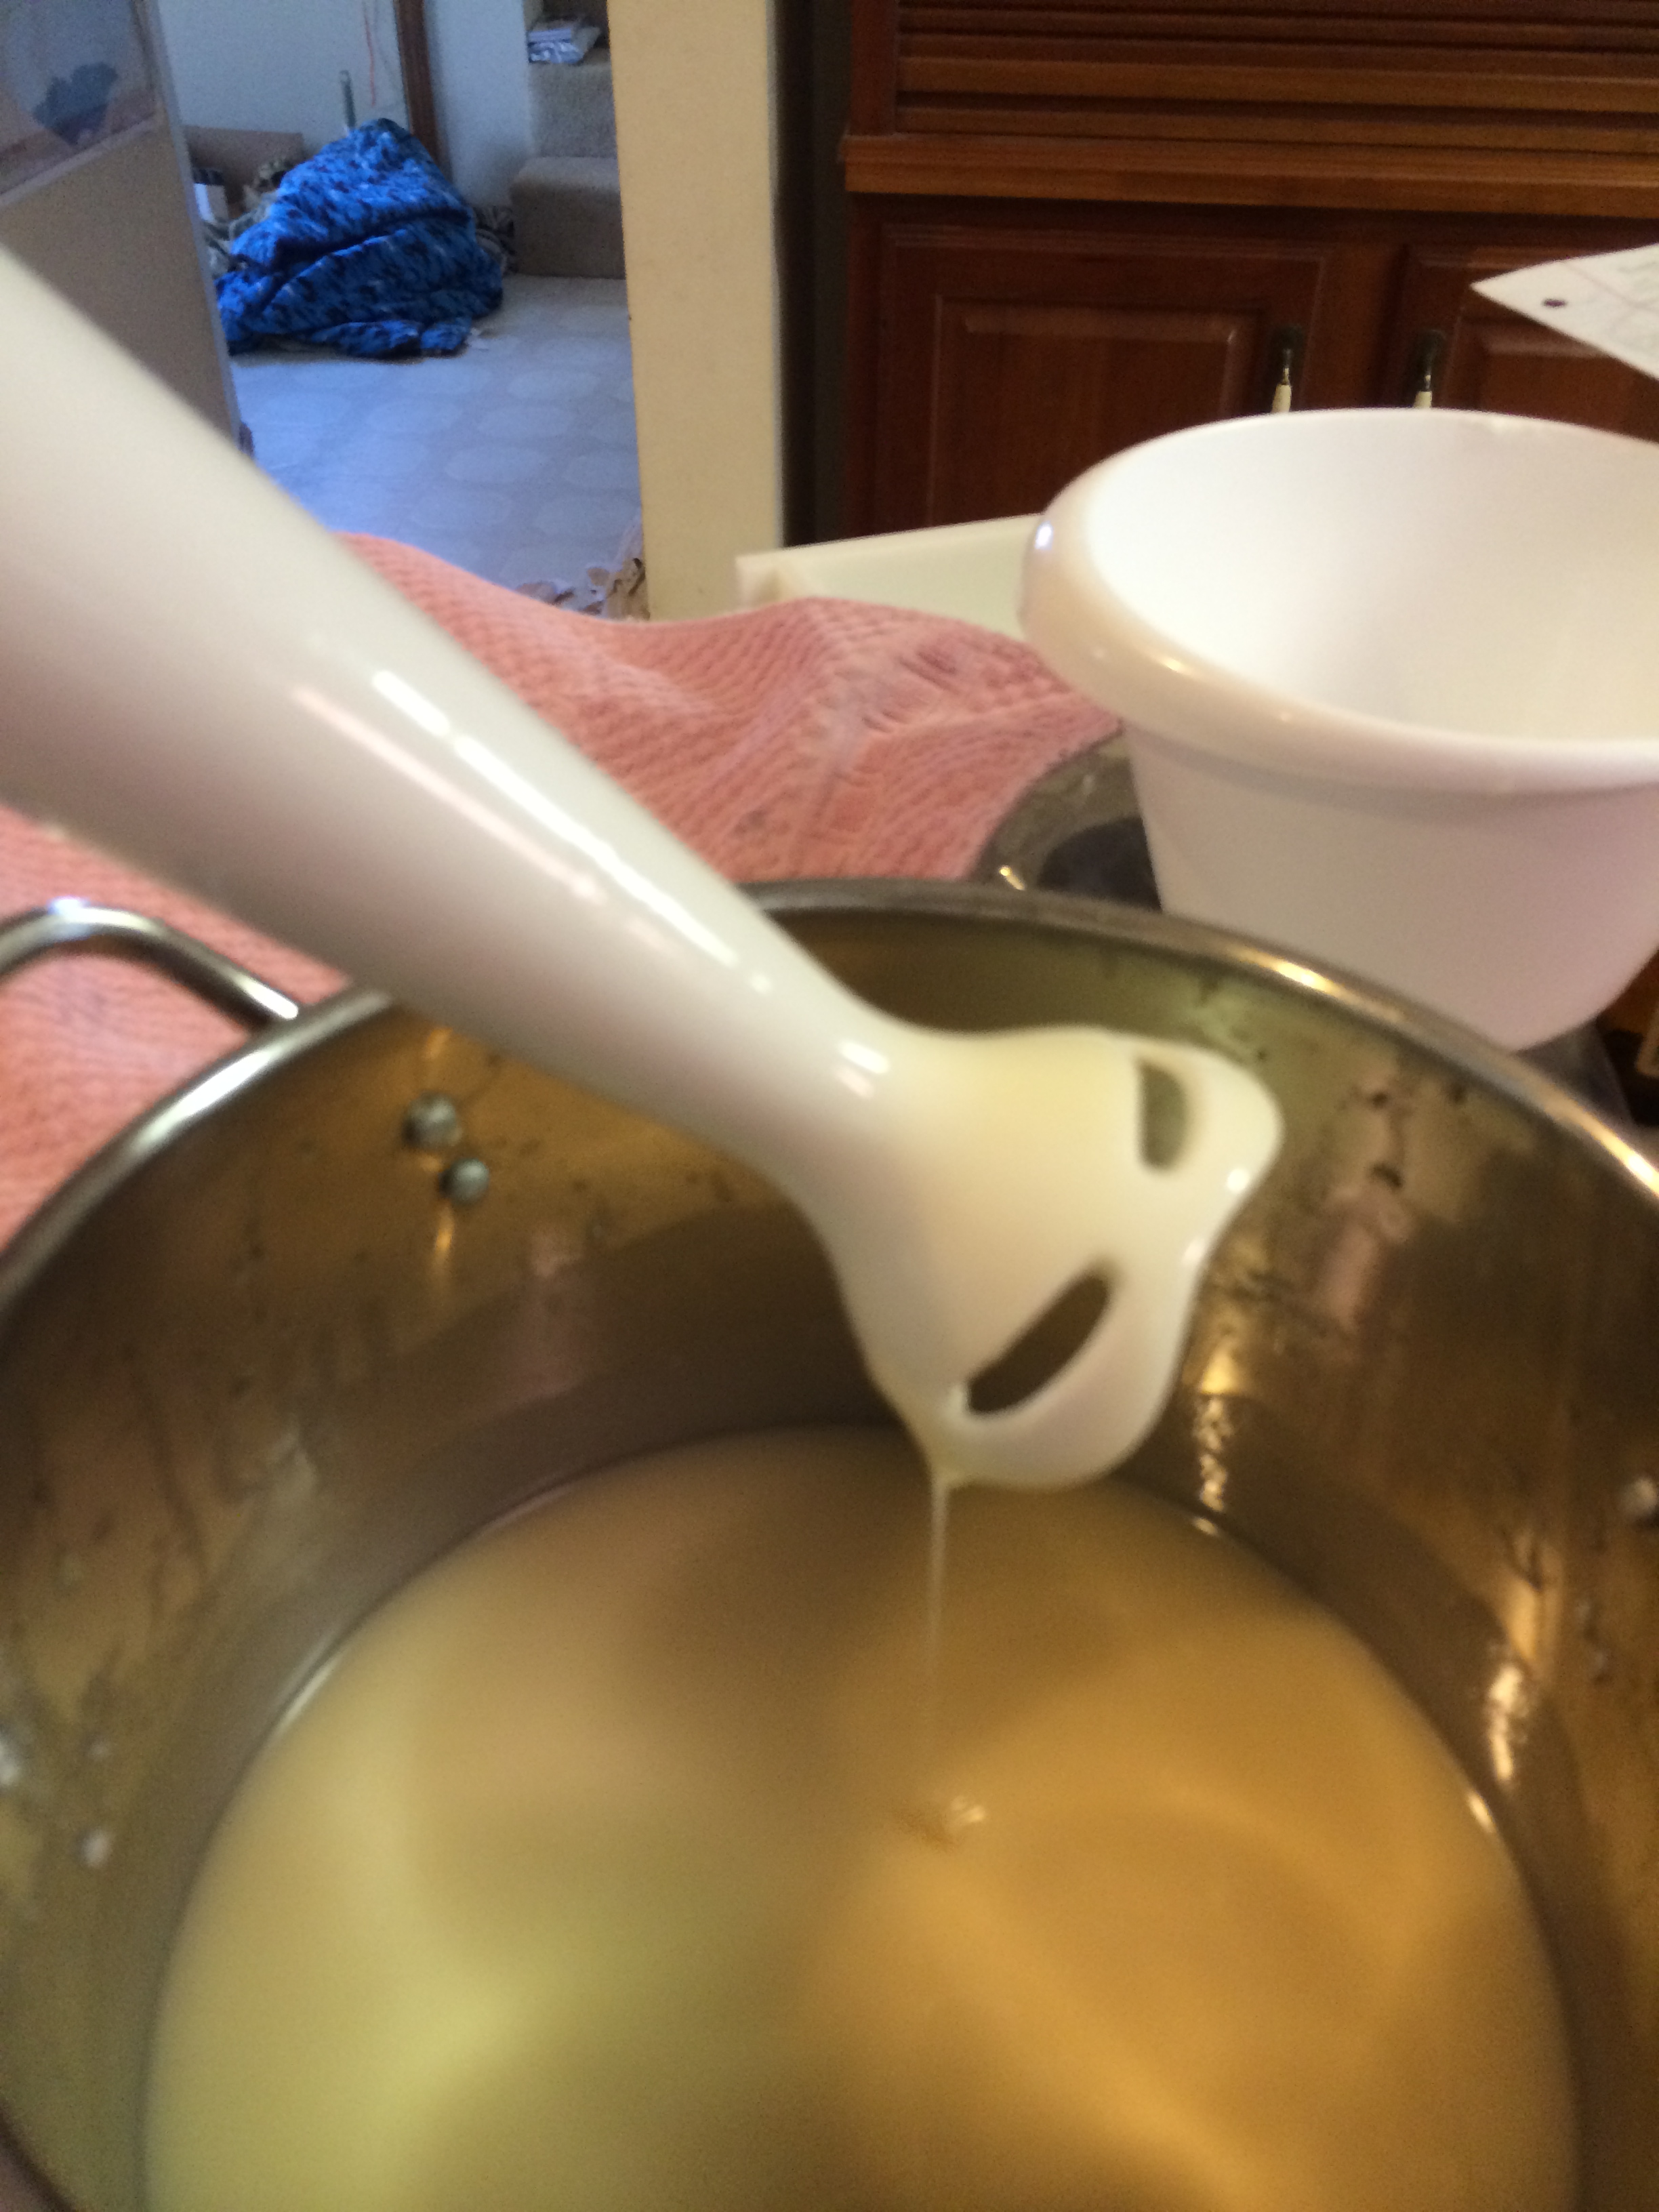
Step 10: Put your immersion blender in the pot upright and all the way to the bottom. Pulse the immersion blender in short rapid spurts and you will see the mixture (the SOAP!) start to thicken. Keep blendering all around the pot keeping it to the bottom to avoid splatters. There are three traces… light trace, medium trace, and heavy trace. These are just ways of descibing how thick it is becoming. Thin trace is the point when oils and lye are mixed but the mixture is still very runny (like a thin soup). Medium trace is like a thin gravy or medium thick soup. Heavy trace is like thick pudding.
Just started blendering… thin trace. Notice the white swirls as lye/water incorporates with oils
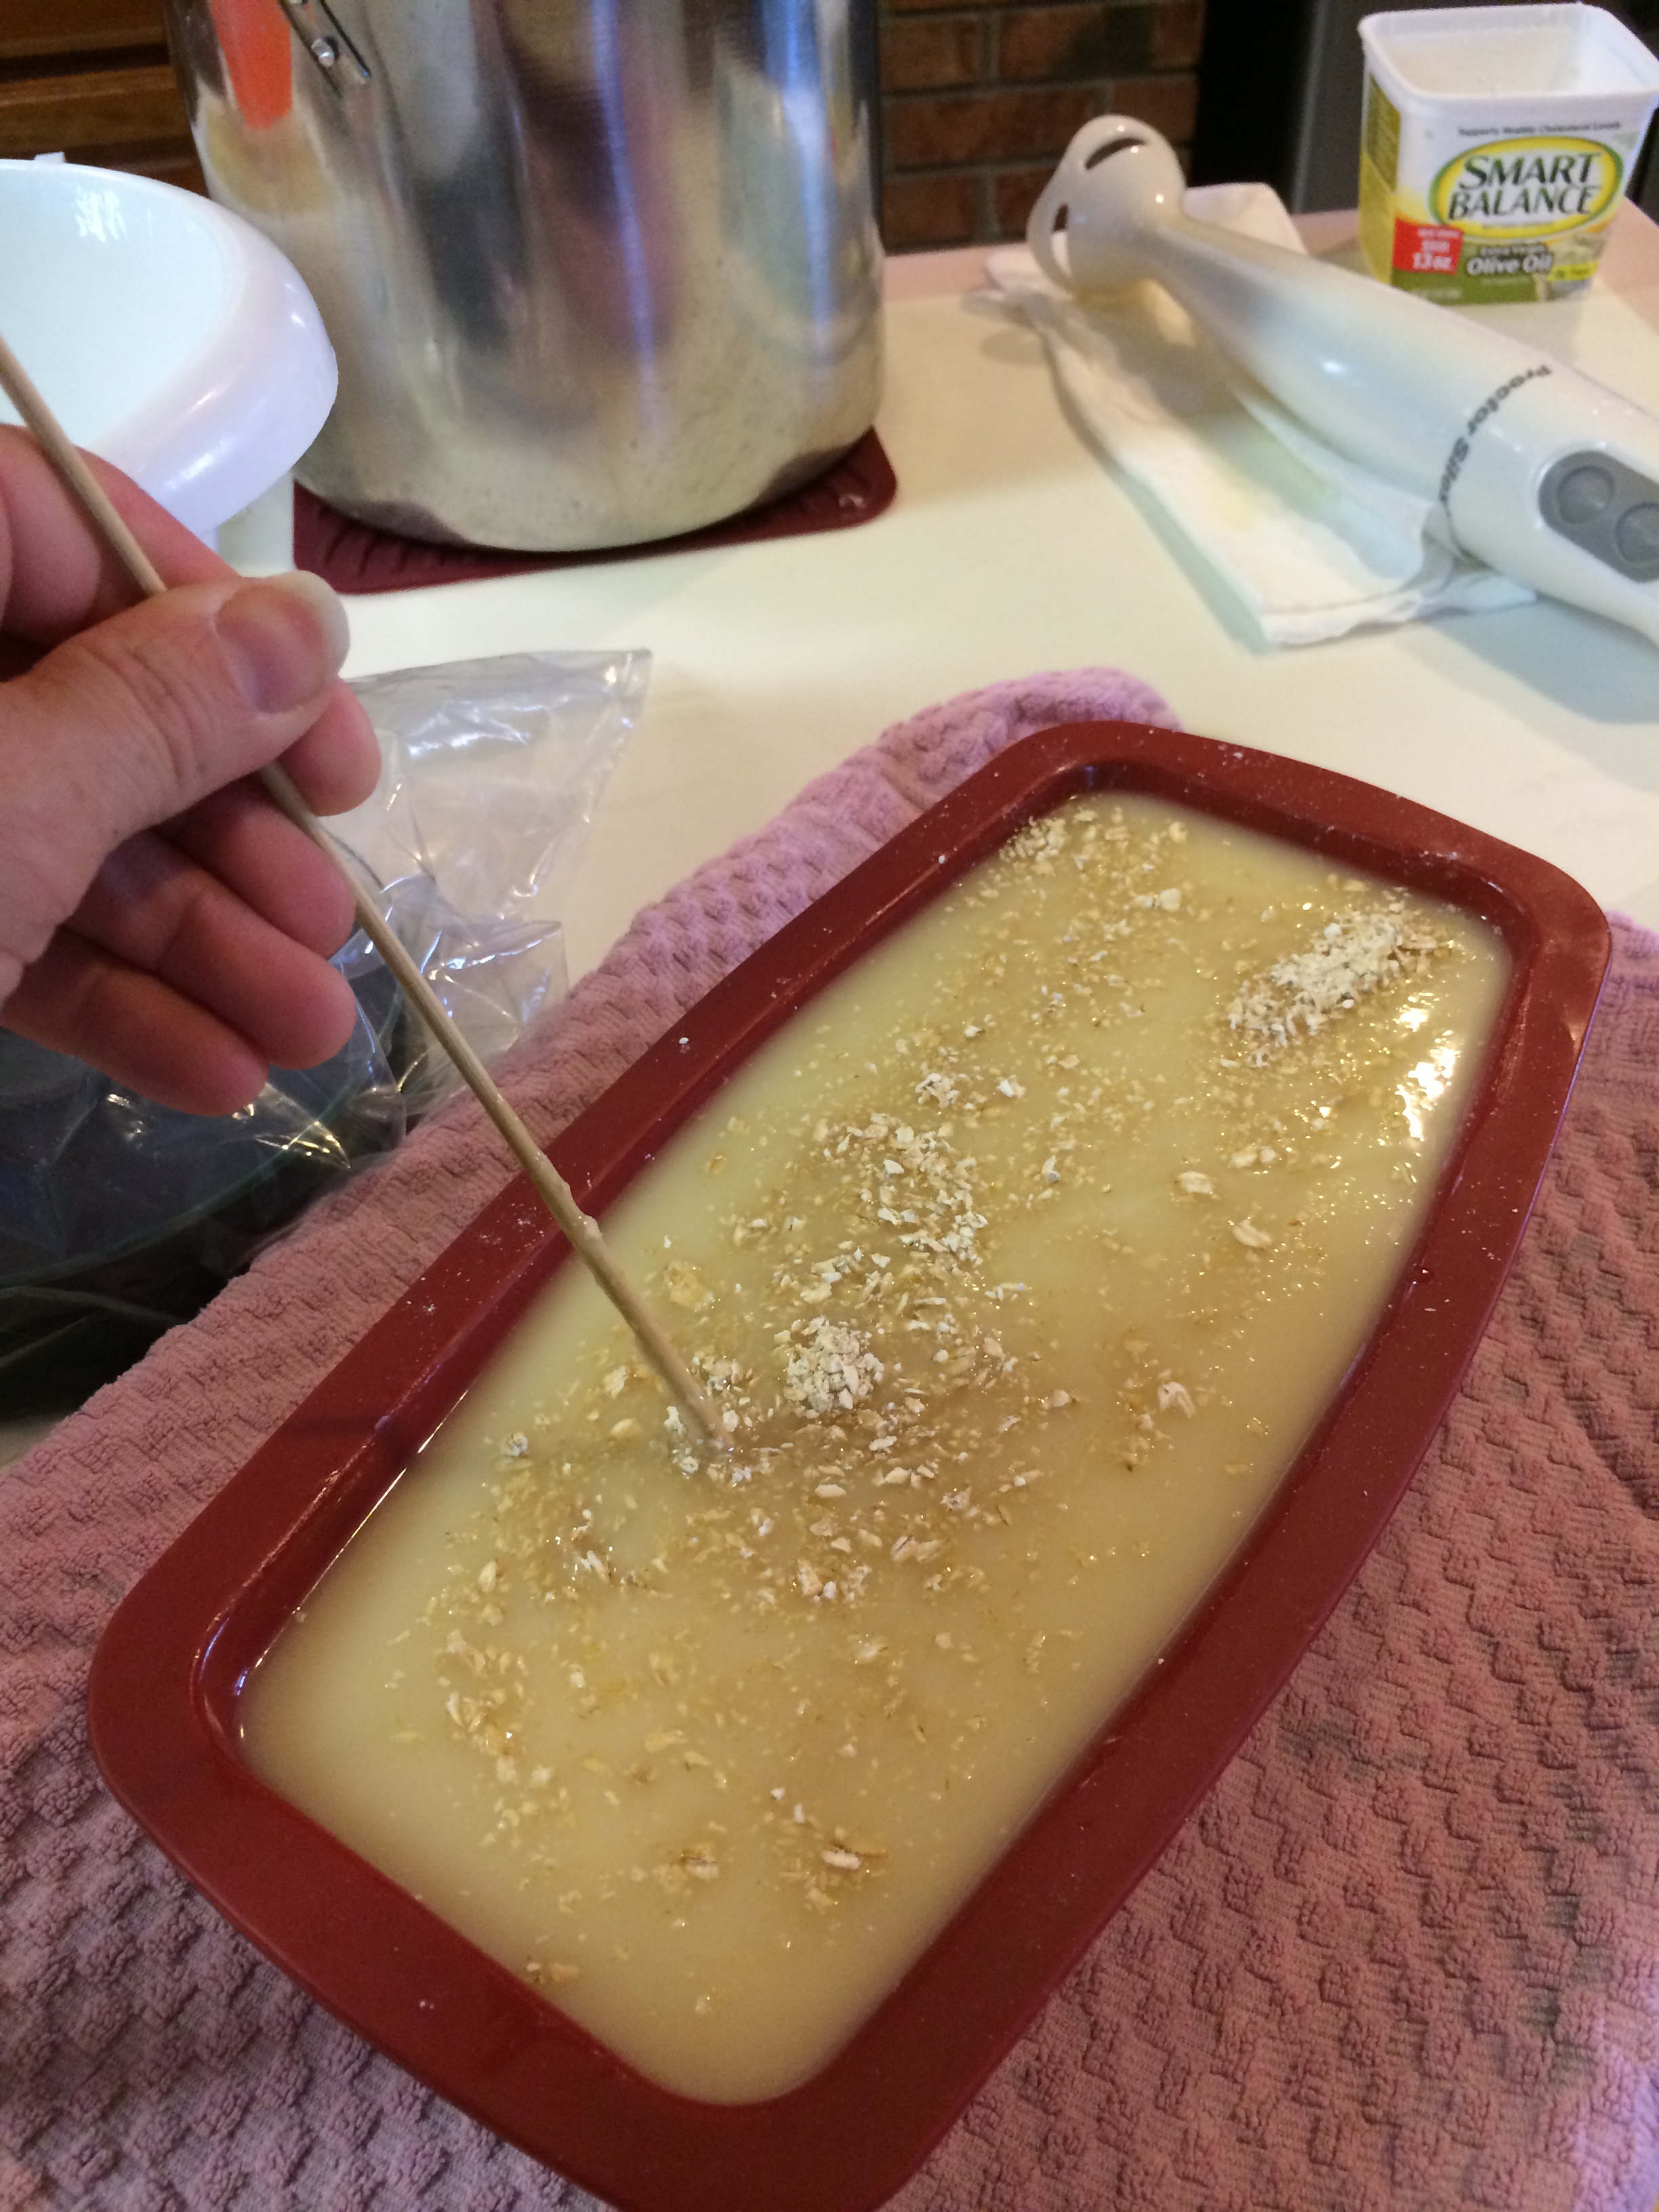
At the medium trace point (thin gravy, for this recipe about 3 minutes into blendering) add the castor oil and any of your other additives that you want (almonds, essential oils, zest, etc.). To my batch I added 2 oz lettuce fragrance oil and 1/4 cup ground oatmeal. Continue to blender for another 30 to 45 seconds, enough to get everything mixed in. I like to pour my mixture into mold right between the medium and heavy trace point.
Medium trace
Step 10: Pour your soap into your molds. I like to add a little oatmeal to the top. Sometimes I use a bamboo skewer to mix oatmeal in and make sure it doesn’t all settle to the bottom.
Step 11: Take your soap somewhere where little fingers will not poke and prod it (including yours!) and place plast wrap or garbage bag over soap in molds and cover with blankets so the soap will go through it’s “gel phase.”
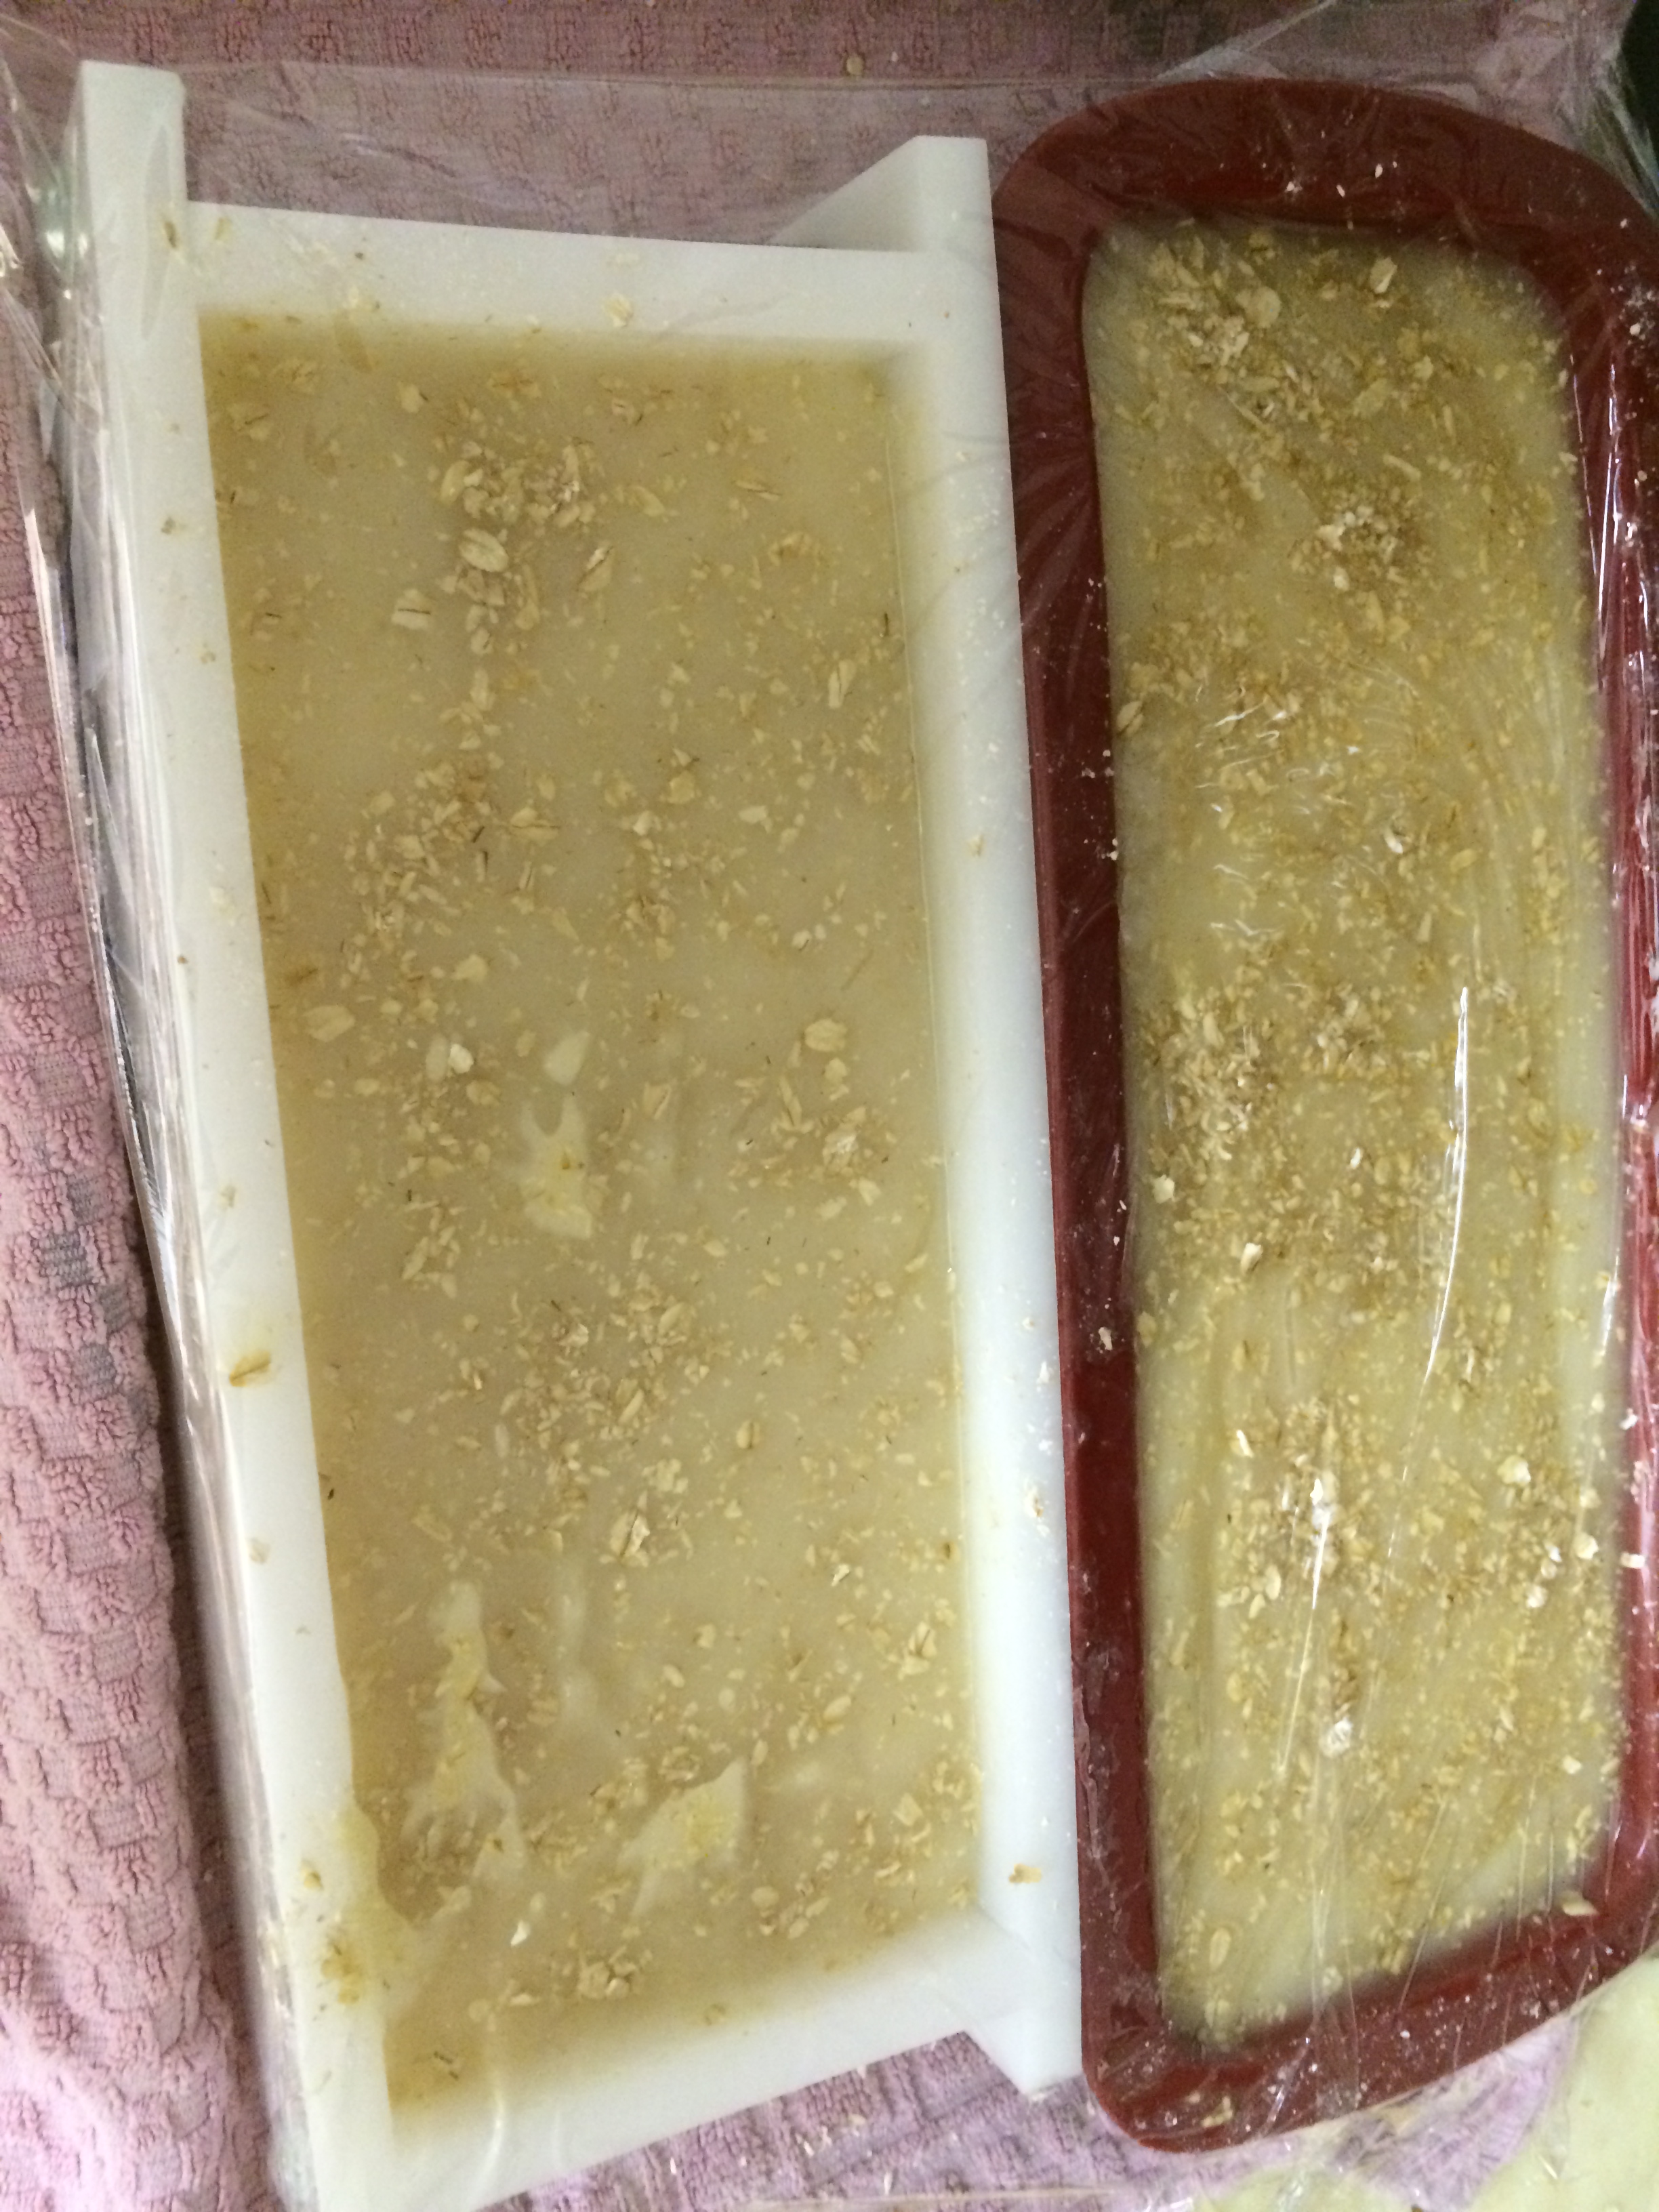
plastic wrapped, doesn’t have to be tight.
Warm and “snuggy” for the night
Step 13: Clean up. I prefer to just put everything in my stock pot and leave it alone until the next day. This gives everything the chance to harden and the lye to become inactive on my supplies (except for the container I measured the lye in, I never wash that out). The next day I just scrape off the soap into the trash and wash everything in my kitchen sink (you can use dish soap to help get the oilyness off but often you only need the soap leftover on your supplies).
I really love this step because it gives me an idea how well the soap may lather and clean and it smells awesome! My hands are silky soft after washing my soap stuff! Doing things this way has never caused a clog in the drain as I’ve heard some people experience when washing up directly after making soap.
Step 12: Wait… the hardest part for me! Twelve to twenty-four hours after covering the soap you can uncover it. Leave it to sit in molds for another 12 to 24 hours (uncovered). You may then unmold it, slice it (it may be a little soft and that is ok!), and put it up somewhere because it has to cure for 4 to 6 weeks!
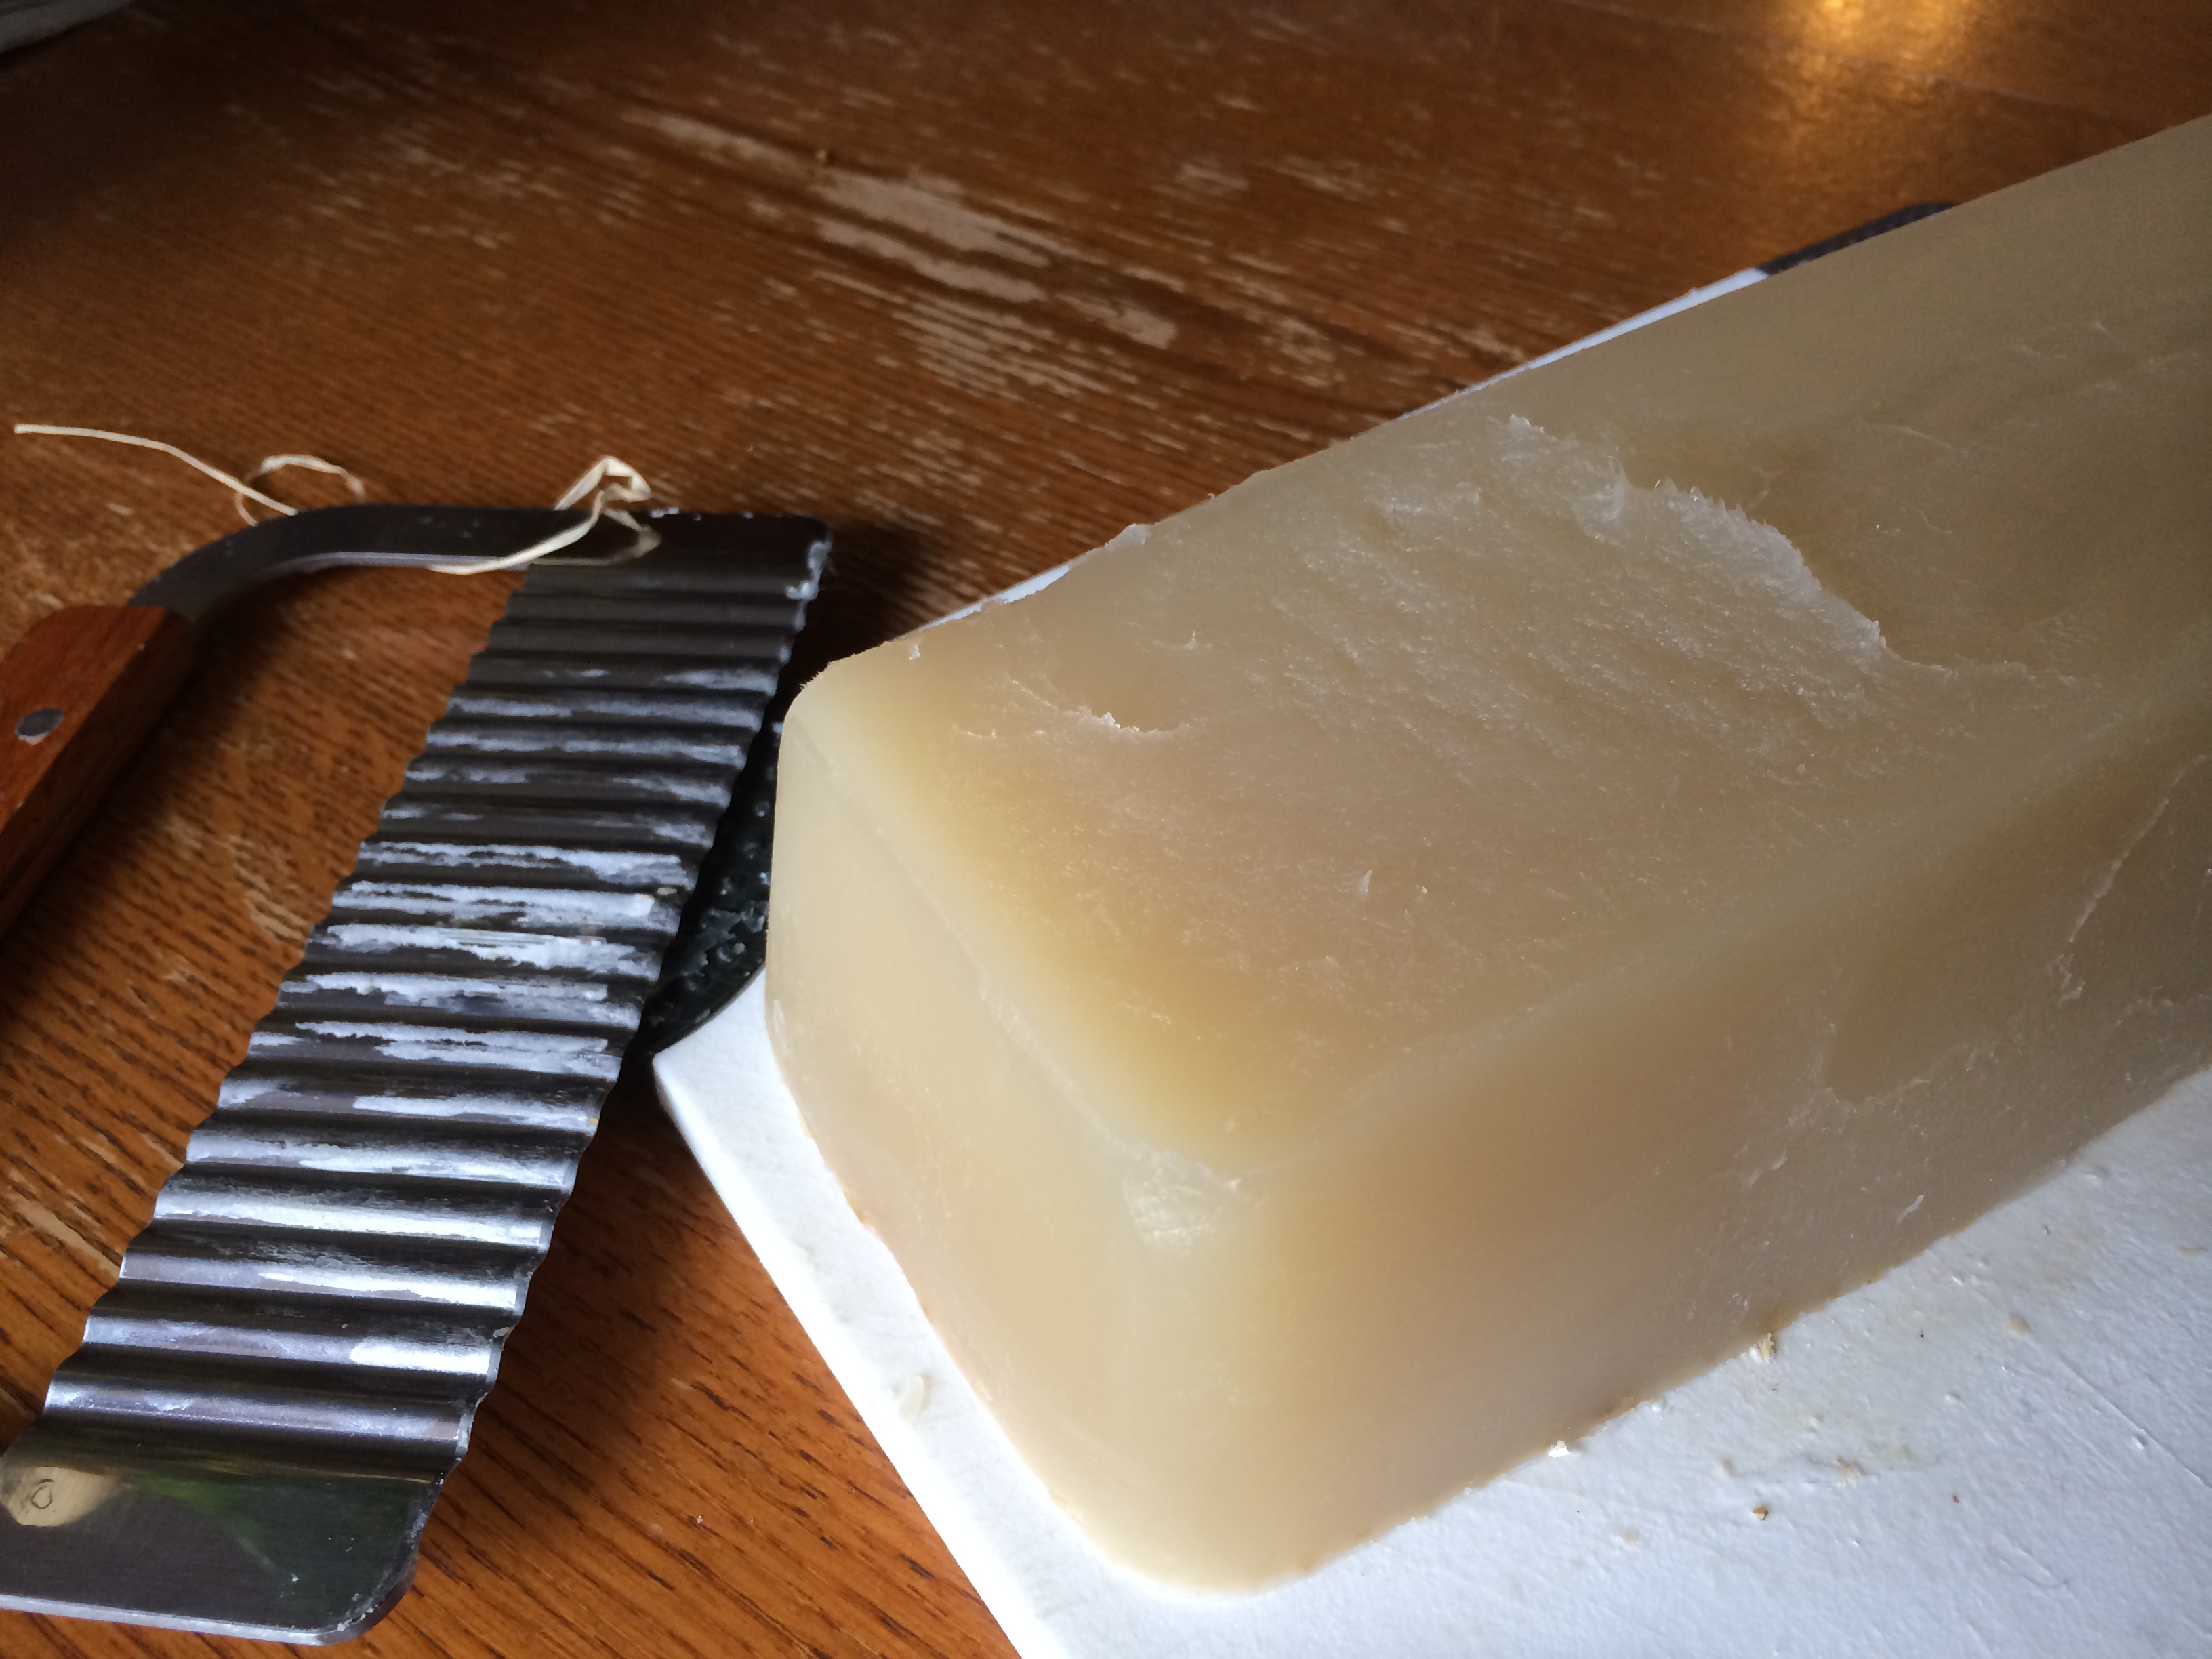
unmolded 24 hours after making it
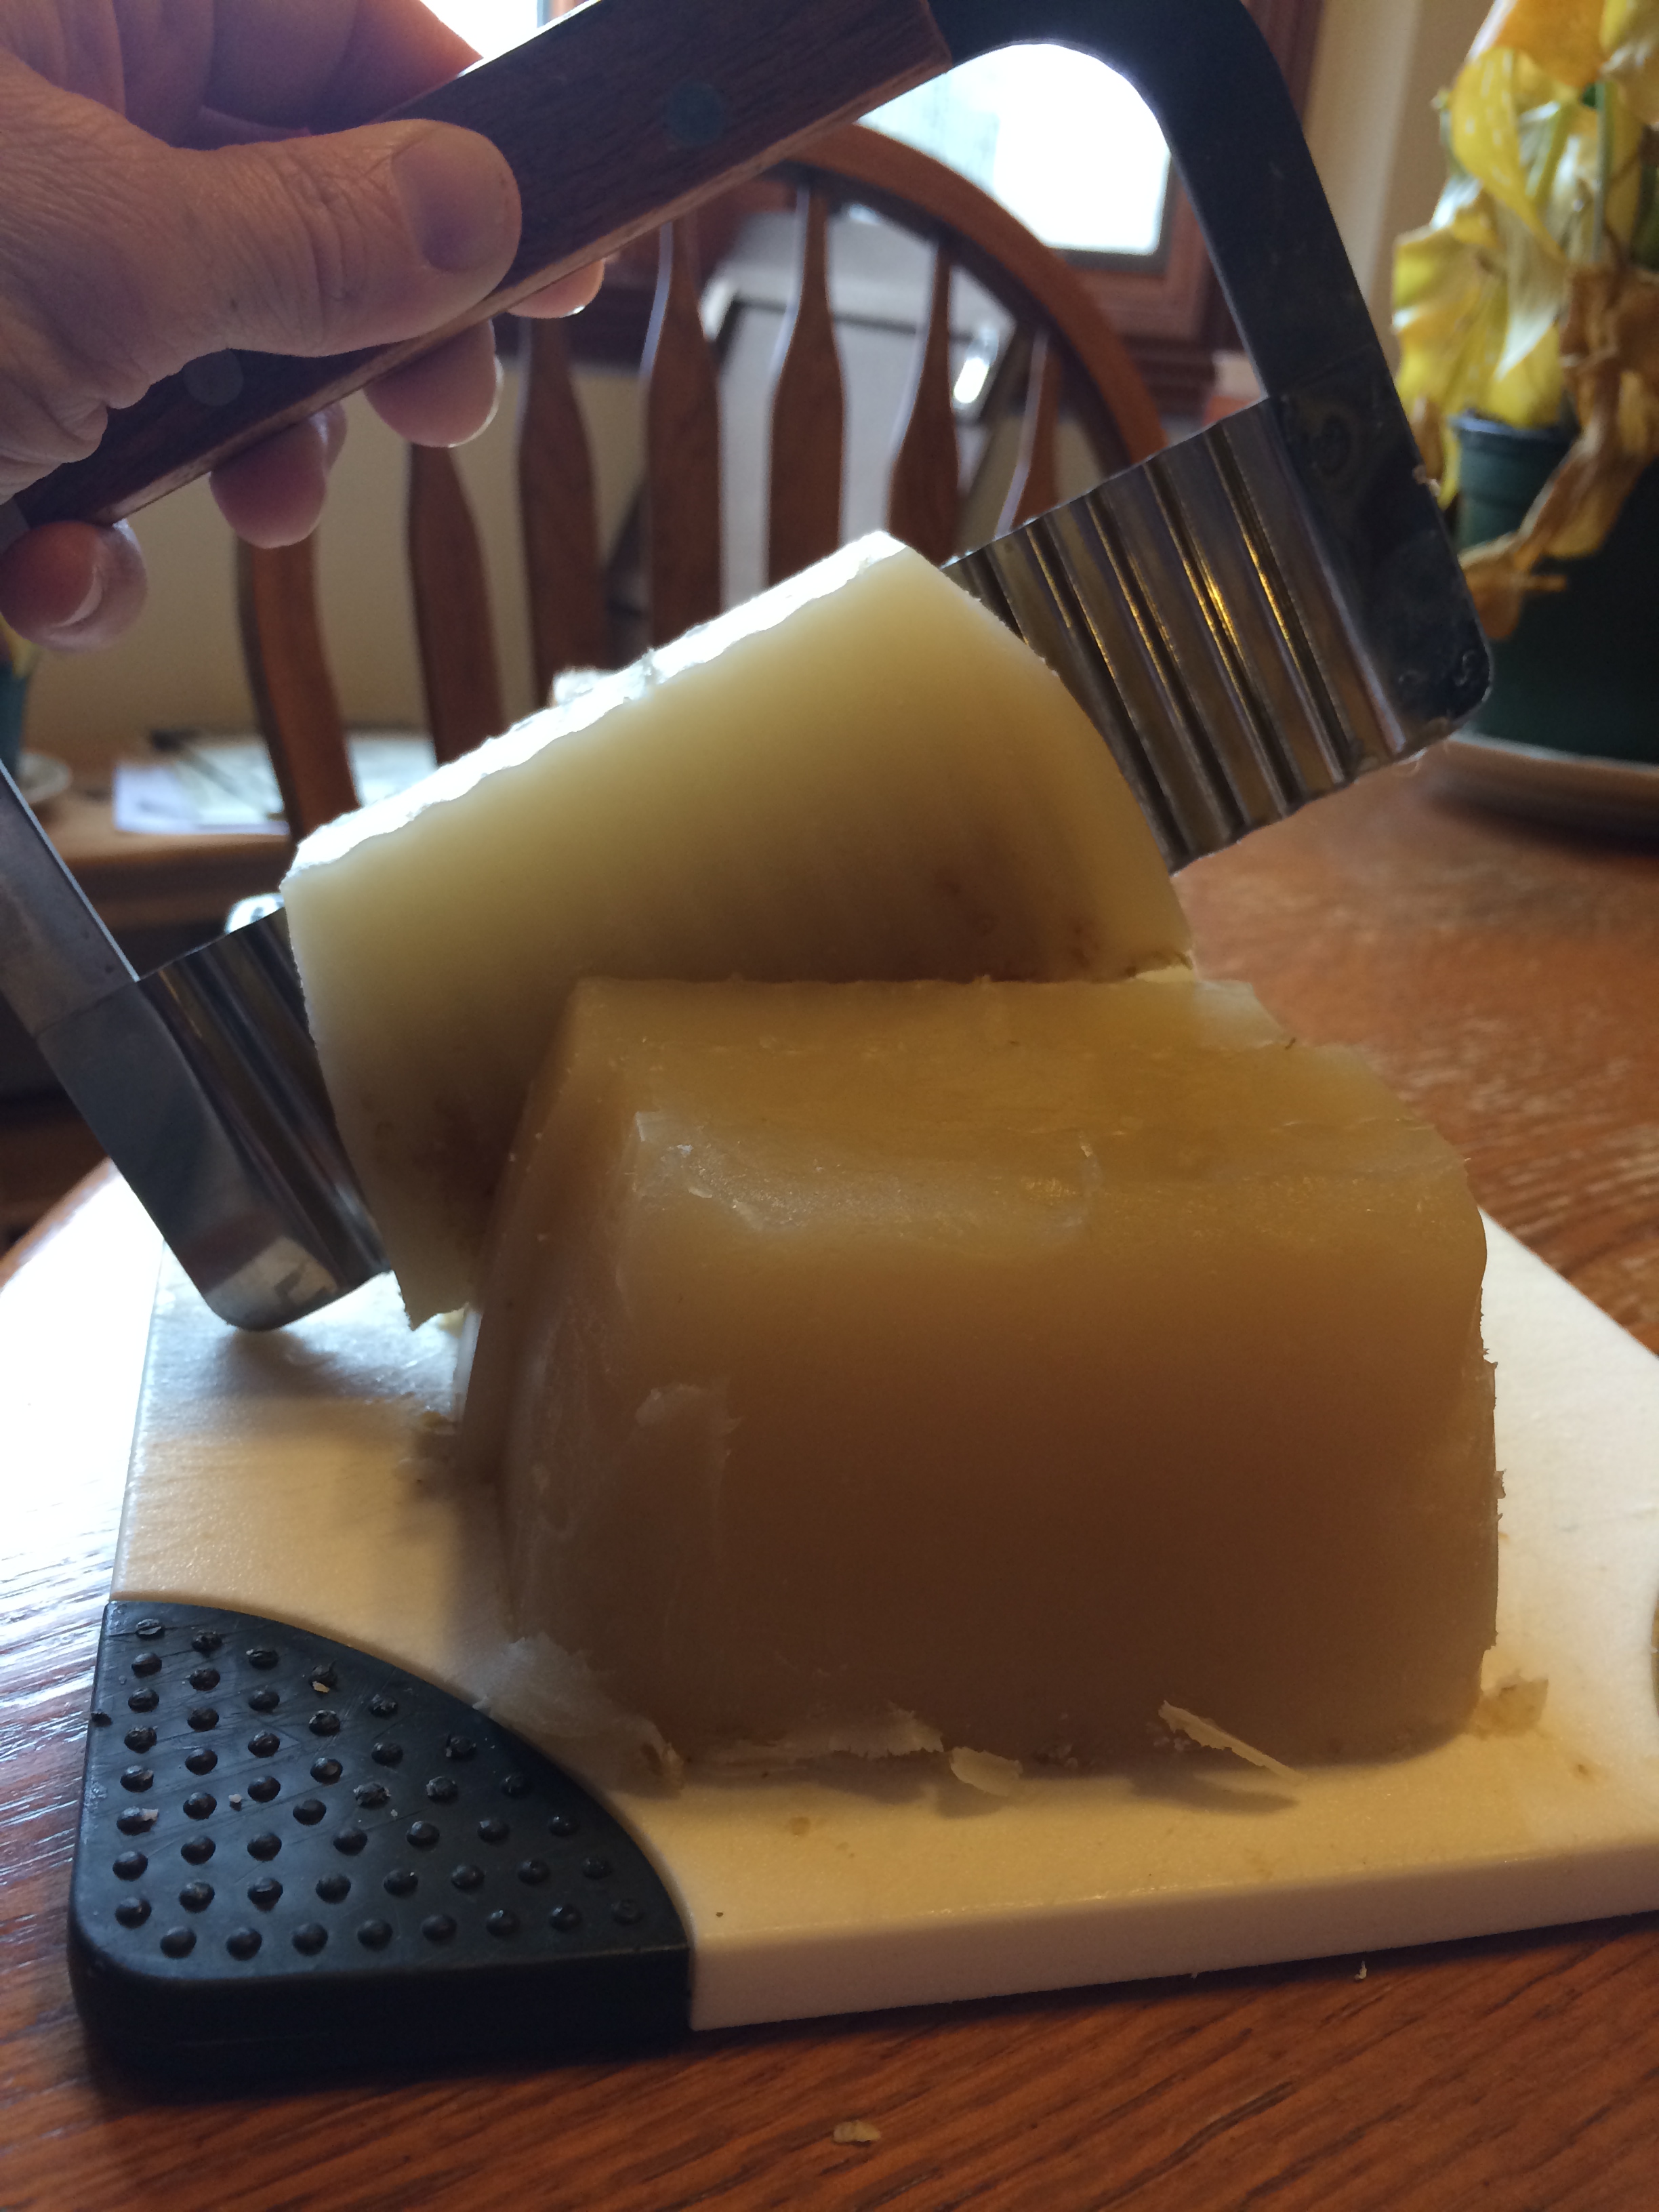
Slicing… a little soft but it will harden to an awesome bar after curing!
You have gone through the chemical process of making soap called saponification and it is time for nature to do its part. During these 4 to 6 weeks moisture is evaporating and making your bar of soap nice and hard. The lye is being neutralized so it loses all of its caustic properties and forms the awesome glycerin that is the base of great soap. Four to six weeks seems a small price to pay for awesome soap that could last you the whole year (depending of course on family size and how often you roll in the dirt). After that time you have perfectly safe and hard bars of soap that you made yourself and you’ll fall in love with!
Enjoy and feel free to post any suggestions, questions, or comments! Happy soaping!
Want to dnate for our “Ride for Arthritis? Tax deductible!
http://ccc14.kintera.org/faf/donorReg/donorPledge.asp?ievent=1087174&supid=400863333
DIY Soap molds
Pingback: How to make Goat’s Milk Chamomile Soap | Simple Hobby Homesteading