Chocolate Covered Strawberries… YUM!
I really can’t imagine many things more delightful than eating chocolate covered strawberries… they are just amazing! However, I am a slight cheapskate and refuse to pay the insane amount of money places charge for these delectable bites of happiness. Add that to the fact that I am not a fan of mushy or bruised strawberries that I have convinced myself places use because no one can tell once they are covered in chocolate. So what do I do? I make them myself and it is so easy! Let me show you how…
What you will need:
- Strawberries
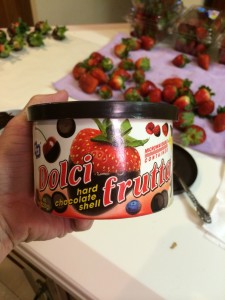
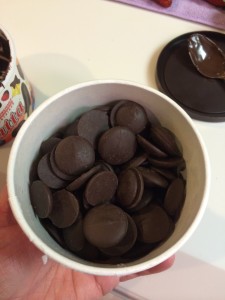
- “Dolci” chocolate wafers (you can use chocolate chips… we’ll talk about that in a bit)
*Dolci is often found in the produce section perhaps by the jars of minced garlic, look around, it’s there.
- White chocolate (chips or baking bars of white chocolate work equally well)
- Wax paper (not a must have but handy)
Step 1: Rinse strawberries. Do this just before you start. If you wash strawberries days in advance they won’t last long in the fridge. You can wash them by putting them in a strainer and rinsing them under cold tap water or fill a big bowl with water and dump the strawberries in (my preferred method).
Step 2: DRY THE STRAWBERRIES! This is a key step and one that will determine your success or failure. Chocolate does not stick to wet or damp strawberries. I take the strawberries out of the water and put them on paper towel. I then pick a few up at a time in a paper towel and gently dry them and then place on a different towel.
Step 3: Put some wax paper on the counter or a cookie sheet. The beautiful thing about using Dolci is that it hardens at room temperature. Woohoo! For anyone who is remotely like me and plays a challenging round of “Tetris” when attempting to put anything in the fridge you will be glad that you don’t have to worry about balancing an entire cookie sheet of strawberries on a mayonnaise jar which is balanced on a stick of butter.
So now we have strawberries dried (admittedly I do a bunch at a time and don’t have room to dry them all at once so there are always strawberries hanging out in the different stations (water bath, drying towel, and dry/ready to dip towel) awaiting their turn.) You are doing great and it’s ok if you are trying to be quiet as a mouse so no kids (or spouse) will run in and steal all your strawberries… a common occurrence at our house.
Step 4: Pull out that “Dolci” chocolate and get really excited because in just seconds you will have your first chocolate covered strawberry ready to “taste test”!
* The concept of heating the chocolate is the same if you use chocolate chips but
the microwave times may differ (probably one extra 30 second interval) and you
will most likely have to refrigerate the strawberries for the chocolate to harden
(all depends on the temperature in your house).
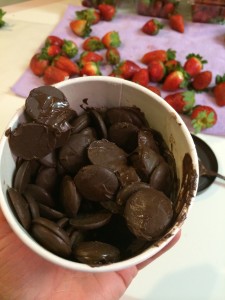
Peel off the plastic on top and put container in your microwave (setting high/normal) for 30 seconds. Stir the contents and put in for another 30 seconds. When you pull it out this time and stir you may see quite a few big pieces or just a couple. Keep stirring for a couple seconds and if there are still big chunks put back in microwave for 15 seconds. Stir, stir, stir and those chunks will melt. Yes, all microwaves are different but I have used this method in 2 different countries, 4 different states, and over a dozen different houses with different microwaves and I have never had to microwave Dolci more than 1 minute and 30 seconds TOTAL. Don’t be that person.
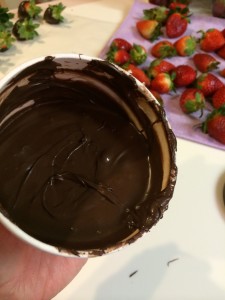
Step 5: When you have smooth chocolate (resulting from stirring) tilt it slightly and gather 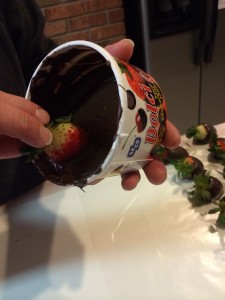 as much chocolate you can to one side to give the deepest “pool” of chocolate in which to dip the strawberries. Start with the biggest strawberries and gently but firmly (that makes no sense, I know) hold by the leaves (or stem if you are lucky enough to get some with stems) and dip in the chocolate. Dangle for a second to get the chocolate to stop dripping and lay on wax paper. Repeat repeat repeat. If a stem or leaves fall off while you are dipping and a strawberry is lost at chocolate sea go in after it! Pull it out with your fingers, plop it on the wax paper, and know which one you’ll be taste testing first. You washed your hands before you started right?
Step 6: When you get low on chocolate in the Dolci container and the strawberries start coming out less than pretty because you have to smoosh them all around to cover in chocolate just put the container down (do not throw away) and get another container of Dolci. If you only have one container skip to step 7. Microwave it according to directions in Step 4. Come back to your workspace and scrape the contents from the first Dolci into the fresh container and stir. It will melt in with the new chocolate and you can resume dipping happily.
Step 7: There will come a time when you are done dipping strawberries and there is a little chocolate left in the Dolci container. Offer some to others if you want or be very quiet and happily grab a couple strawberries, pretzels, marshmallows, or whatever you want 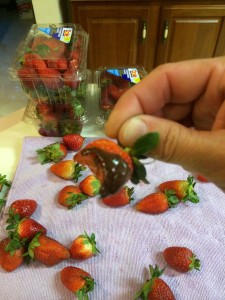 chocolate on and dip away and eat directly. Yum! Have the camera ready if you call in the troops (otherwise known as kids and spouse) because one will very likely try to stick their face in the container to lick out the last bits of chocolate and the resulting chocolate face is adorable!
You can be done at this point if you want or you can really get fancy (this is not difficult) and go for the gusto with white chocolate drizzle.
Optional Step 8: Get a plastic Ziploc (or off brand, I don’t care) bag (I highly recommend a “freezer” strength one as the regular sandwich bags may melt with the heat of the 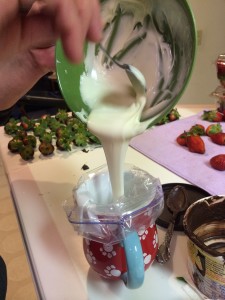 chocolate), open it, and place in a coffee cup to give support to the bag.
Melt white chocolate just as you did the Dolci in step 4. However, chips and baking bars often take 30 seconds or so longer to melt than Dolci. Melt at 30 second intervals even if it seems they are hardly melting. Stir after every interval. After 3 or possibly 4 intervals, with stirring, you will have smooth creamy white chocolate. Pour it into the Ziploc bag, press the air out as best as you can, seal, and cut off the bottom corner of the bag (the bigger the cut the thicker your drizzle). Squeeze and drizzle over the strawberries in whatever fashion trips your trigger. I like to drizzle each strawberry individually instead of down a row because it helps prevent strings of chocolate connecting them.
Unless it is really hot I have never had to refrigerate the strawberries to get the white chocolate to harden… perhaps the Dolci talks to the white chocolate and tells it to “quit your whining and harden up!” If you have any white chocolate left feel free to “draw” designs (squiggles, hearts, letters, etc.) on wax paper and let it harden to decorate your platter of strawberries. I hate to waste chocolate so I often do this even though my oldest son almost always swipes the designs for delivery to his tummy instead of my pretty platter of strawberries. 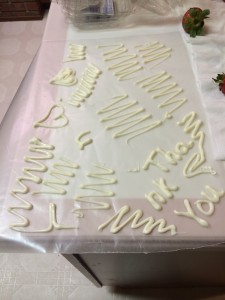
There you have it folks, you can easily make these strawberries and they taste AMAZING! Give them to friends, family, teachers (your kids will get some MAJOR brownie points), pastors (you’re welcome Pastor Ernie), or keep them all for yourself… I won’t judge lol!
Enjoy and let me know how they turn out. I’d LOVE to see pictures and any tips on how you made yours even better.
** I did not receive any payment for suggesting “Dolci” or Ziploc brand. I just really love using Dolci and have no clue what one would call those Ziploc bags other than “Ziploc bags”.

 Follow