Category Archives: Barnyard

CHICK DAYS!

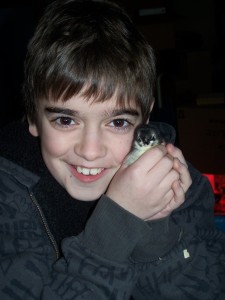
images[2]Chirp… chirp… chirp… do you hear it? I was just heading in for some goat feed and their cute little chirping lured me over to them like a siren’s call. I was hypnotized and before I knew it I was signing my name in the ledger and walking out of the feed store with a box of chicks. Minimum of 6… I thought I better play it safe and get 10. Who does the minimum anyways? I have always been taught to go above and beyond so I assume this applies to chick buying as well.

I drive home talking to my little box of chicks… promising them a great future and lots of cuddles. And then… reality hits me… I was ill-prepared to bring home chicks. It’s mid February and the weather is still fluctuating wildly in southern Indiana. One day it’s 70 degrees and the next day it’s 30… ugh!

So this was me the second year we lived on our little homestead. The first year I had ordered some lovely cochins from Murray McMurray (hatchery that I HIGHLY recommend and am absolutely giddy about when I get their catalog!) and had everything ready for them when the post office called and told me my chicks had arrived. Yes, you read that right… companies MAIL chicks and they actually arrive in great shape (depending on the company and postal workers). I had a nice plastic baby pool with pine shavings and small square wire fencing making a nice round 2 foot high wall set up in a closed off room so the cats couldn’t get at them. Heat lamp was secure so there was no chance it could fall, waterer was set up with electrolytes and feeder was completely full with feed and a bit of chick grit mixed in. That was 7 years ago and those chickens are living happily on friends’ homesteads as we went through the great chicken purge in 2015 (totally got rid of ALL of our chickens!)

So then this second year of homesteading I had many adult cochin hens and a rooster who were doing great! Why would I add more chicks to the farm? Ummmmm… they are so cute and like I said, they hypnotized me. So, I had to come up with something fast to prevent these chicks from dying due to my crazy impulsiveness (could not be helped… hypnotized, don’t judge me). I’m going to hook you up with the basics needed to prevent chick death and even make them happy! You’ll see the “great way” and the “make do” way. Whenever possible do the “great way.”

Want a quick list, here you go…

Brooder (bin, box, playpen, or whatever  to put them in)

Food dish and food

Water dish and water

Heat source

Grit (you can buy it or put some clumps of grass with dirt attached in brooder)

Brooder bedding/paper towel

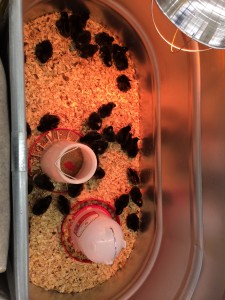
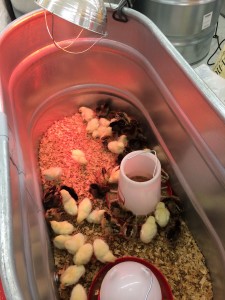
  1. Shelter: chicks need to be free from drafts, wetness, and kept relatively warm. When they are with mother hen they tuck up under her feathers for warmth so when you can provide something similar to that they will be happy. Chick shelters are called “brooders”. A “great” brooder is a large round/oval plastic bin of some sort. Many people use empty water troughs(50 to 100 gallon size are great for 20 or so chicks) because they have nice high sides, are easy to disinfect/clean, and provide no holes for drafts to come through. The “make do” shelter can be a plastic tote for a few chicks or even a large box. Just watch out that the chicks don’t all huddle in one corner and squish the poor chick unlucky enough to be on the bottom.
  2. Water: chicks need clean fresh water at all times. Chicks will dehydrate quickly and die if they don’t have access to water. The “great” waterer is the simple plastic water containers sold in the chicken section of your feed stores (or online). If you have 10 or more chicks save yourself the hassle of refilling little waterers nonstop and go ahead and get the 1 gallon waterer. The “make do” waterer can be any shallow pan (pie pan or whatever) with water in it and some rocks so the chicks won’t climb in and drown. **IMPORTANT** when you bring your chicks home and take each one out of the box to put in the brooder check their bottoms for pasty butt (see below for what to do about that) and then dip their beaks into the water source in the brooder. This lets them know where the water is! It is always a good idea to provide some electrolytes in chick’s water for the first day when you bring them home to help combat the stress of travel. Feed stores sell special chick electrolytes but you can also just mix 1 Tbs (that’s tablespoon) of regular sugar in with a gallon of water for them.
  3. Food: If you have dual purpose or typical chickens for egg laying feed them the regular chick starter food. Often you see “starter” food and starter/grower” food in the chicken section. Check the back of the bag for recommended ages as brands differ on what they recommend. If you have meat chicks (cornish rocks etc.) try to find the meat bird chick food. No big deal if you can’t. DO NOT feed the meat bird chick food to chicks that you don’t plan on butchering within 6 months.                                                                                                                                                                                                                      Medicated or unmedicated? Medicated feed is formulated for chicks to help them combat coccidiosis, a disease that is found just about everywhere in the environment. Most medicated starter feeds contain the medication amprollium. If your birds have been vaccinated against coccidiosis, feeding them medicated feed will nullify the coccidiosis vaccination, although it will not hurt them. You certainly don’t have to feed medicated food! I usually feed medicated chick food as the amprollium is well out of their system by the time they start laying eggs 5 or 6 months later (they are on a different food at that age).
  4. Heat source. “Great” option, they make these super safe little rectangle chick warmers (I’ve seen them in magazine and online) that sit low in the brooder and allow the chickens to huddle under them all cozy and happy. “Make do” option is the classic super dangerous and inexpensive thin metal heat lamp with red heat bulb. Why is it super dangerous you ask? Well, because it gets quite hot and can catch something on fire if it gets too close to something burnable. I’ve seen many barns and hen houses burned down because of the ol’ heat lamp. With that being said, I have used heat lamps for 7 years now and take extra precautions to make them safe as possible. I clip my heat lamp (often comes with a clamp) at the proper distance above the chicks and attach two safety chains to the lamp and a support above. If the clamp fails and the lamp falls it will be stopped by the chain about a foot from the base of the brooder.                                                                                                                                                                                                                            When deciding how far away from the chicks you should put the heat lamp let the chicks tell you. Place the heat lamp about 2 feet over the chicks, towards one end of the brooder. If they all huddle directly under the light and are chirping loudly they are too cold and it needs to be lowered. If they are on the far end of the brooder trying to escape the light it is too low and too hot. You may need to change the height depending on temperature in day and night etc. What you are looking for is chicks slightly spread apart (maybe little groups of 2 or 3) all around the glow of the light laying quietly and happy. Place their food on the edge of the light circle towards the middle of the brooder if it is larger. If you have a very big brooder or a long brooder you may need more than one heat source.
  5. Grit: So let’s talk chicken physiology for a moment… Chickens do not have teeth to grind up their food. Instead they use grit in their gizzard to grind the food. Grit is just hard rocks or sand. If you buy grit, it will probably be granite because it is really hard and works well, plus it is a cheap by-product of granite quarrying. But about any rock will work as grit. The harder it is the longer it will last. Good granite might last a month. Softer rocks could be gone in days. “Great” method is buying the small bag of chick grit in the chicken section of the feed store… it will last you FOREVER! “Make do” method is grabbing some dirt and putting it in the brooder. If all the chicks eat is the prepared chick feed, they do not need grit. It has already been ground up real fine, then formed into crumbles using water. Their gizzard can handle that just fine. I add a nbit of grit to my chick food because I do put garden weeds, clover, mealworms, etc. in for my chicks. If you feed them about anything else (other than just the chick feed), they should have grit. It’s not that they are automatically going to die if they don’t have grit, but it is a possibility. Remember that just because something can happen does not mean that it will each and every time. What can happen with some foods, like grass, is that it can form a wad in their gizzard and cannot pass on through their system. It can block the exit from their gizzard so nothing can pass through and cause a condition called impacted gizzard. Don’t freak out because you gave your 3 day old chicks some grass without having grit for them. They will probably be fine. Just know it can cause a problem. What I like to do is pick a clump of grass or weeds (make sure they have not been treated with pesticides!) and just make sure some of the dirt is still attached on the bottom and I lay it on its side in the brooder, they love it, especially if they find a worm in the clump!
  6. Brooder bedding: If your chicks have already been on pine shavings in the feed store then go ahead and use those if you want in your brooder. If you are getting new chicks from the hatchery mailed to you put down paper towel instead of shavings for the first couple days so they know to eat the food in your feeder rather than the shavings. Don’t sue newspaper as it tends to get slippery when wet and can cause splay leg in chicks. Besides, we don’t want to depress those chicks with our world news.


Tips:

Pasty butt: Often the stress of traveling, over-crowding, sickness and just stress of life itself can cause chicks to have “pasty butt.” It is simply when droppings stick to the down by the chick’s vent (booty) and get crusty and hard after time. If left to go too long it blocks other droppings from exiting and the chicken will die. I have heard expert after expert tell people to take a nice warm cloth and gently wipe the area until it is clean. Ok, that is great… in fact we will call that the “great” method and I have tried that over and over again but have had mixed results. Sometimes the vent stayed clear and sometimes it got all pasty again.

My other method, we’ll call it the “make do” method requires some tough love but it has 100% effectiveness and takes literally 1 second. I simply hold the chick firmly, grab the clump at the base and pull off the hardened droppings (only works when the pasty butt has hardened). Yes, it pulls the down/fuzz out with the clump of droppings and yes the chick usually gives a little chirp like, “Hey, that hurt, you jerk!” but none of my chicks have ever had a recurrence of pasty butt after doing that because there is nothing for the droppings to stick to.

Feather duster: I tried this a couple years ago and the chicks LOVED it. I got one of those ostrich feather dusters and hung it upside down in the brooder somewhat close to the heat lamp (keeping safety in mind because wow, I bet those feathers are flammable!) and all of those chicks huddled under it like it was their mama, they loved it. I even freaked out one day because I thought something had gotten them but they were ALL tucked up under that feather duster! I have it hanging about an inch or two above the brooder floor/shavings.

There ya go… just my quick little chick 101 for these awesome chick days that are upon us! Show me your chicks or tell me all about how they hypnotized you too!

Signing off… for now…

Jhenna

Potty Training Your New Dog

Potty Training Your New Dog

Potty Training Your New Dog

It suddenly dawned on me this morning (as I watch our own 9 month giant German Shepherd puppy romp around in my kitchen with his best buddy, a Rottweiler that we board here once in a while) that I have not written a single post on dog training! What, how is that possible? I have trained dogs on a professional level for almost 15 years and haven’t written a single post about it yet, unacceptable!

Here you go… I decided to start with the basics.

Potty Training Your New Dog

I’m going to explain the way I have potty trained every one of my own dogs (7 in the past 16 years) and explain the thinking behind each step so you have a better understanding of where I am coming from.  These steps pertain mostly to puppies but towards the end I will tell you what are the very minor differences when dealing with an adult dog. If you have an adult dog who suddenly seems to have “regressed” in this area, have your vet cjheck for kidney function or an urinary tract infection issue.

Step 1 Make sure you do not have any known carpeted areas in your home where other pets (or children) have soiled repeatedly. If you do and it is urine, you will most likely have to replace that part of the carpet and pad underneath and treat the subfloor with a product that seals any odor (ask for it at Home Depot or Lowes, it’s a paint). Dogs have an incredible sense of smell and some will find that spot in a heartbeat even if you have used “all the best cleaners” to get it out. Others won’t and you don’t have to worry about replacing the carpet but you don’t know which type your dog will be. You are welcome to take your chances with just cleaning and not replacing the carpet but don’t say I didn’t warn you.

Step 2 Get a kennel before you bring your dog home. Get a kennel that is big enough for the dog to lay comfortably, stand up fully, turn around, and sit comfortably but no bigger. You don’t need the Taj Mahal of kennels for a small or medium sized dog.  If you are getting a puppy, get a kennel that will fit them as a full grown dog. There are kennels you can purchase that have the divider to make it smaller in the beginning and those are perfect! If you can’t get those you can always make your own divider or just put a big box in the back to cut the kennel size down.

This kennel will act as your dog’s den and safe place. Most weaned dogs will not make potty messes in the same places that they sleep (their “den”) which is why you want it just big enough to comfortably fit them. If it is any bigger then they will have room to make messes on one side or in one corner and still have room to sleep or hang out in a different area of the kennel. That folks, defeats the purpose of kennel potty training.

The kennel should always be a happy and safe place for them. A place where they get special things or treats that they don’t otherwise get, a place they can go if they are frightened or just want to be left alone, and a place they go when you can’t keep an eye on them so they don’t get themselves in trouble. Never use the kennel as punishment. When they are in their kennel they are off limits to kids and try to make them off limits to other animals in the home. You don’t want them to be teased or messed with when they are in their “den”.

Step 3 Get new dog. Woohoo how exciting, a new dog in the home! Ooh ooh I’m even excited for you, I love new dogs! Did you get a cute adorable puppy? Did you find a great dog needing a home from your local shelter? Did a pup “follow” your kids home from school (with them hanging onto the rope that just happened to be tied around their neck)?

This is an exciting time for sure but first things first…don’t take things too fast. If you have a dog that is old enough to walk on a leash take them for a 45 minute walk around the neighborhood the second you get home (yes, even before you show them the inside of their awesome new home). This helps burn off excess energy, establishes you as the leader, and helps them become familiar with their surroundings so if they happen to run off they have a better chance of making their way back to you. If you have a puppy, play in the yard with them for 30 to 45 minutes or take them on a 20 to 30 minute walk if they are leash trained. Give big praises if they potty and assign a command word to it. For example, when your dog goes pee you can say something like “tinkle” (make sure it’s the same every time). For now, just say the word each time they do their business, you’ll see why later. We use “potty” (#1) and “poo” (#2) here at The Shepherd Hobby Farm.

Step 4 Take your pup inside and show them the room where their kennel is as well as their water bowl (probably thirsty). For now shut the doors to other rooms so the dog isn’t overwhelmed and open to getting out of your site and having an accident or getting into something. Let them get to know their limited inside surroundings a bit (keeping a constant eye on them for signs of potty behavior… circling, squatting etc.) and then attempt to lure them into their kennel with a treat or a special toy. The first couple times may require TONS of patience. If they go in allow them to come right back out if they want. This is showing them that the kennel isn’t a trap. Reward them a lot when they go into the kennel (treats, petting, kind words etc.) and say/do nothing when they come out.

After they have been in and out several times (when they are comfortable with going in) shut the door. Count to 5 and open the door (they may come out if they want). Repeat the exercises of in and out with an open door. Look at you, you’re a dog trainer 🙂

When they are once again comfortable with going in give them a special toy or bone and a treat, shut the door and walk away. If they settle down quickly let them relax in there for 15-30 minutes for a pup and 30-45 minutes for an adult dog. If they whine and carry on wait for them to settle down (noise and behavior needs to be quiet) and then open the door and let them out. Continue the exercises of in and out and do the whole process again. Make sure if you have a pup you are stopping ever 15 min or so to let them go out and go potty. Set timers if you need to because time may fly by!

Step 5 The serious training begins! Your dog is somewhat or completely comfortable in their kennel, this is a huge step, congrats! Now the potty training gets put into full swing and if you follow the instructions your pup will be housetrained so very quickly (some as short as 3 days while others take a week). Here’s the rules, only 5 and they are simple. They serve a purpose and they are not to be taken lightly if you want success.

Rule 1 Pup is in kennel unless they are going out to potty or actively being played with.

Rule 2 Active play means someone responsible has their full attention and eyes on the pup the ENTIRE time they are out of the kennel for active play. Play play play. Get them worn out!

Rule 3 You go out with pup every time for potty. You cannot just turn them loose in the backyard to go potty, you need to be next to them to give them the biggest celebration and rewards when they potty.

Rule 4 While your pup is out for active play encourage them to drink as much water as you can.

Rule 5 While your pup is out for active play take them out to potty every 10-15 min (longer for an adult dog of course). Set a timer if you need to. For puppies you may need to pick them up and carry them to the door to go out.

Step 6 Set up the potty routine. This is what it looks like and this is how it should be done every time… Take your pup out of the kennel (Never make a big deal of taking the pup OUT of the kennel even though you may be excited to play).

Take pup out to potty. If they go potty say your command word (“tinkle” or whatever you chose), give tons of praise (you are right next to them so this is easy), a treat, lots of petting, whatever your pup loves. Give them a drink of water regardless if they go potty or not.  If they do not go potty (make sure you give them some time to try… most dogs go potty better after they have moved for a bit so walk them around in a small area ) take them back to their kennel and give them praise as you lure them into the kennel with their favorite toy or treat.  Shut the door and try again in a short amount of time (15 or 20 minutes). Repeat same process if they do not go potty again.

If they do go potty then it’s play time! Bring them in and play play play actively for 10 to 15 minutes. Lots of water during this time. At the 10-15 minute point take them out to potty. If they potty then it’s another play session! If not then into the kennel (happily, with a treat, toy etc.).

What if they go potty but you have to go somewhere? Actively play with them for just a few minutes and take them back out to potty. If they don’t potty then into the kennel and you can go do what you need to do. If they do go potty (amazing, I know, sometimes they just live to mess up our plans) then you have to actively play for a minute or two and try again. The active playing is the super reward for going potty.

You will find after time(a couple weeks, maybe a month or two) you can simply say your command word (“tinkle” or whatever) and they will potty on command. Super convenient when it’s raining, freezing or super hot out or you are traveling and there’s a million new smells to smell and you just want to get back on the road. Darn those truck stops and their enticing smells to dogs lol!

That’s it folks, it’s really that simple. Pretty soon your dog will start going to the door to tell you they have to go potty and that’s such an amazing feeling! When your pup goes to the door and looks up at it, take them out to potty. If they go potty then another play session. If not then into their little den for some rest.

What ifs….

Yup, there’s always what ifs.

What if my pup has an accident in the house…  If this happens, give them a quick, short, “NO” and get them outside immediately (even if you have to pick them up mid stream) and let them finish their business out there giving tons of praise as they do (yes, I know your temper may be rising at this point, get control of yourself!). This is the ONLY time you are able to have them go into their kennel after they finish going potty outside (if they do) because you have a little mess to clean up.

With our pups we could often see the signs that they were about to potty and get them out in time. When going poo dogs will often start sniffing the ground in a circle pattern and then of course start to squat. If you see this take them out to potty just to be safe. Remember, if they don’t go potty and you have to have them go back in their kennel you can always get them back out to try again in as little as 5 to 10 minutes 🙂 Most all pups will squat to pee as well but usually give little warning signs so just watch for the squat and take them out often as a precaution.

When pups are young I suggest play time not be on carpet if possible (easier to clean up in kitchen etc.)

What about feeding… feed them in their kennel. If they won’t eat their food, take it out and offer it again in a couple hours. Young pups should be fed at least 2 times per day but more little feedings throughout the day is much better. We would keep a day’s worth of food in a Ziploc bag and every time a pup went into their kennel they not only got treats and a toy but also some of their food.

What if I don’t have time to actively play with my pup after they go potty… If you can’t give them even just 3 minutes of play then you really shouldn’t have gotten a dog that needed to be potty trained. Remember, at the beginning of every play session and at the end of every play session pup goes out to potty. It’s ok if a play session can only be 3 minutes but you better be sure you’re getting a lot of play sessions in a 24 hour period if that’s the case.

What if my pup whines in the night to go potty… get up and let them out. Yup, they can be a lot like babies. The play sessions should be a lot more low key but they still get an active play session even if it’s 2:00am. Once again, this can be a 3 minute play session and then when they go out to potty at the end of that 3 minute play session they probably won’t go potty and they get to go back into kennel. The only thing I change about night sessions is I only offer a little water once or twice in the night.

If you have an adult dog who needs to be potty trained the only difference is the amount of time you can actively play before having to take them to potty. A little puppy can only go 10 to 15 minutes at most before pottying while an older dog has a bigger bladder and more control so they can usually play a little longer. Often times you will get wore out before the dog is worn out. Adult dogs need more “active” type play which is often best started outside with fetching etc. and then wrapped up with fun play inside before you take them out at the end of the play session to see if they will potty. If they don’t then back into kennel. If they do then more active play (doesn’t have to be super long if you have other things to do).

What if my pup has an accident in their kennel… clean it up. Do not scold the pup. NEVER scold the pup in the kennel unless you are disciplining bite or nipping behavior. Look to see if the kennel is too big. Were they able to poo or pee and then get away from it? If so then the kennel is probably too big. If not then you probably dropped the ball with not getting them out enough to potty. When a pup wakes up from a nap they almost always have to go potty, watch for that.

You might be saying, “Jhenna, you sure are asking us to pay A LOT of attention to this dog.” Yes, yes I am. For potty training you need to make it your whole and total mission to devote your energy and time to the matter at hand for it to be trained in quickly and assuredly. Put in the work now to save your carpets and floors down the road.


Have any other “what if” questions for me? Let me hear them! I’ll answer the best I can.


The Mouse Patrol

So…  I know a lot of my blog posts are “How To” and “This works for us” kinds of things and I love to write all of those posts. However, there are just those times when I want to let you all in on some of the “personality” of our little hobby farm.

As I sat on the mulch pile today, taking a little coffee break from gardening, watching the dogs play and being completely molested (otherwise known as forceful petting) by one of our cats (Mountain Man) I realized that I’d love to tell you all about our cats of The Shepherd Hobby Farm.

We have 11 cats… no I am not a crazy cat lady… well I kinda am because I really like them… but I’m not a hoarder kind of crazy cat lady…

First and foremost, these cats play a very important role on the farm… vermin/varmint catcher and killer! They catch and kill everything from snakes to mice and our farm would be overrun with vermin (just think of all the grain and feeds we store for the various animals… a mouse’s dream!) without these cats. After the fact they are great companions, comic relief, and a way to add a few more gray hairs to this head of mine. Flash got a fish lure caught in her mouth, Socks has had two hematomas in his ears, and countless other kitty cat mishaps keep us on very good terms with our vet!

It all started out with Mommy Cat (I know, our most unoriginal name EVER… I blame my boys… they got better with naming as you will see). We moved onto our little homestead in 2009 with one dog, Katja. We noticed a skinny stray cat hanging around our garage and started feeding her (she was the sweetest cat ever!). About two weeks later I noticed a faint meowing coming from the rafters/storage area of the garage and found Mommy Cat (she had gone unnamed until this moment because none of the family could agree on a name) with a litter of 5 kittens. We moved her and kittens to a safer place and started keeping track of their weights and personalities daily. It was a great lesson for the boys to learn how to weigh kittens and make sure they were steadily gaining weight as well as look for any medical issues (eye discharge etc.). With Mommy Cat’s help we raised up her five kittens and advertised to find good homes for them when they were weaned (what crazy person has 6 cats?… they needed to be rehomed.)

Did you know everyone is trying to rehome kittens in the spring and summer? UGH! We sent one little female, named Muffins, home with my cousin to Wisconsin (you visit us you go home with an animal… it’s kinda standard.) Another female, Scout, went to a local family with two young sons. The rest, well, no more relatives were visiting and we couldn’t find good homes for them so we decided to have them spayed and neutered and we kept them… that’s how it all got started…

Even though these are outside mousers we take their health and safety very seriously. We live far off from the road which is why we let them be outside and they all are spayed and neutered. They all are current on immunizations at all times as well as are constantly on flea and tick prevention (yes the vet loves to see me walk in the door 🙂 ) They are provided with a warm place to sleep in cold weather and always have shelter. They are fed cat food but rarely eat it because they usually fill up on varmints. We use no pesticide that would endanger them if/when they do eat their “catch of the day” (think about local cats if you use poison on mice in or around your home). Mice ingest poison and die, cat finds and eats mouse, cat dies or gets really sick… not good!

I’d like to introduce you to our Mouse Patrol…

____________________________________________________________________________________

Mommy Cat in mid yawn.

Mommy Cat in mid yawn.

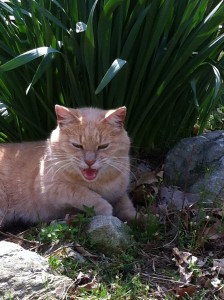
Mommy Cat (female)

Age: unsure but the vet estimated she was around 2 years old when she had her kittens so that would make her 7 now.

Mother to Scout, Flash, Simba, BG (passed away in 2012) and Muffins (went home with my cousin to Wisconsin).

She is a very sweet cat but won’t be the first to greet you. She likes to do her own thing and loves to be pet on her terms at her time of choosing. She will give little paw swats at you when she has had enough.

____________________________________________________________________________________

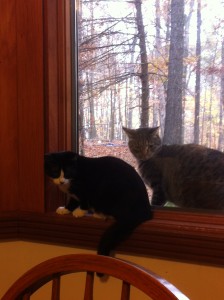
Socks (black and white) and Scout (striped)

Socks (black and white) and Scout (striped)

Scout (female)

Age: 5 years old and daughter of Mommy Cat. Scout was the first off the blanket when exploring as a new kitten and never liked to stay on the scale to be weighed… too much to see, do and “scout” out. That is how she got her name. She went home with a local family but they called after having her for 4 months and said she started hiding under furniture and wouldn’t be social. We are thinking she may have been “loved too much” by the two young boys in the home so we asked the family to bring her back to us.

Scout never really came back around to being a social friendly cat but she will try to fool you. She is our most vocal cat and will meow and meow just beckoning for you to come and pet/hold her. However, the second you get close she will bolt… Haha SUCKER! Then she will stand a distance and do it all over again… she’s a tease. Once you catch her and hold her she settles down but catching her is a challenge and I’m usually the only one who can do it (we have to do it every couple days just to give her a check once over and make sure she’s healthy).

____________________________________________________________________________________

Simba... totally a lion!

Simba… totally a lion!

Simba (male)

Son of Mommy cat and brother to Flash and Scout.

Age: 5 years old

Even though he’s neutered he looks like a big tomcat. This boy was an “indoor cat” but decided he liked the great outdoors much better as he would constantly try to get out and decided everything in our house was his personal scratching post (even though he had tons of toys and cat scratching posts!). Because he spent so much time indoors he developed a great bond with our dog Katja and can often be seen rubbing all over her in great loving admiration (or he’s just trying to annoy her, success!). He likes to be held and pet by anyone but isn’t a huge fan of large crowds. He got his name because I love The Lion King and he looked like a lion… that is all.

____________________________________________________________________________________

Flash says "Pet me!"

Flash says “Pet me!”

Flash (female)

Daughter of Mommy cat and sister to Scout and Simba.

Age: 5 years

This little girl was always the runt of the litter so she got extra love and attention. She had a pretty bad respiratory infection as a kitten but bounced back well. She is a lover and a cuddly cat who will jump in your lap at any given moment. However, once you start petting her don’t expect to stop. If you do she will give you  little love bites (but they kinda hurt 🙁 ) until you start petting her again. Sometimes it’s best just not to start with this one unless you are in it for the long haul. She is a little love though! She got her name because she was always so fast… she would dart here and there just like a little flash of light.

Flash and Scout, happy sisters

Flash and Scout, happy sisters

_____________________________________________________________________________________

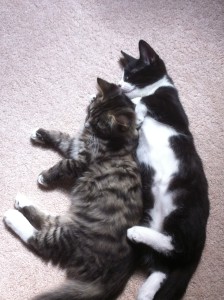
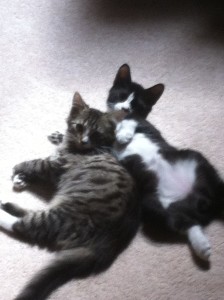
Kitty Soft Paws (left) and Socks (right)

Kitty Soft Paws (left) and Socks (right)

Kitty Soft Paws (left) and Socks (right)

Kitty Soft Paws (left) and Socks (right)


Socks (male) and Kitty Soft Paws (male)

Brothers from another mother and father… totally not related but we got them as kittens at the same time so they were raised together.

Age: almost 2 years old

So Kitty Soft Paws and Socks were our second attempt at indoor cats. Kevin was on a work trip for a month to Oklahoma City and our youngest son wanted a kitten. OK, sure, why not! How about two? We found a listing for free kittens (two unrelated litters) and got Kitty Soft Paws and Socks. They did really well in the house for about 7 months and then started peeing all over and scratching up everything! The problem with making them outside cats was that our current little posse out there was very territorial and did not like visitors. It took us almost 2 months working with all the cats to get them used to Socks and Kitty Soft Paws. It worked though and you would never know now that they hated outsiders. Kitty Soft Paws loves it outside but Socks is stil adjusting so he gets to come in and out a bit and he hasn’t made a single mess in the house (usually snuggles up somewhere and naps)

Socks has had two hematomas in his ears so he kinda has the “wrestler” ear look going for him. The vet and I have no idea what caused the hematomas but some cats are just more susceptible to them than others and apparently Socks is very susceptible. Socks is a total lover and will let you pet him all day long if not many people are around. Kitty Soft Paws prefers private petting as he tends to hate big crowds. He’s a more one on one kind of lovin’ guy.

Kitty Soft Paws... pic was taken by Zach Galloway (10 years old at the time)

Kitty Soft Paws… pic was taken by Zach Galloway (10 years old at the time)

______________________________________________________________________________________________________

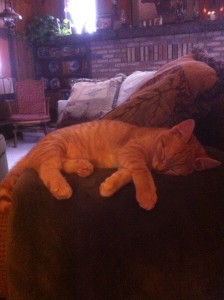
Sleeping Patricia

Sleeping Patricia

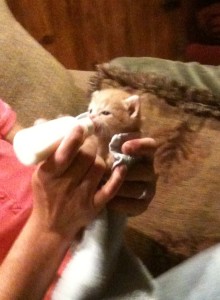
Patricia just learning to eat from a bottle

Patricia just learning to eat from a bottle

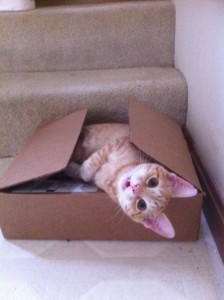
you've got mail... it's not spam! Patricia says Hi

you’ve got mail… it’s not spam! Patricia says Hi

Patricia

Age: Almost 2 years old

So, we had just gotten these two kittens, Socks and Kitty Soft Paws, when I go to church one day and low and behold someone has left a box outside the back church door. It had stormed all night and the box was soaked through. Inside was a soaking wet and shivering kitten covered in fleas. Yup, I took her home.

She went to the vet the next day where it was estimated that she was about 1 week old and had a severe upper respiratory infection. We had to bottle feed (used a syringe for the first couple weeks because she’s was too little and weak for even the kitten bottles) her every hour at the beginning and each week we would add another hour between feedings… those were some loooooong nights! The boys helped which was awesome. She was weighed every day and she steadily started gaining weight. She received a bath with Dawn dish soap every day for a week to get rid of the fleas. After that first week she was FINALLY flea free and her antibiotics were kicking in. She had to stay away from our other kittens because of the fleas and respiratory infection so that was fun, not!

The boys named her and I think it has to do with something from SpongeBob Squarepants? Patricia is an aboslute love and prefers to spend her days and nights sleeping in the entry way. We were able to introduce her to all the other cats when we were acclimating Socks and Kitty Soft Paws so it worked quite well for those three to enter the pack together. Patricia and Socks are best buddies and often snuggle togther.

Please don’t count how many cats we are up to now because then you may not believe that I am in fact NOT a crazy cat lady… You just went back and counted, didn’t you? Don’t judge me…

Well, at this point we had decided no more cats. The whole “inside cats” thing did not work out and we had plenty of outside cats to keep our varmint numbers in check.

So this one day I was driving out past the county animal control place… totally innocent, I was on my way to the place I had gotten my horse to pick up her registration papers that I had forgotten to get several years ago when I bought her (I don’t put a whole lot of stock into registrations and what not). I saw two dead kittens in the road ahead (awww poor things) and as I drove by I noticed a box by the side of the road by the kittens. I drove a little further but something kept nagging at the pit of my stomach.

I turned around and went back. I stopped and checked the box and sure enough there were 3 little kittens in the box. Ummmmm… I couldn’t leave them there to get hit like their littermates so I scooped them up and brought them home (totally forgot to go get registration).

______________________________________________________________________________________

The three Amigos... Mountain Man (orange and white), Dump Truck (black and white) and SPeckles (gray and white)

The three Amigos… Mountain Man (orange and white), Dump Truck (black and white) and Speckles (gray and white)

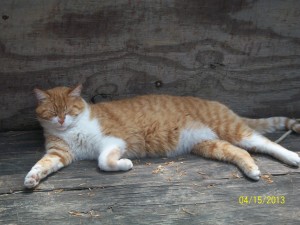
Meet Dump Truck, Mountain Man and Speckles (all male)

Brothers (I’m assuming)

Age: Almost 1 year. We knew these guys would not be indoor cats and they were already eating solid food. After their vet check, flea baths and immunizations they were immediately introduced to the outdoor cats. However, our youngest son really fell in love with them (he’s our cat whisperer) so they did stay inside for a few months. Anyone every have 3 kittens running around your house? They tear up EVERYTHING! Anyways, these guys REALLY wanted to be utside as they would rub against the screens with the other cats, dart out the door every second they could and just in general try to be outside with the other cats. They were all neutered, healed up indoors and then did the inside/outside thing for a few weeks before they became full outdoor cats when the weather turned nice.

These three boys are our friendliest cats of the bunch. They LOVE everything about people… the snuggles, the pets, the love, the carrying, everything! They also love the dogs and the goats. These three are the first ones to meet you when you arrive and will not leave you alone… sorry people with cat allergies 🙁

Speckles (cat) and Katja (dog)

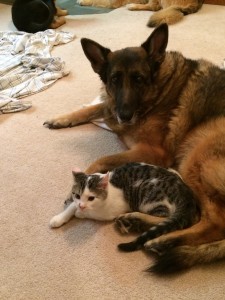
Speckles (cat) and Katja (dog)

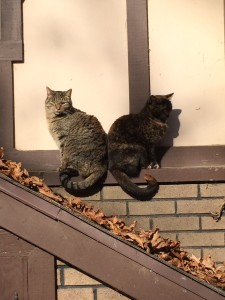
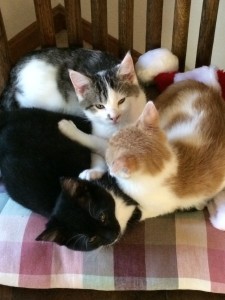
Simba (far left), Scout (bottom), Flash (sandwisched between Simba and Mommy Cat) and Mommy Cat (far right)

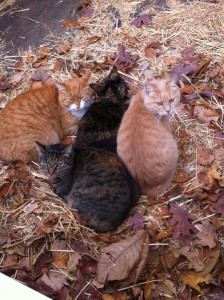
Simba (far left), Scout (bottom), Flash (sandwisched between Simba and Mommy Cat) and Mommy Cat (far right)

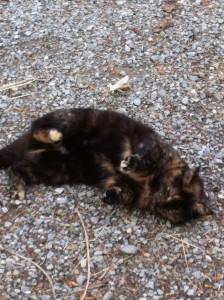
A very flattened Kitty Soft Paws

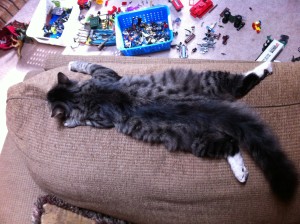
A very flattened Kitty Soft Paws


Hope you enjoyed our walk down kitty lane. Have a purrrfect day!

Jhenna

Meet the Nigerian Dwarf… Goat


iphone pics 11 Feb 2012 179

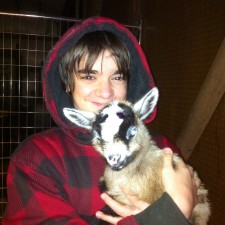
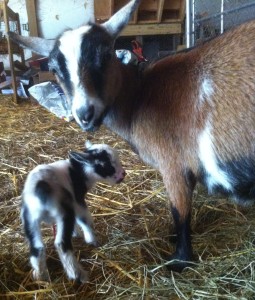
Baby Ella, Feb 2012… Could you resist?


I just had to go with this title as my husband always loves to joke about all my little Nigerian Dwarves running about the farm. I beg him to add “goat” so people don’t think we have some sort of labor camp for foreign little people but he refuses to give up this joke.

To be perfectly clear, we have Nigerian Dwarf Goats. In fact the boys actually counted this morning and we officially have 11 of these amazing little creatures. We have 13 goats total but 1 is a Nubian and 1 is a fainting goat (sooooo funny to watch!). The boys and I are proud card carrying members of the Indiana Nigerian Dwarf Goat Association… we even have the shirts to prove it!

I fell in love with the breed immediatley upon getting our oldest son a week old Nigerian Dwarf buckling for his twelth birthday. I saw a picture on Craigslist of the most adorable little goat and said, “He must be ours”… the timing of Jackson’s birthday was perfect and I convinced him he wanted a goat. We named him Elliott. He was our first goat and one of two wethers we have. I’m going to be throwing around some terms during this blog that everyone may not recognize so let’s get a couple things straight in the goat lingo department…

  • doe: female goat
  • buck: male intact (not neutered) goat
  • wether: male goat (neutered, no testicles and therefore none of the hormonal surges and stink of the buck)
  • kid: baby goat (boy and girl)
  • buckling: baby boy
  • doeling: baby girl

We wethered Elliott (via banding) and bottle raised him. Goat’s can easily digest whole cow’s milk and I have to say bottle feeding this goat was an amazing experience which bonded him to us (and us to him) in ways few would ever believe. Elliott comes when called, loves snuggles, and gets along beautifully with everyone he meets (animal and human!). I highly recommend bottle raising goat kids to bond them to you.

Boys with Elliott in 2012. Notice the cat in the background playing with a snake... ugh!

Boys with Elliott in 2012. Notice the cat in the background playing with a snake… ugh!

People ask if we consider our goats as pets. No, we really do not. I define a pet as a creature that you have almost constant contact with and allow in your living space (no, I don’t call my kids my “pets” but they could qualify I guess). There are only a few occasions that we have brought a goat kid inside for any length of time and for that period yes, I guess they could have been considered pets (when they joined the herd outside they relinquished pet status).

However, this does not mean that goats are less friendly, less trainable, or need less attention than our indoor dogs, cats, bunny, or fish pets. Goats certainly need to be checked on at least twice a day, socialized and receive human contact (yes even the smelly bucks… PLEASE handle your bucks people so they do not become unruly!) if you are to have any chance of being able to trim hooves, give veterinary care, milk, and be able to lay hands on your goats for whatever purpose (including snuggles!).

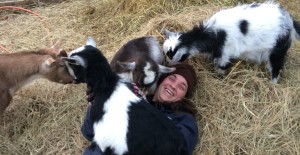
Jhenna and baby goats6

Left to right, Tybalt, Mercutio, and Baine

Jhenna and baby goats4

Bainey Boo is so gonna jump on me as Ariel just watches from a distance!


Well socialized bucklings... ATTACK!

Well socialized bucklings… ATTACK!

Why do we have goats? Oh let me count the ways…

  1. Great comic relief and so much fun to watch
  2. We milk our goats and use that milk in lotions and soaps.
  3. We use their droppings (called “berries”) for fertilizer in the garden and compost
  4. They are amazing at clearing brush and poison ivy in our woods
  5. They provide an avenue to build work ethic with our boys
  6. Some day I will talk my sons into joining 4-H and they can take the goats into the show ring!
  7. They are just plain adorable
  8. To teach others about God’s creation
  9. I can’t resist the lure of a baby goat face (not a good reason I know but I’m honest)
Ella all grown up with her baby Baine Bloodhoof

Ella all grown up with her baby Baine Bloodhoof

Many urban areas even allow up to 2 miniature sized breeds of goats (think pygmies and Nigerian Dwarf Goats). Please know that if you are thinking of getting a goat consider this

  1. Goats need hay (or forage to include grass AND more fiberous woody material), minerals (can be bought in bags at feed stores), constant access to clean water (try to elevate it slightly, they seem to love pooping in their water and will not touch it after that… can you blame them?), and a balanced feed ration, especially in winter (often comes in a pelleted form).
  2. Most goats (including the Nigerian Dwarf Goat) are escape artists and can easily jump 4 foot fences and climb seemingly vertical structures to check out if the grass is truly greener on the other side of the fence…or if shingles on your roof are edible. Though they will not eat ANYTHING as most people think, goats do eat A LOT of things (to include your or your neighbors beautiful roses, garden produce, berry bushes, and pine trees). Like horses, goats usually know instinctively which forage is harmful to them and will stay away from it. But, if they are really hungry and nothing else is available (or if it’s heavily mixed with things they do find yummy)they will eat things that can poison them. Goats will not eat any little piece of hay or food that has been urinated or pooped on… put their hay up!
  3. Goats have to be wormed regularly. There are organic and chemical methods for this but it has to be done consistently. Because they eat from the ground they tend to carry wormloads and you don’t want worms overtaking your goat!
  4. Goats are herd animals and want to be part of a herd (this can include other goats, sheep, YOU, and sometimes dogs). If you are getting one goat I highly recommend you get another for its buddy unless you want to hear a goat “yelling” for you day and night.

To understand these things is to understand that you need to let a goat be a goat. I understand our goats really well… they want to eat, drink water, play, sleep, fight, and reproduce. The fighting is few and far between as they all have their herd status and “pecking order” figured out now, but as our bucklings grow up they are testing their elders and each other. Goats spend most of their time grazing (eating). They fill up their bellies to almost bursting proportions and then they lay or stand lazily regurgitating that food and chewing it (chewing their cud) to finally be digested. I wish I had a dime for every person who has asked if my wethers were pregnant… full bellies (known as “rumen” in goats) makes any goat look very pregnant to the unpracticed goat handler.

See those healthy rumens :)

See those healthy rumens 🙂

Why the Nigerian Dwarf Goat?

  1. For their size (small in stature, a tiny bit bigger than a standard pygmy) they give an amzing amount of milk. Ariel, our wonderful beige Nigerian Dwarf Goat, kidded a few months back with a single buckling and we are getting almost 2 quarts of milk out of her a day. Most goats kid twins and triplets and usually will produce even more milk than that!
  2. Their personalities can’t be beat. They are friendly, easily trainable, and truly enjoy human contact.
  3. They are able to breed year round. Most goat breeds only are able to breed once or twice a year, based on seasons, but the Nigerian Dwarf Goat cycles throughout the entire year making it easier for us to schedule breedings and kiddings to fit our plans and schedules.
  4. They are a hardy breed. Great in winter and in summer.
  5. They are small and therefore take less to feed and drink less water than bigger breeds of goat. Their veterinary care is also less expensive (think dosing worming meds, antibiotics, etc.  on weight)
  6. They are very agile and this adds to the entertainment value when you pull up a chair or log and watch them jump about and play.
  7. They are intelligent. All of our goats know their names and come to them. We are working on teaching a couple of them fun tricks and they are proving to be quick learners. Except Ella, she is so stubborn and is trying to teach me tricks! I secretly think she has the upper hand and has me trained quite well.
And then there's Pedro... our Nubian wether and only horned goat (the rest are polled or have been disbudded)

And then there’s Pedro… our Nubian wether and only horned goat (the rest are polled or have been disbudded)

Not to be left out is Pedro… his coming to the farm was a bit of a surprise to my husband (I really thought I had talked with him about Pedro but apparently not…)

One day I was looking at Craigslist (note to self, stop looking at Craigslist) and saw an ad for a Nubian wether who was super friendly! We had just gotten Elliott and the love for goats was becoming strong (think of the Star Wars “force”) in this hobby farmer. I had talked with Kevin (my husband) about a buddy for Elliott and apparently I left out the fact that I had found one. I told the boys I was heading to get Pedro and to let their dad know if they needed anything. I picked up Pedro, brought him home and unloaded him to meet Elliott. They became instant best friends and I saw Kevin and Gunner at the sun room window watching Pedro and Elliott meet. This is the converstaion I could not hear but was told about word for word when I came inside…

Kevin: What is that?

Gunner: That’s Pedro, our other goat.

Kevin: What other goat?

Gunner: You know, Pedro

Kevin: No I do not.

Note to self… make sure I clear all new animals with my husband BEFORE they arrive at the farm.

Itchin’ for a chicken!

Katja and chickens

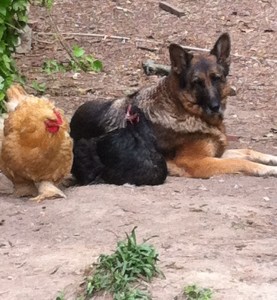
Katja hanging out with a buff cochin and black cochin.

Stephanie asked a great question just the other day and I bumped this topic to the top of my “gotta blog this” list immediately. What kind of chickens should we get and what basics do we need to know?”

Chickens are the perfect starter livestock for any hobby farm, homestead, and even urban backyards. I get the following questions a lot about chickens and am so excited to share what has and hasn’t worked for us…

  1. What is the best kind to get
  2. What basics do I need from the start
  3. Where is the best place to get my chickens


What is the best kind to get? Chicken breeds/types are a lot like dog breeds/types. No matter what the breed is known for there will always be exceptions and a lot of your outcome depends on how the animal is raised. Basically, you need to ask yourself, “Why do I want these chickens?” and that will determine what type you get.

  • Do I want great egg layers?
  • Do you want meat birds (dinner table)
  • Do I want dual purpose (decent egg layers but also good for butchering)
  • Do I want good free rangers/pest control
  • Do I have extreme winters/summers
  • Do I want my kids (and me) to be able to easily handle them?
  • Do I want certain color eggs (brown, white, blue, green, pink etc.)
  • Do I want quick egg layers (chickens can start laying anywhere from 17 to more than 26 weeks old)
  • Do I want heritage breeds or hybrids?
pics 8 apr 2011 006

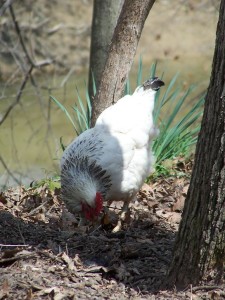
Delaware chicken searching for yummies to eat


This may seem a bit overwhelming and an awful lot of questions to just get a couple chickens but it cetainly helps guide one in the purchase of the best flock.

What is the best kind to get?  I absolutely have preferences on breeds based on what we have had. At one time I kept a flock of over 200 chickens which had the freedom to roam the entire hobby farm (including our front porch which did not make my husband and kids very happy). We had 23 different breeds of chickens and they all had their pluses and minuses but one breed certainly stood out amongst the others. The great cochin! We have had bantam (miniature version) cochins, standard cochins, and even frizzle cochins (their feathers are all frizzled and stand out on end) and I have loved them all for their gentleness, great egg production, ability to withstand cold and hot temperatures, beautiful looks, and great mama skills when we wanted to hatch out some chicks.

Some other great all around chickens for any type of environment are the orphington, brahma, australorp, cornish, polish, ISA browns, and golden comets, Rhode Island whites, Plymouth Rock, and New Hampshires.

We love the look and color of eggs (rich dark brown) we get from cuckoo marans but I have to say these ladies are not very friendly. We also had a Cuckoo Maran rooster, Stanley, who was pure evil. He would even chase our German Shepherds around the farm, horrible guy. The boys wouldn’t go out the door when Stanley was out. He got his own pen because we needed him to raise other cuckoo marans from our hens but I really really really did not like him. Needless to say I was not all that sad the day old Stanley kicked the bucket however I was scared to death to go in the pen to get his body to bury because I thought he might be faking it to lure me in to attack me.


On the flip side there was Meathead, the most amazing (and HUGE) rooster you could ever find. He even visited grade school classes for kids to learn about chickens and hobby farming. He loved to be held and everyone loved him. Sadly Meathead passed away last fall and he will serioulsy be missed!

Meathead

Meathead

Meathead...photo by Casey Braden

Meathead…photo by Casey Braden

Next item to consider is whether you want:

  • chicks (male and female)
  • pullets (female less than 1 year old)
  • cockerels (roosters less than 1 year old)
  • full grown hens
  • full grown roosters

I’ve always preferred chicks because they are so darn cute and we could raise them up accustomed to being handled and returning to their coop at dusk. In spring you can get chicks from many feed/farm stores (around here it’s Tractor Supply Company and Rural King), mail order (my favorite is Murray McMurray Hatchery, link below), and from local breeders (check out Craigslist or local farmers).

pics 8 apr 2011 008 pics 10 apr 2010 064 21 mar 2010 115

What basics do I need from the start? This depends on what age you get.

Full grown egg laying chickens:

  1. Coop or hen house with nest boxes
  2. feeder
  3. waterer
  4. feed  (at least initially so you can entice them to return to the coop each night if they are free ranging. Make sure it is NOT “meat bird” feed if you are raising egg laying or dual purpose breeds), protected run (depending on predator level and which, if any, livestock guardians you have) and chicken first aid kit. Pretty easy right? Yup, which is why they make great starter critters for any homestead.
  5.  If your birds do not have access to dirt ( I highly encourage as much access to “foraging as possible) then you need to provide grit for their digestion. A small bowl or feeder of it is sufficient as they will eat what they need.
  6. Calcium of some sort. Some people provide this with oyster shell (we do) given freely as the grit would be. Others crush up egg shells and give it to them (we also do this).

Pullets/Cockerels: All of the same things above except you will not want to feed the egg laying feed. Instead get the starter/grower or grower/finisher feed depending on age of pullets. They will probably not be free ranging at this age (due to their size they make too easy of targets for predators) so you will be giving them more feed than full grown, free ranging chickens.

Chicks:

  1. Brooder of some sort. There are a million ideas on the internet for “homemade brooders” that range from super simple to complex. In the past we have used a baby pool with square mesh wire surrounding it or refrigerator boxes laid down with the “top” cut out. We now use a big stock tank with high walls similar to what you see the chicks in at the feed stores. It’s a bit of upfront investment but if you plan on having new chicks again it is worth it. If you only have a couple chicks feel free to make something or use boxes.
  2. Brooder light. Yes you need this even if it’s summer. Chicks need to be kept warm so you will have to adjust the height to get it just right. The chicks will let you know.

If they are all huddled directly under the light most of the time they are cold, lower it. If they are most often in the far depths of the far corners trying to get away from the light it is too hot, raise it.

1 mar 2014 iphone pics 089
PERFECT!
1 mar 2014 iphone pics 079
Maybe a little low but all in all this is fine

3.   Waterer. Do not use a bowl of water as they will probably tip it over and/or drown in it. Fresh water every day is super important for chicks. When you first get them home add 1 TBS of sugar per gallon of water and make it slightly warm the first time.

4.   Feeder. The round ones are great (pictured above). I have often found that my chicks get their food super dirty and icky with the long trough type.

5.   Feed. You will need chick feed (starter). DO NOT Get the meat bird starter (it is designed to grow chickens super fast to butcher sooner and that will be bad if your chicks are used for egg laying or dual purpose). You can get the medicated feed if your chicks were not immunized (Marek’s Disease) but only feed it for 1 to 2 weeks. You can also get feed with antibiotics but I have found I don’t need that as long as I keep the brooder clean and water refreshed daily. When we hatch out our chicks here on the farm I give the medicated feed (for Marek’s Disease) but if I get them from a hatchery I have them immunized there before shipment.

6.   Grit. If your chickens do not yet have access to the outdoors (dirt) put a bowl or feeder of grit out for them. THey will eat it as they need it to aid in their digestion.

7.   Bedding. If they came from a hatchery or someone’s incubator at first you will want to have paper towels down for the chicks (newspaper becomes slick when wet and they could easily hurt their legs). You can put hem on top of wood chips or just have it down on the floor of your brooder (I suggest the latter). Change this paper towel out daily. If you put them on wood chips when they have not been accustomed to them they often mistake them for food, eat them, get impacted crops, and could die. If they came from a feed store you can put them directly on wood shavings or chips as they are accustomed to them and shouldn’t eat them

8.   Chicken first aid kit. I will have more on this soon as I am working on a blog post all about general chick/chicken health and ailments. Basically you want scissors, antibiotic ointment, dressings, pressure tape, gloves, magnifying glass, and thermometer.


Last but not least, Where is the best place to get my chickens? I’ve bought them locally (breeders, farmers, fed store), ordered them, rescued them from inhumane conditions,and hatched chicks here at The Shepherd Hobby Farm. I love getting rare breeds and funny breeds from a hatchery but cannot help myslef in spring when I go into the feed store so I end up bringing a few home from there as well every spring. My all time favorite though is hatching them here at the farm… if you are ever able to do it I highly recommend hatching your own out.

Hey maybe I should start an “incubator rental” business, so fun!

When you get them from the feed store choose chicks that are moving around and curious. You may be tempted to “rescue” that one huddled by herself in the corner but you are setting yourself up for more work and probable heartbreak if she doesn’t make it. “Straight Run” means they haven’t been sexed (male and female) and you have no idea what you are going to get (hens or roosters). Pullets are female and cockerels are males as we stated before (though I’ve never seen a feed store sell just cockerels). You do NOT need a rooster for hens to lay eggs. Roosters are great but that is for a whole nother blog post!

Quick links that will help even the most seasoned chicken enthusiast!

Murray McMurray Hatchery: http://www.mcmurrayhatchery.com/index.html

Mother Earth News did an interesting survey all about different breeds and chicken management techniques. The results can be seen here… https://www.surveymonkey.com/sr.aspx?sm=Ng1SFU0PmWjHUT7ofHi5hKvyLiYkduQuX0GzIJnw6z0_3d

Another tool from Mother Earth News is their “Hatchery Finder.” You type in what you are looking for and it comes up with the mail order hatcheries that have what you want, cool!

http://www.motherearthnews.com/find-chickens-poultry-hatchery.aspx

Questions? Comments? Ideas? Pics of your poultry friends? Let me hear it and see them, post here in the comments section and feel free to share our site!